It’s already February and I’m especially excited about today’s blog post, where I get to share the Step-by-Step process of how Closet POSSIBLE installed our custom armoire!
Note: Affiliate links are provided below for convenience. For more info, see my full disclosure here.
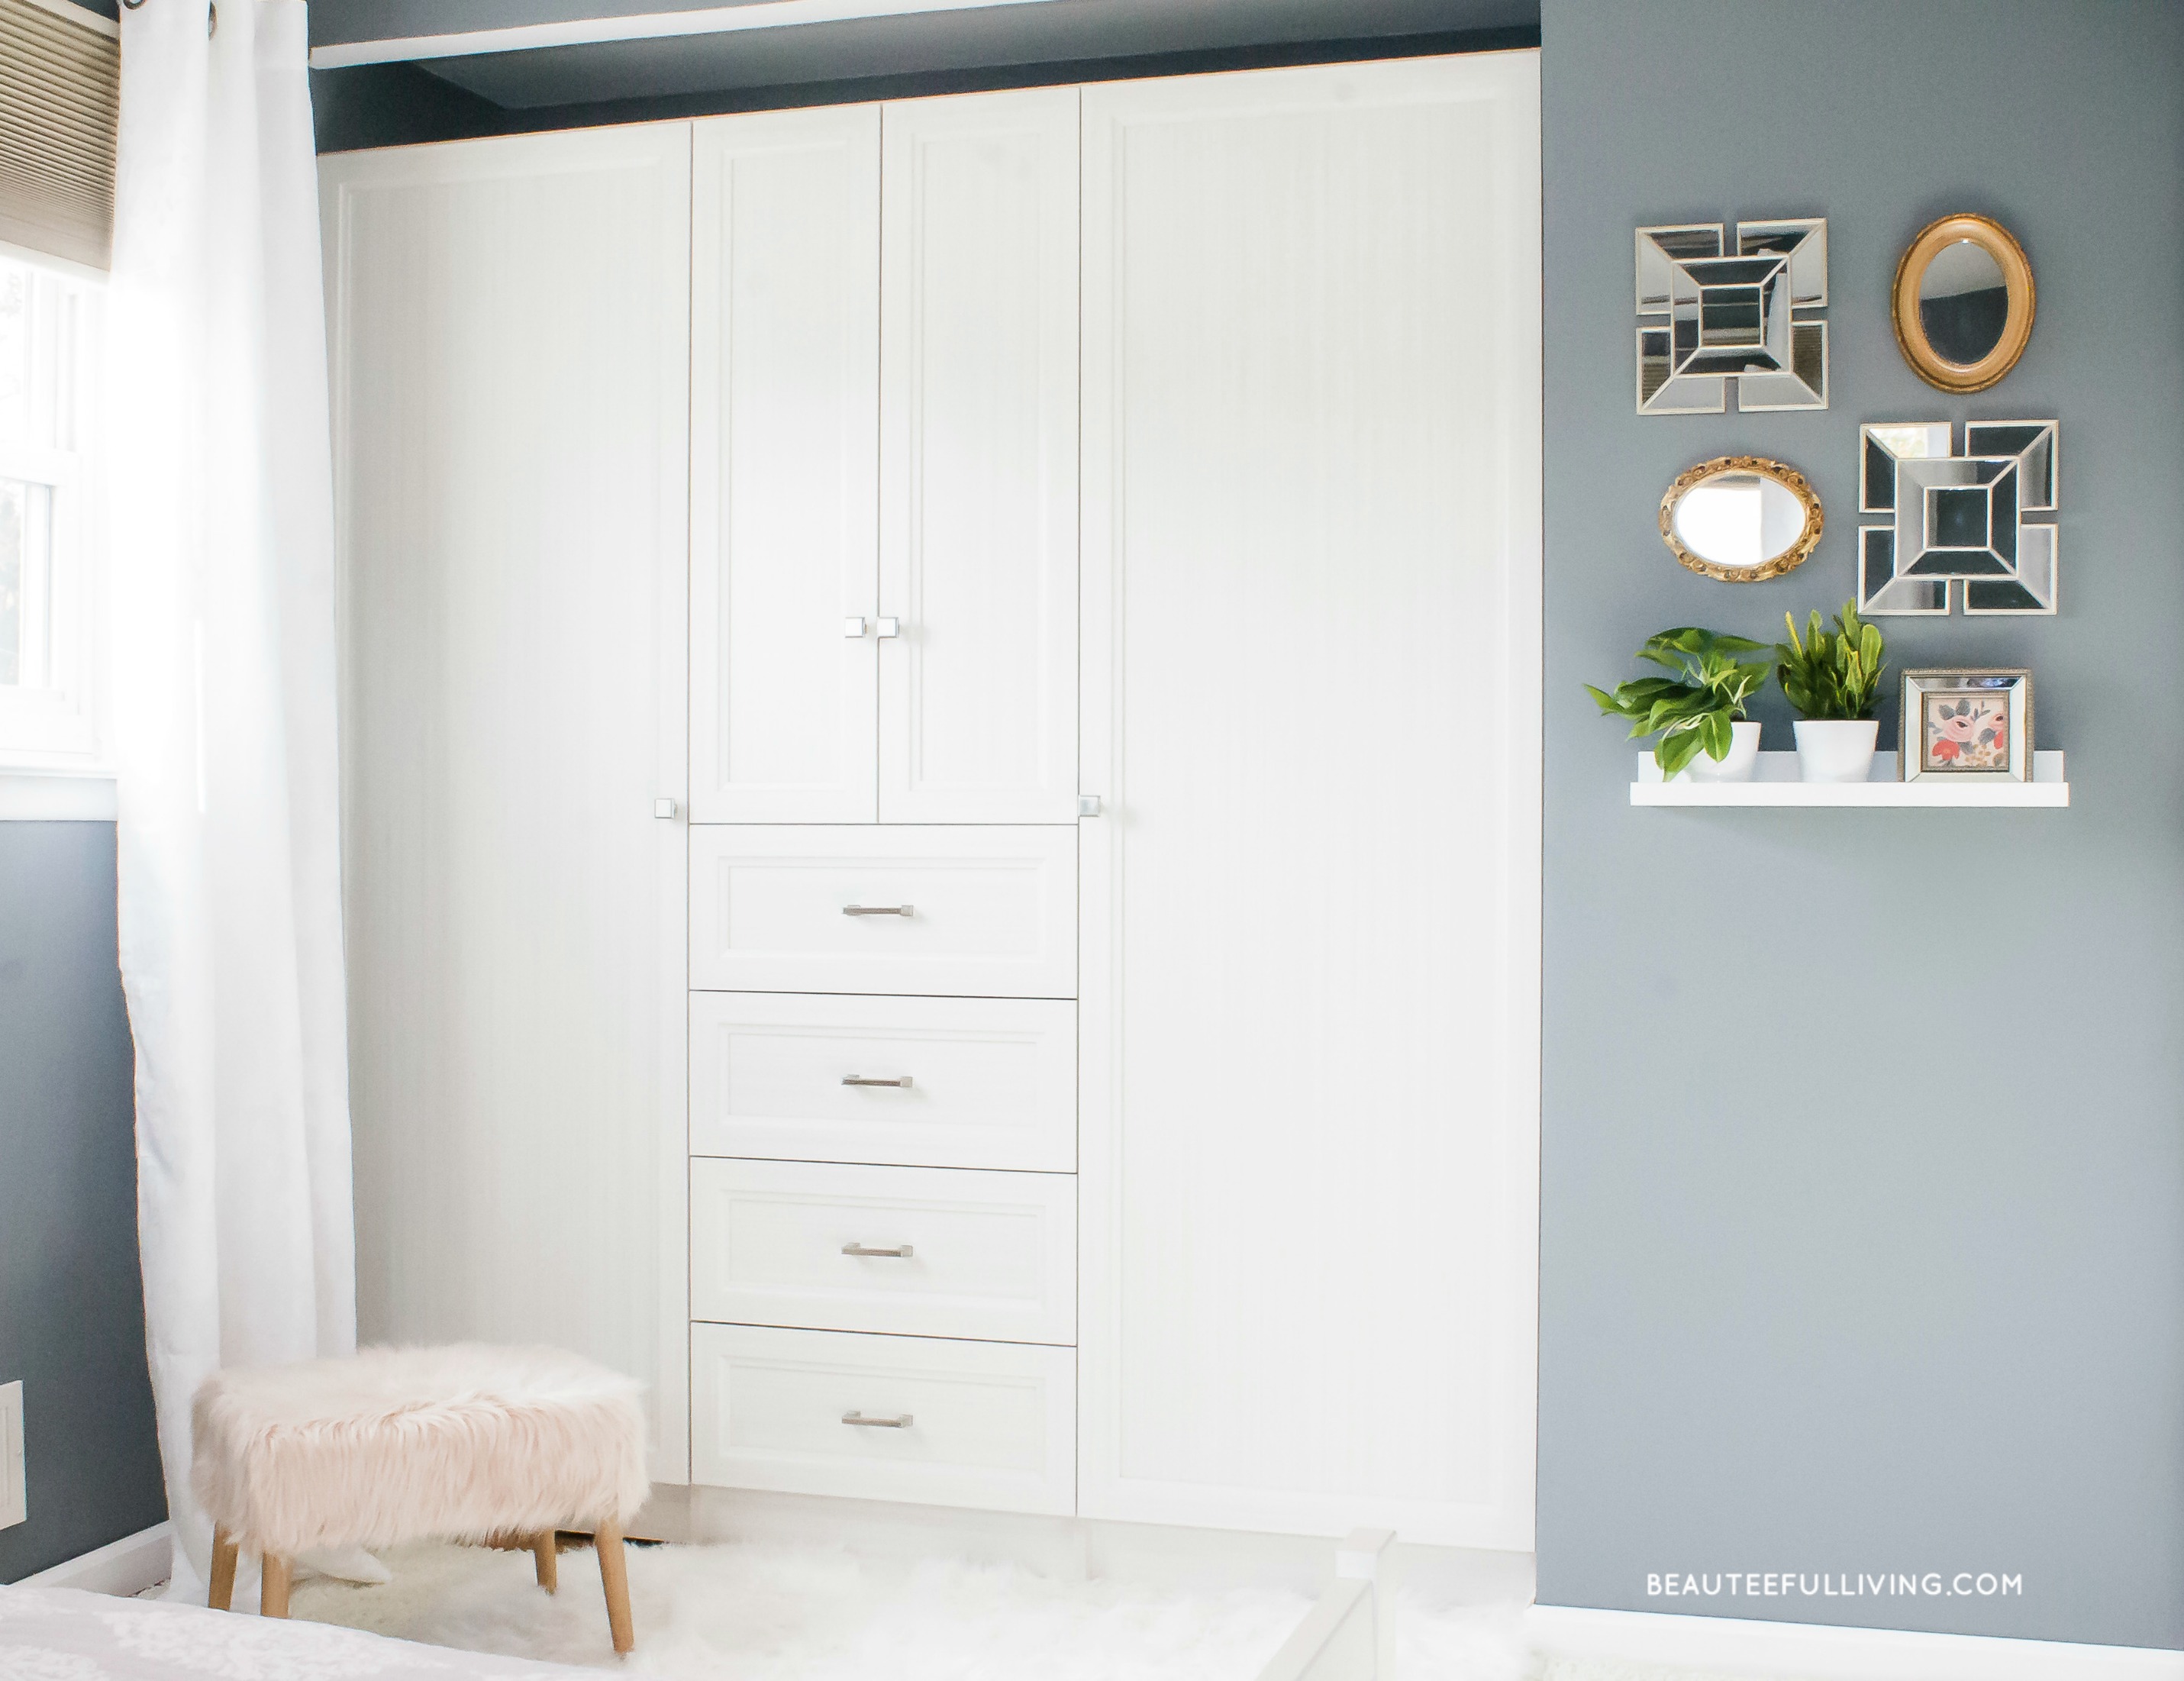
If you followed along my Modern Glam Master Bedroom Makeover (see room reveal here), you’ll recall what a big difference our new armoire made in our bedroom, both in aesthetics and function. On the blog today, I’m happy to share the Step-by-Step process of how our small, reach-in closet was transformed into a custom armoire. Let’s get started. 🙂
Photo 1 – Closet with all contents removed.
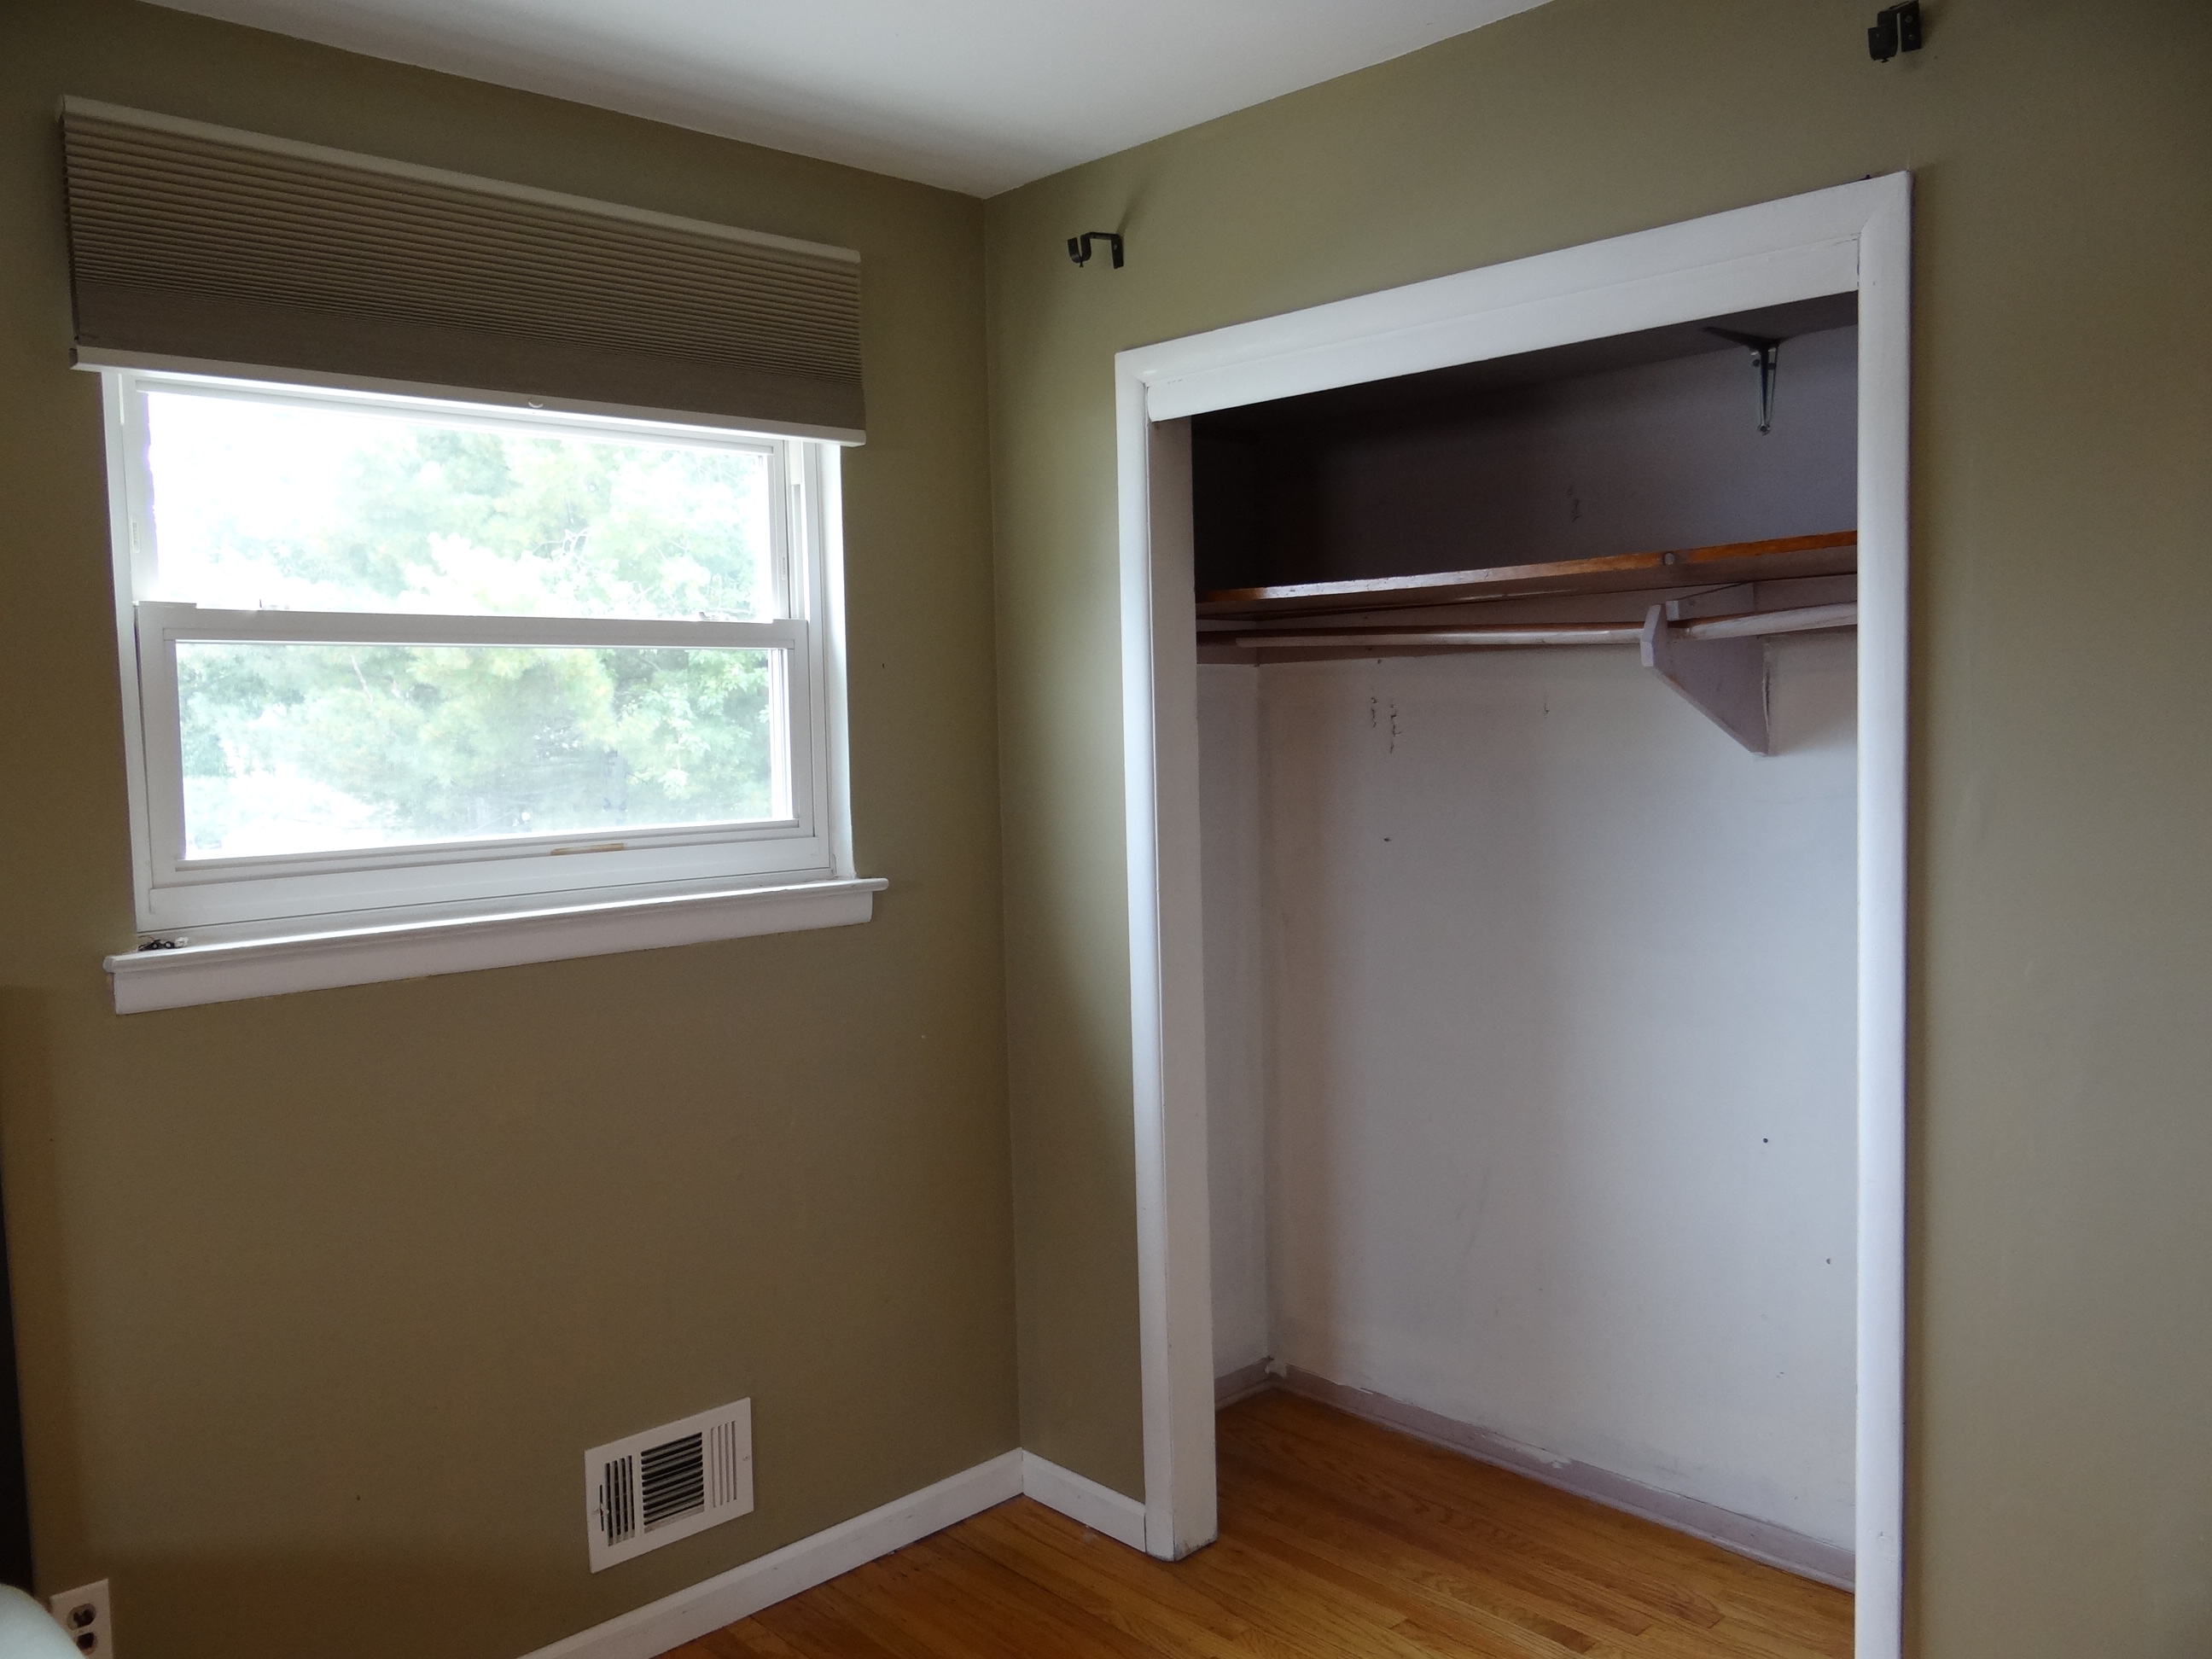
Photo 2 – Sides of closet wall removed.
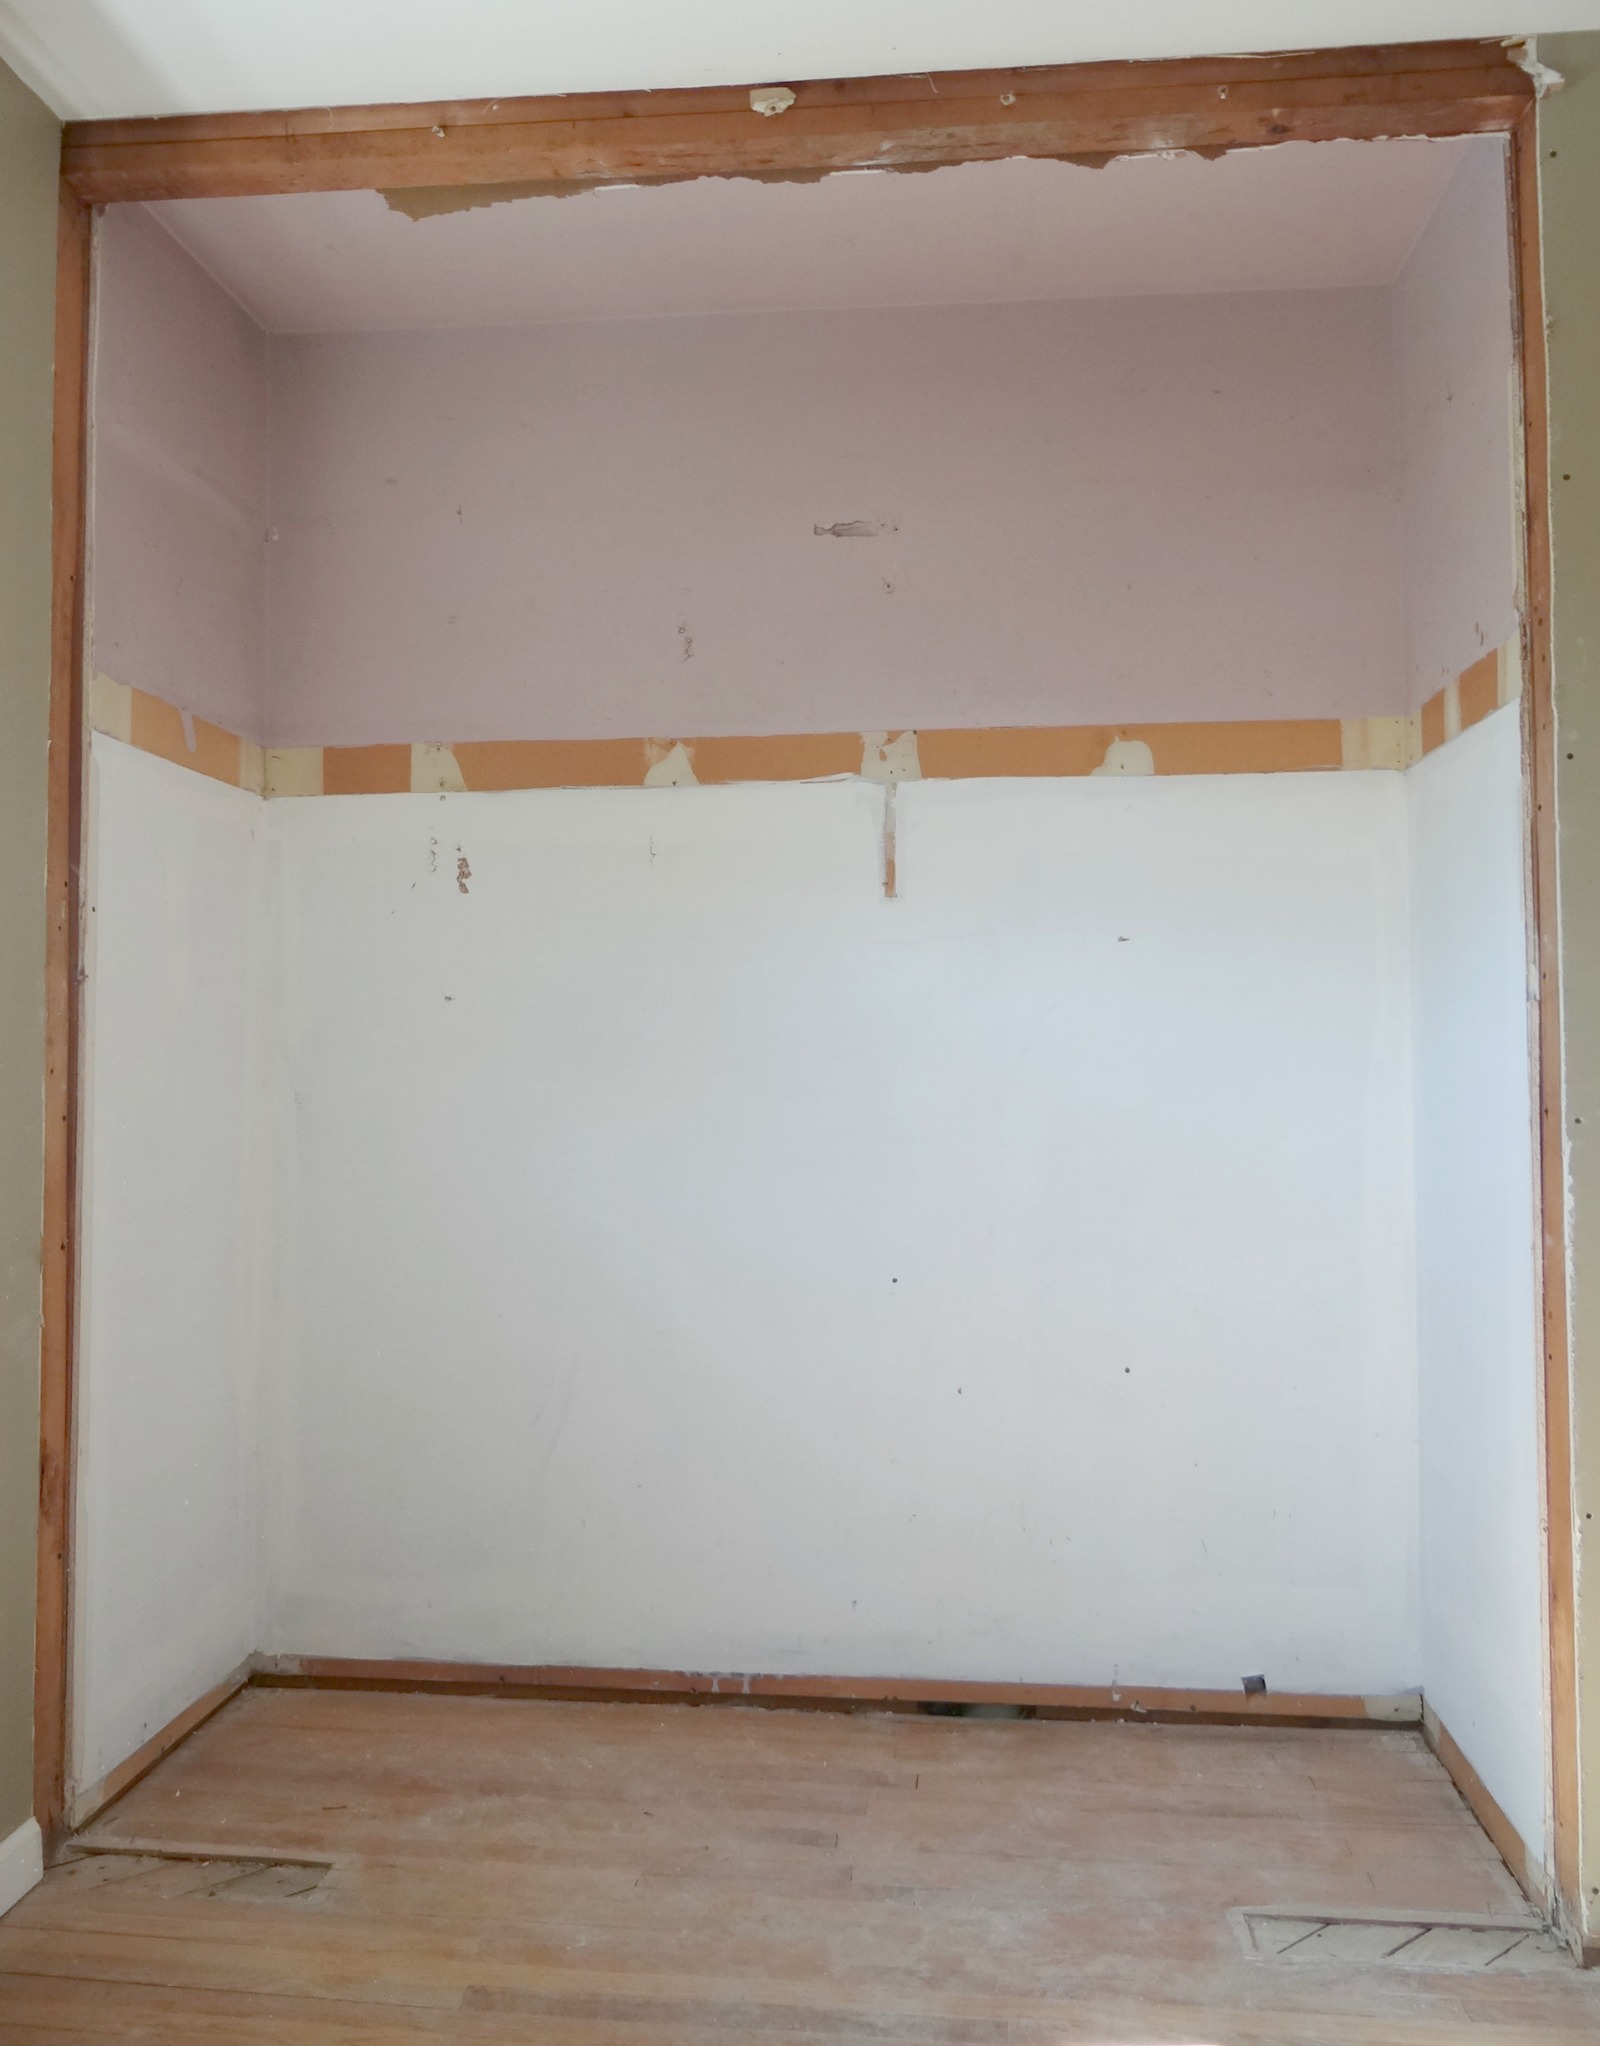
Photo 3 – Closet area all prepped for armoire installation.
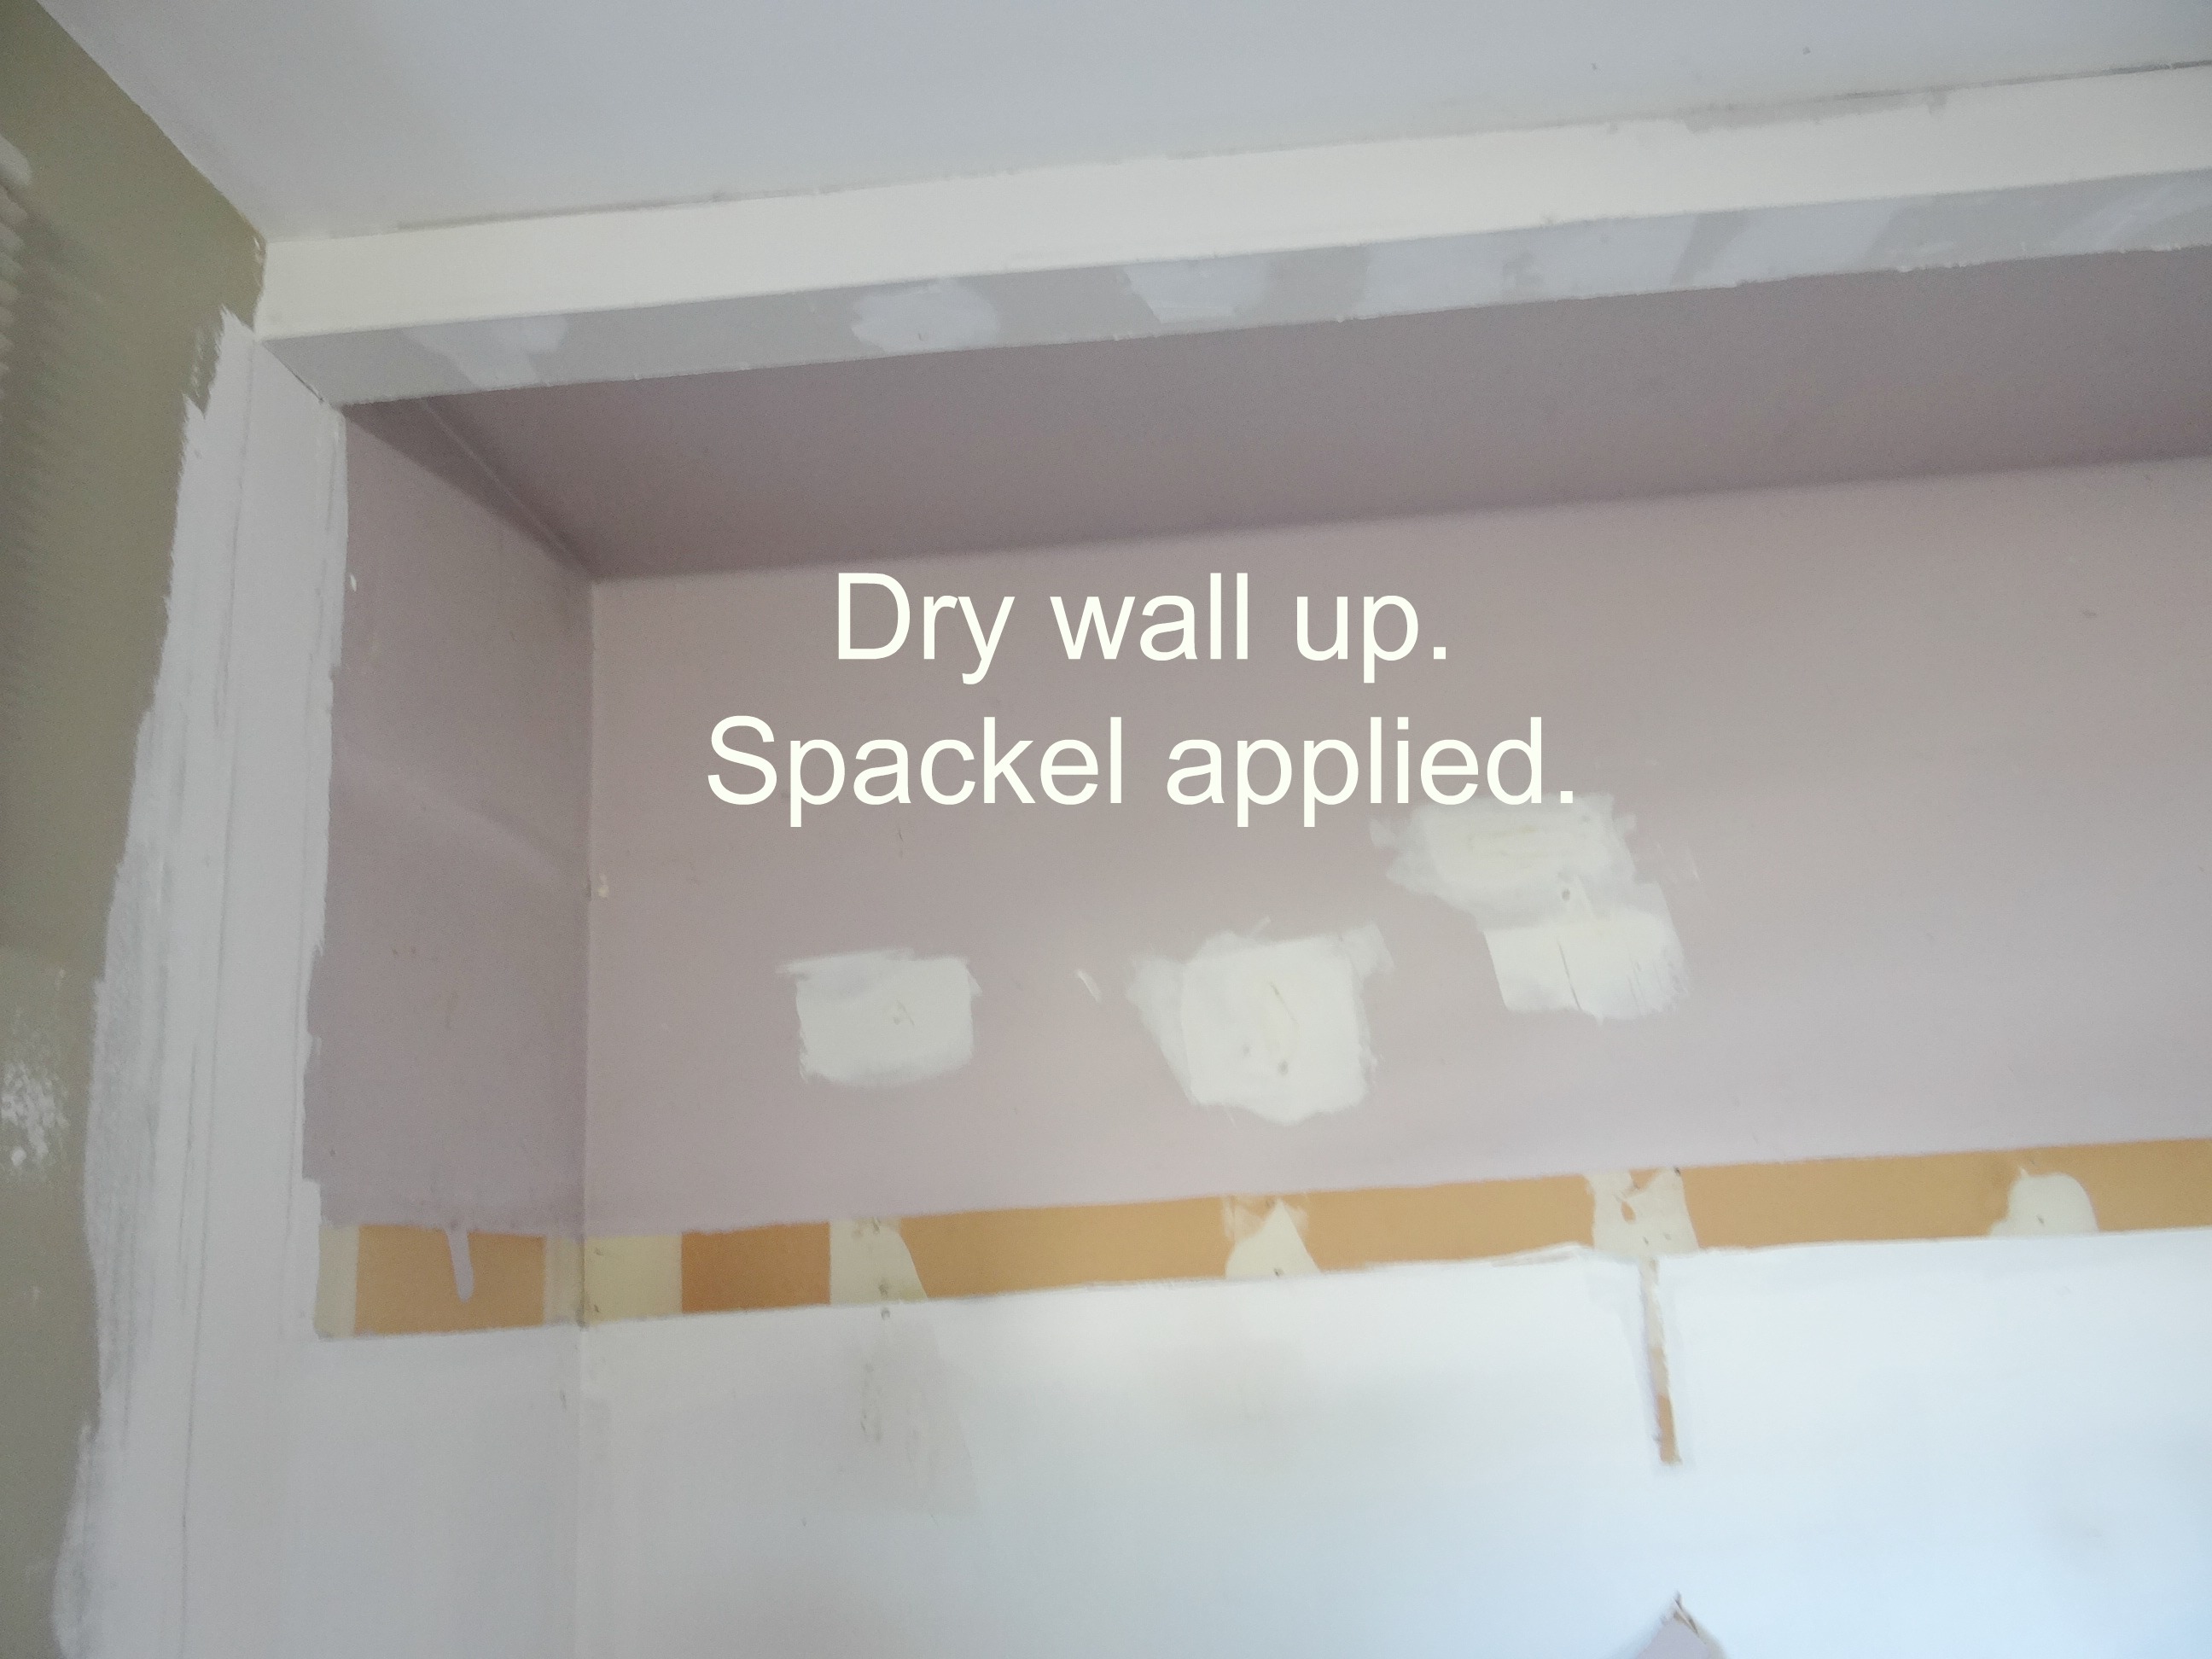
Photo 4 – Large panels installed by Closet POSSIBLE.
I have arrow pointing to a wood shim inserted in the center. Good to know that installer made modifications to ensure closet would be leveled.
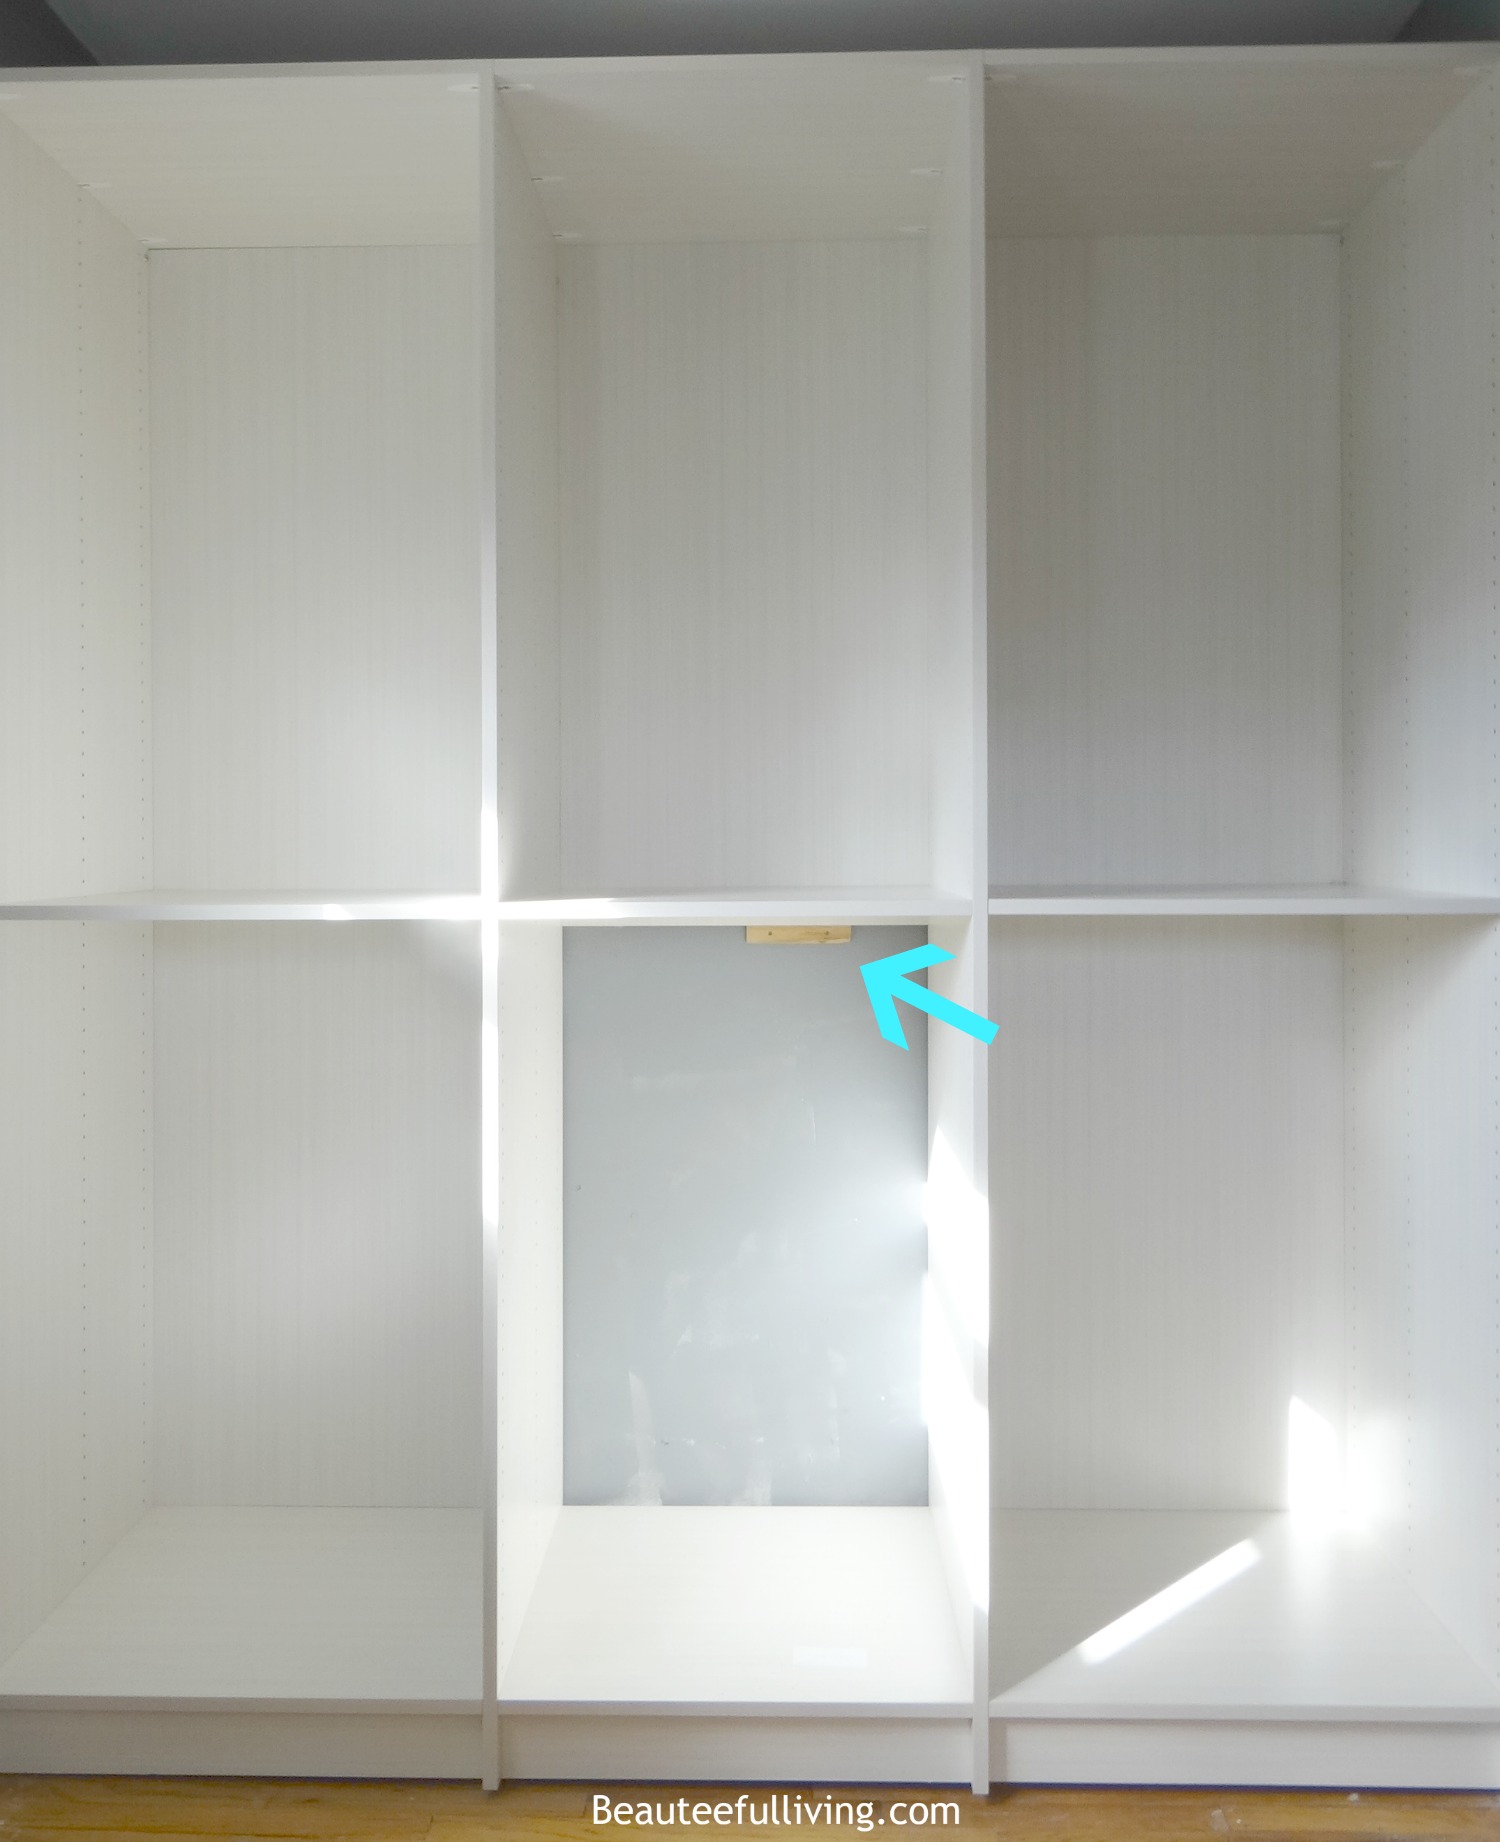
Photo 5 – Installation of door hinges.

Photo 6 – Installation of drawer slides.
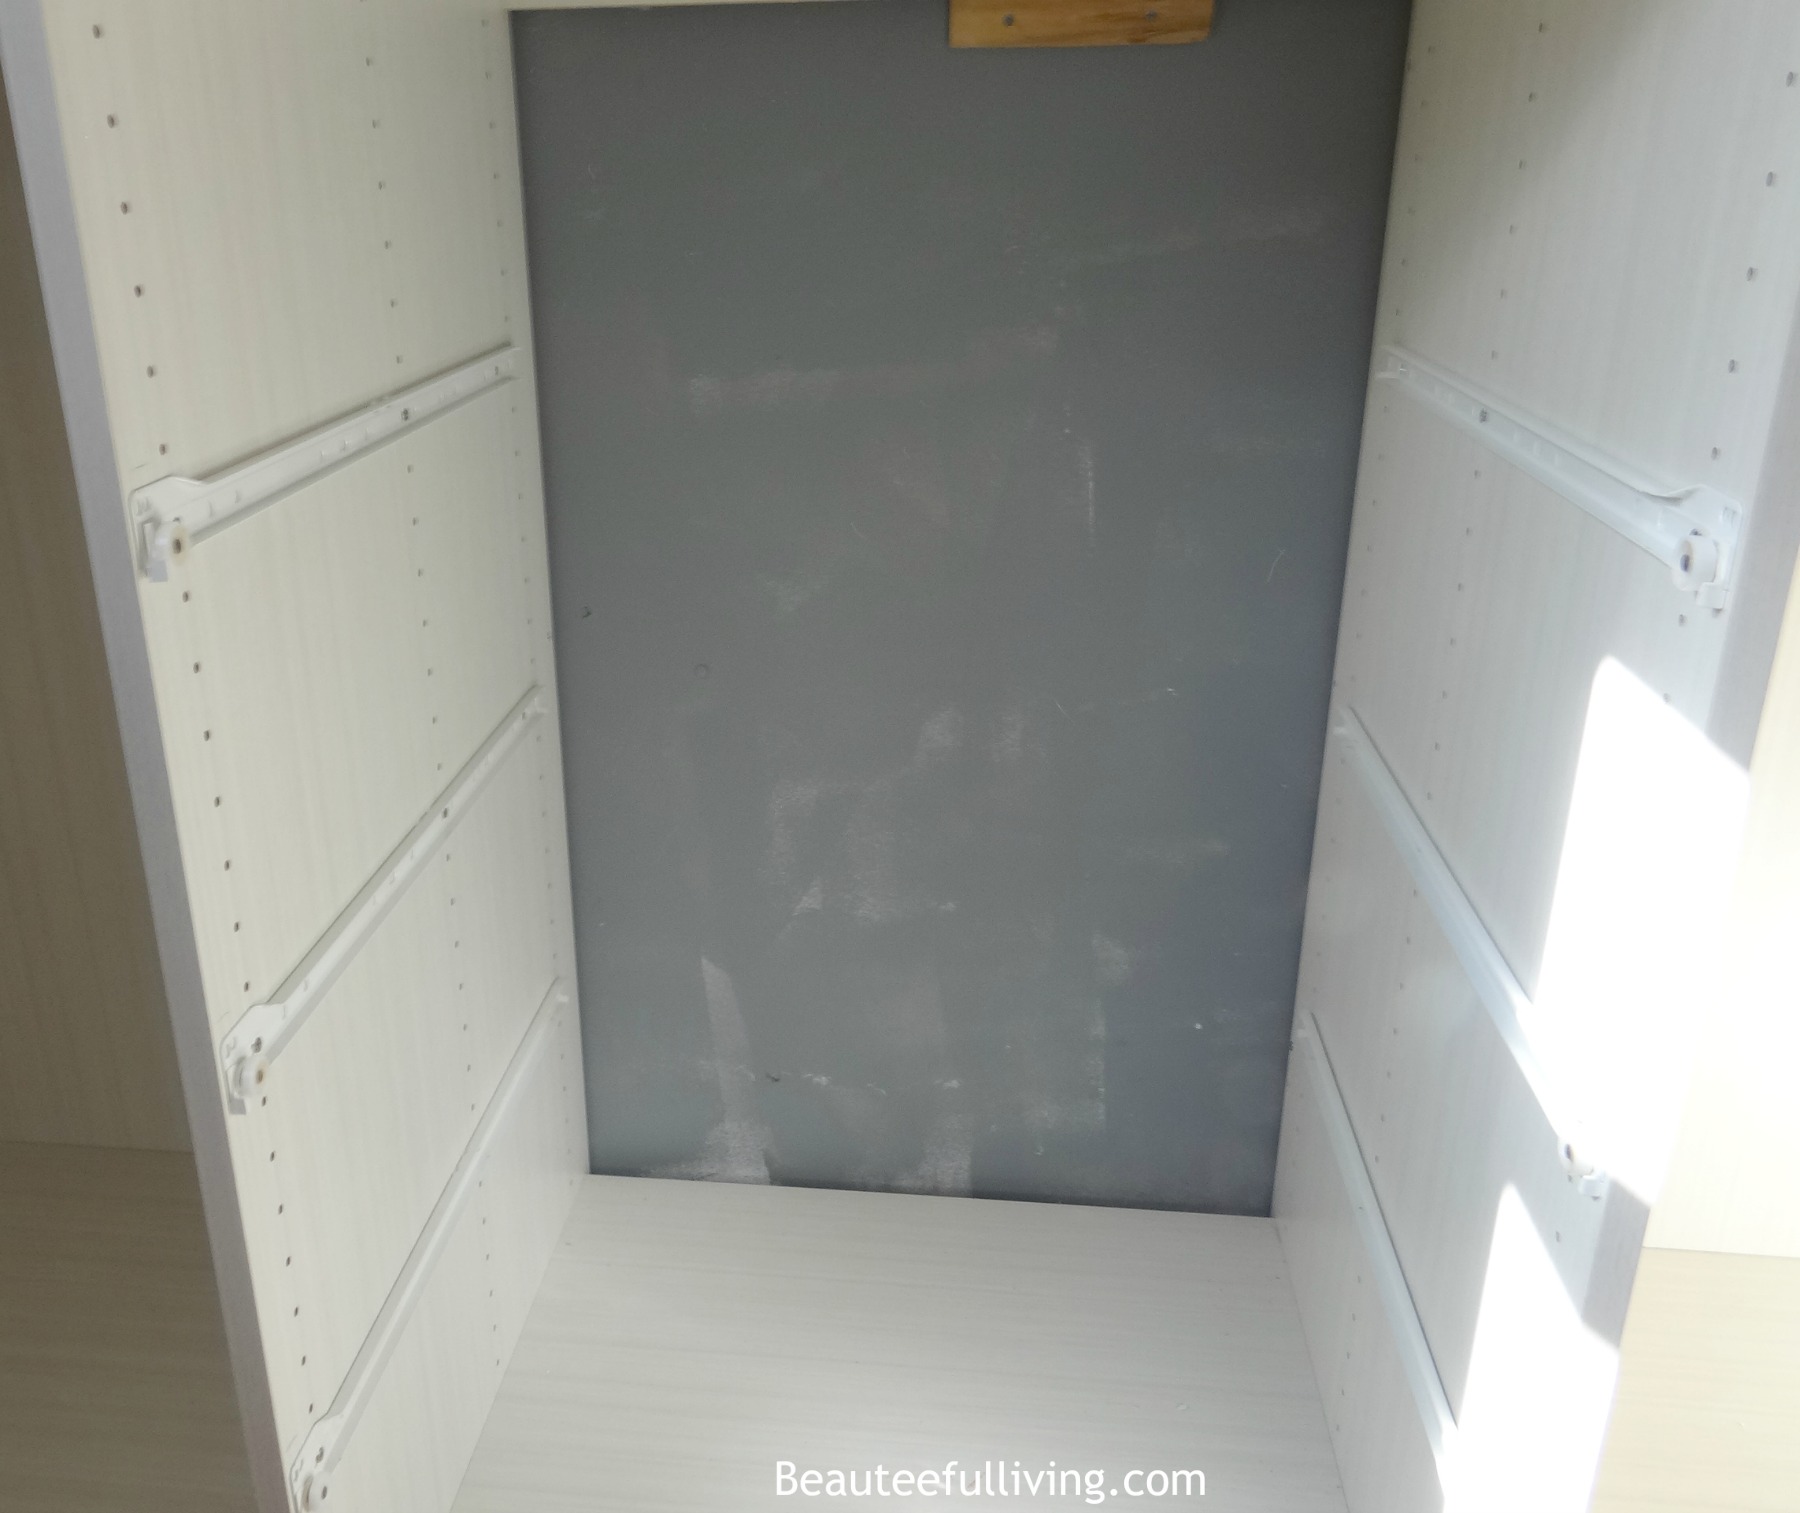
Photo 7 – Hanging rod installation. We now have 4 hanging rods versus the 1 that we had in previous closet.
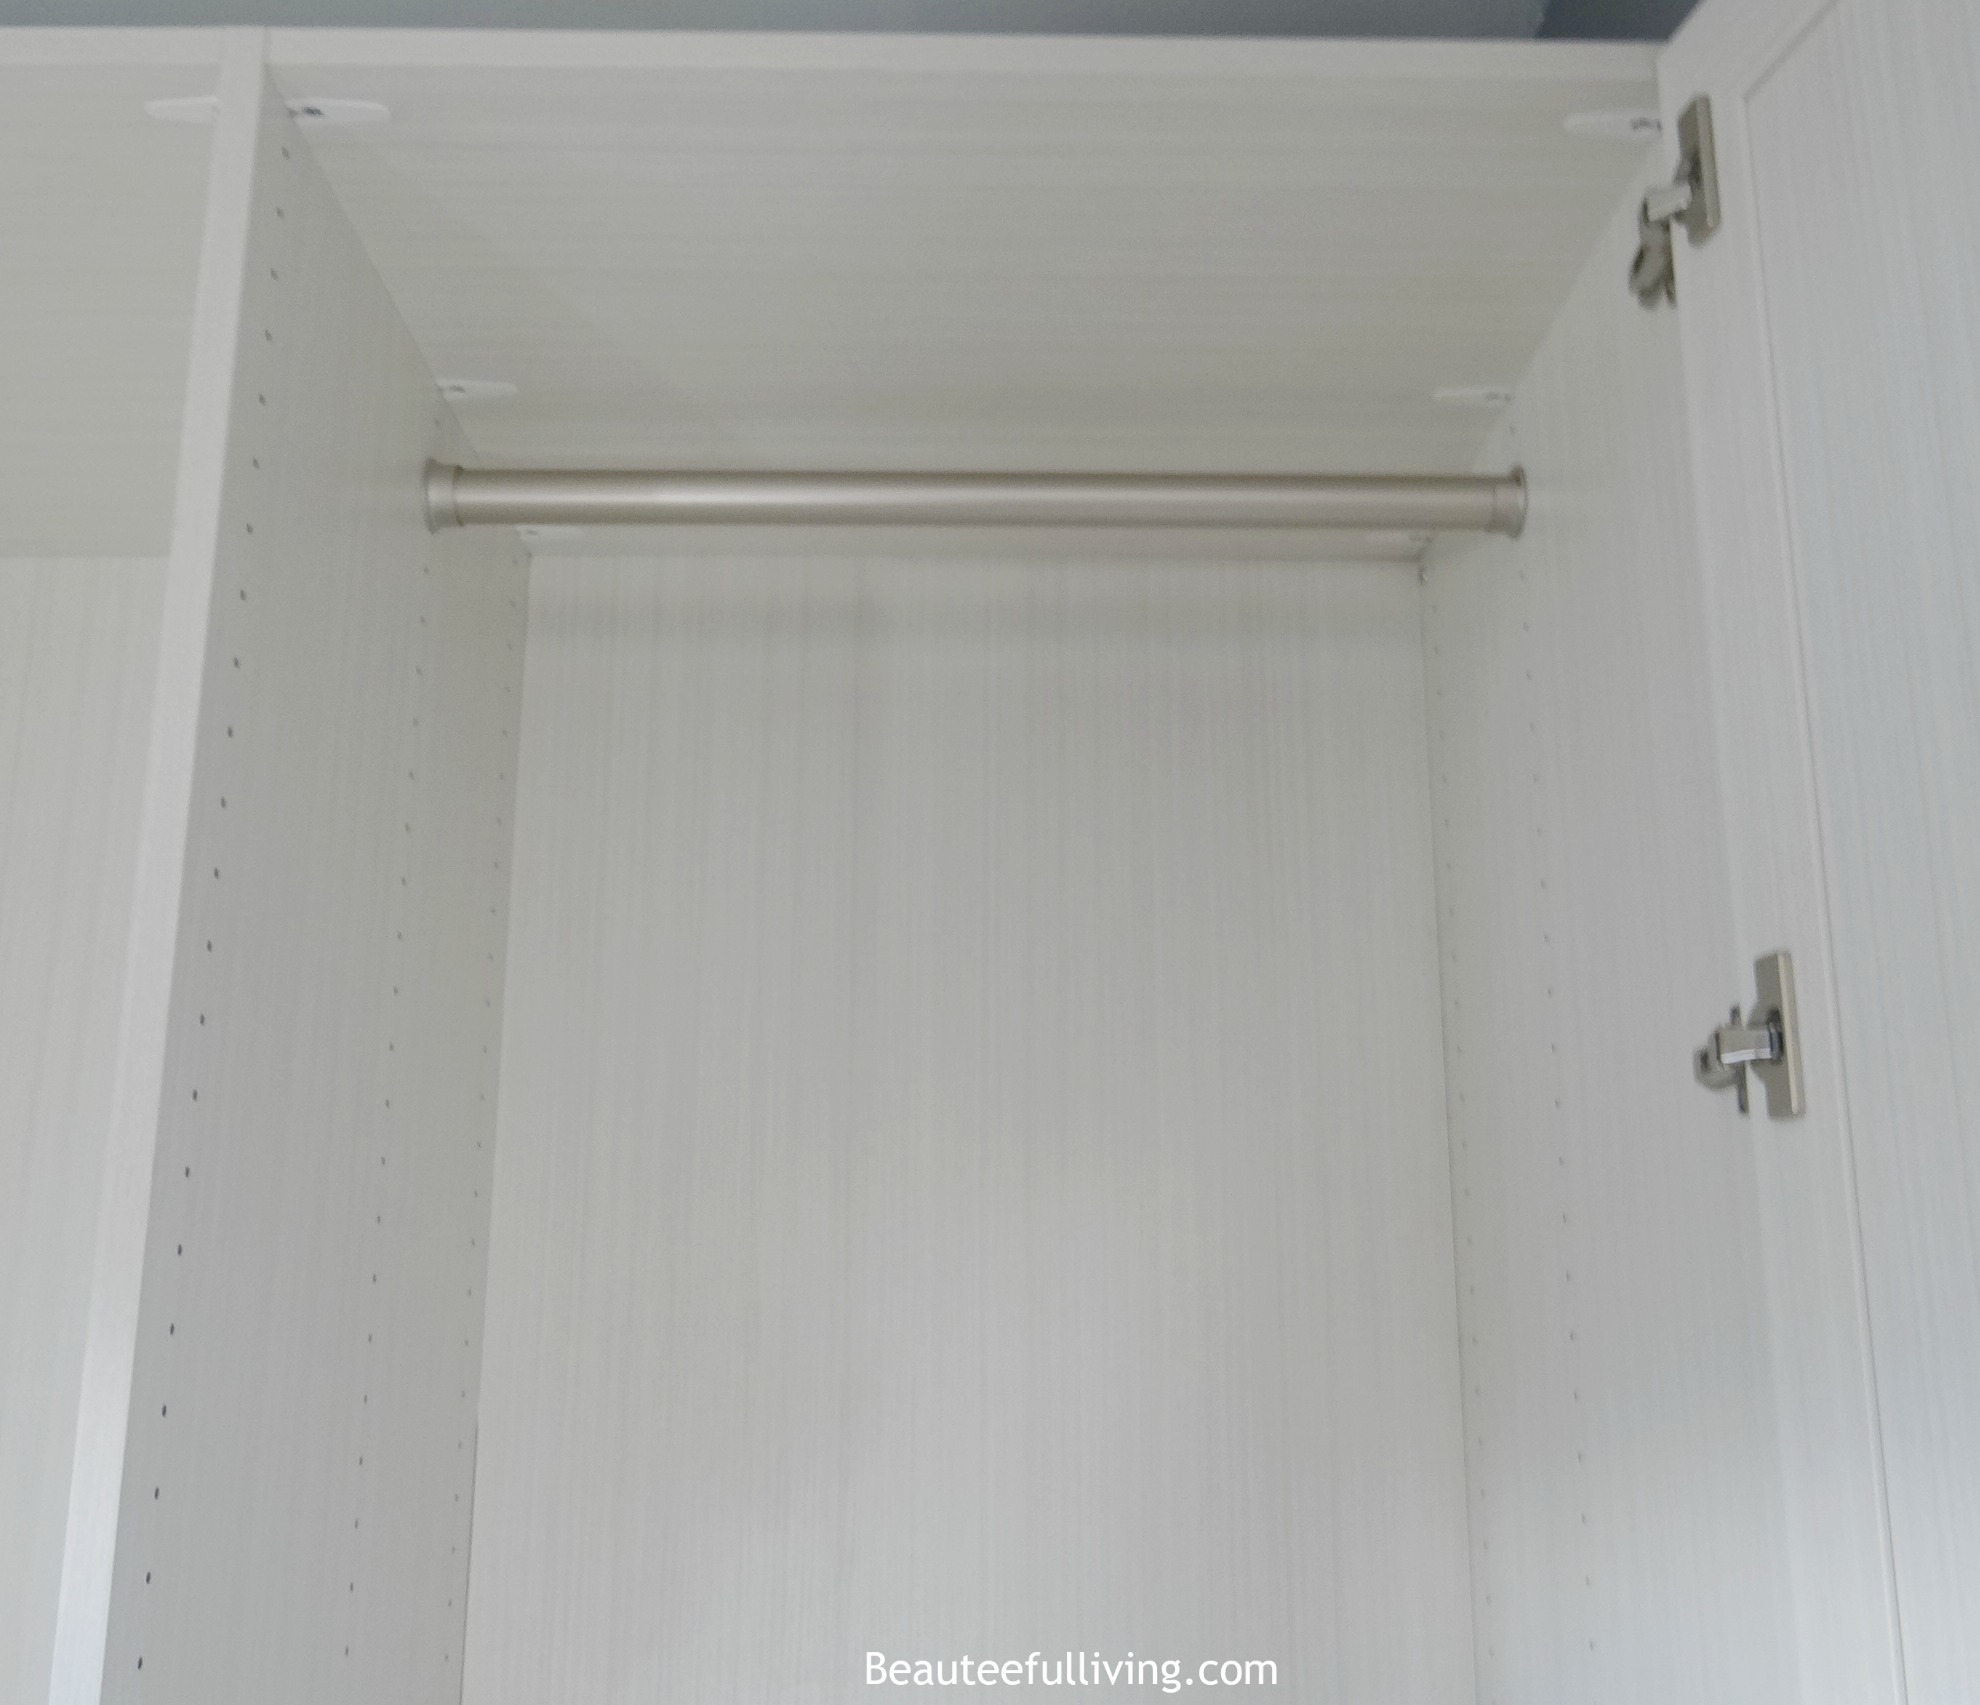
Photo 8 – Almost all done! Aren’t those doors and drawers so beautiful? The finish I chose was called “White Chocolate.”
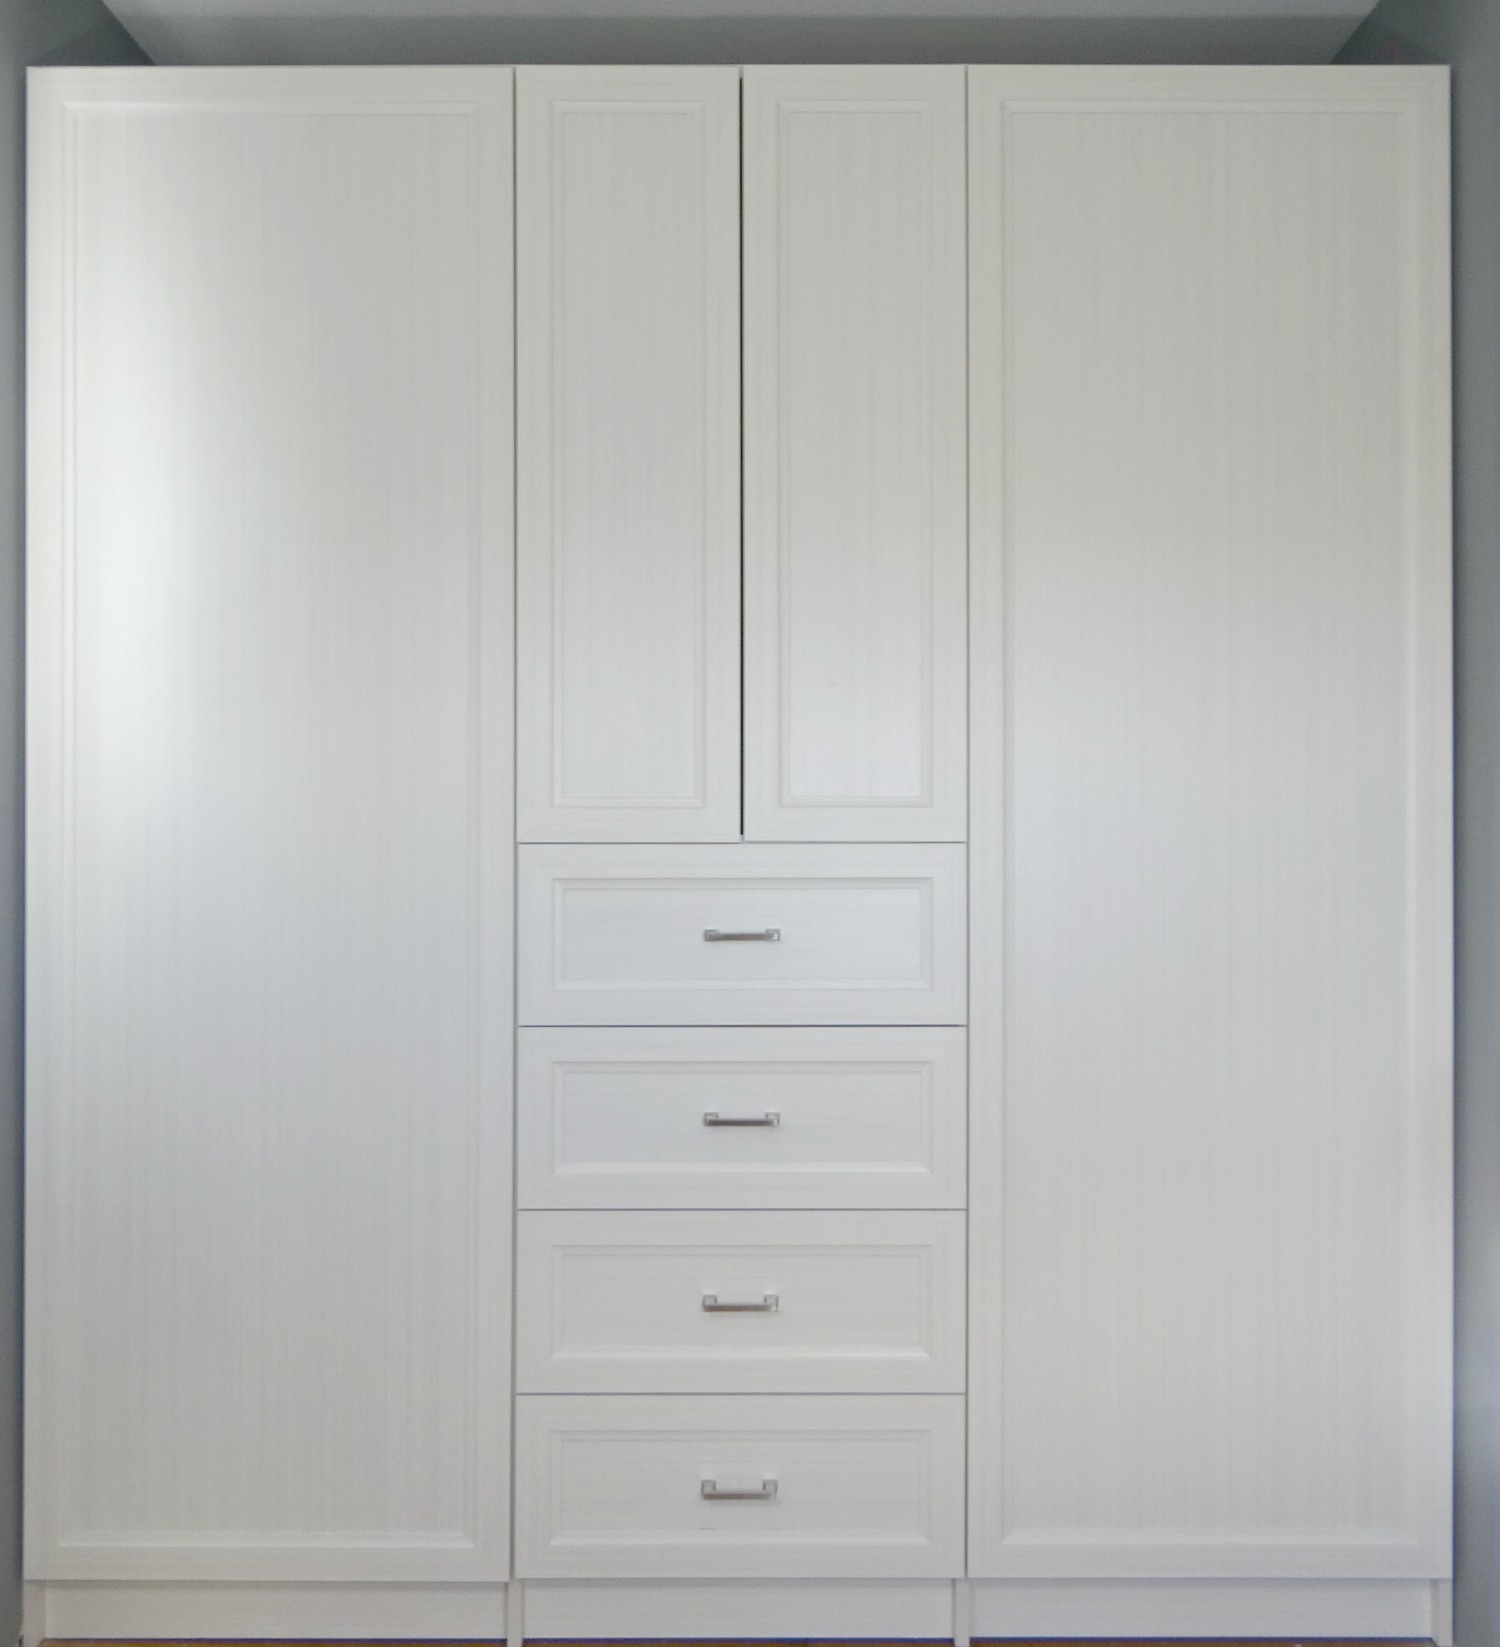
Photo 9 – Deciding on placement of door knobs.
The installer was so patient while I debated over where the doorknobs should be placed. It probably took me 10 minutes to make my decision. I appreciate not feeling rushed. Better to be 100% positive before holes are drilled, right?!
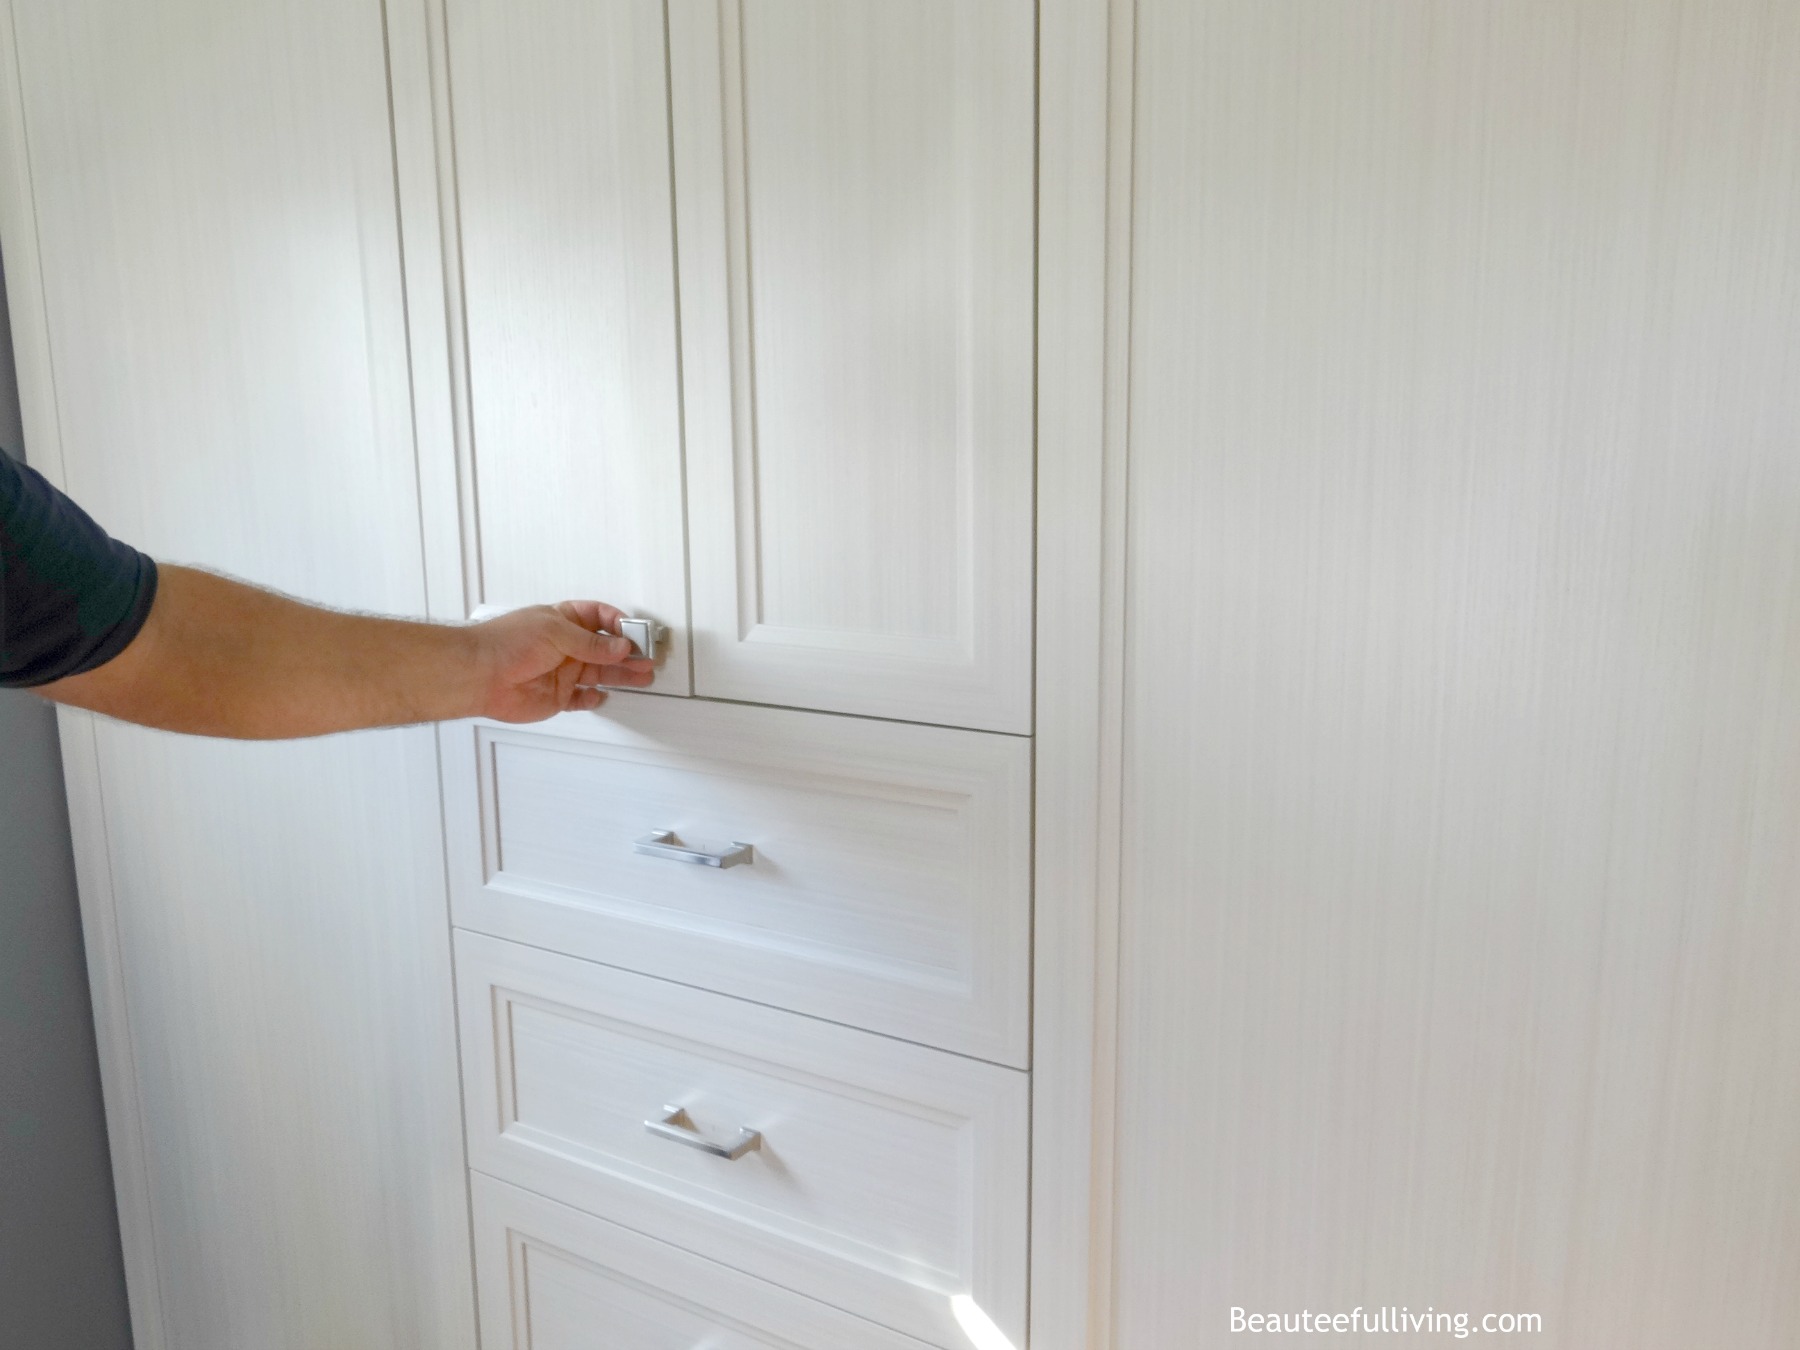
Photo 10 – Clean up after installation. Yes, installer even cleaned up thoroughly after closet was installed!
From start to finish, our armoire took approximately 3 hours to complete.
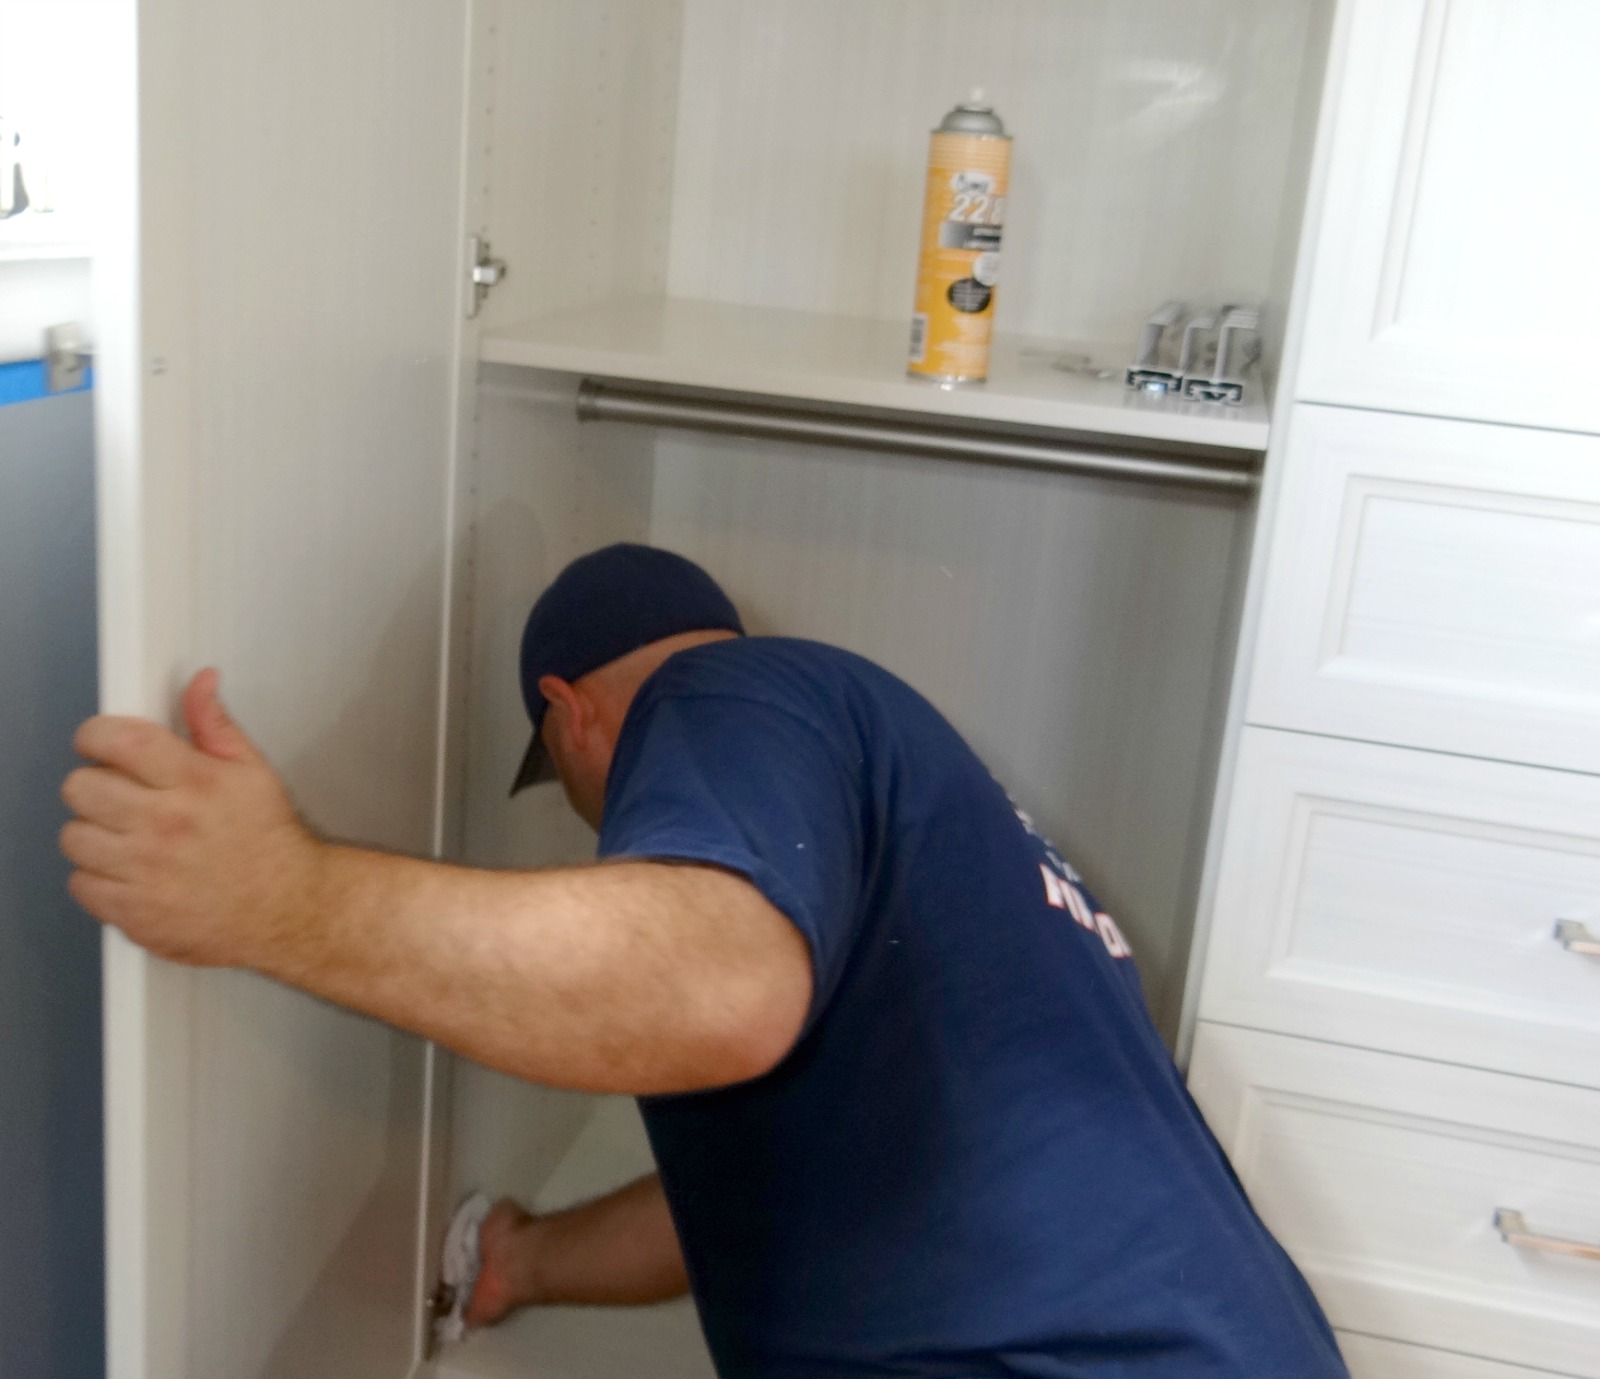
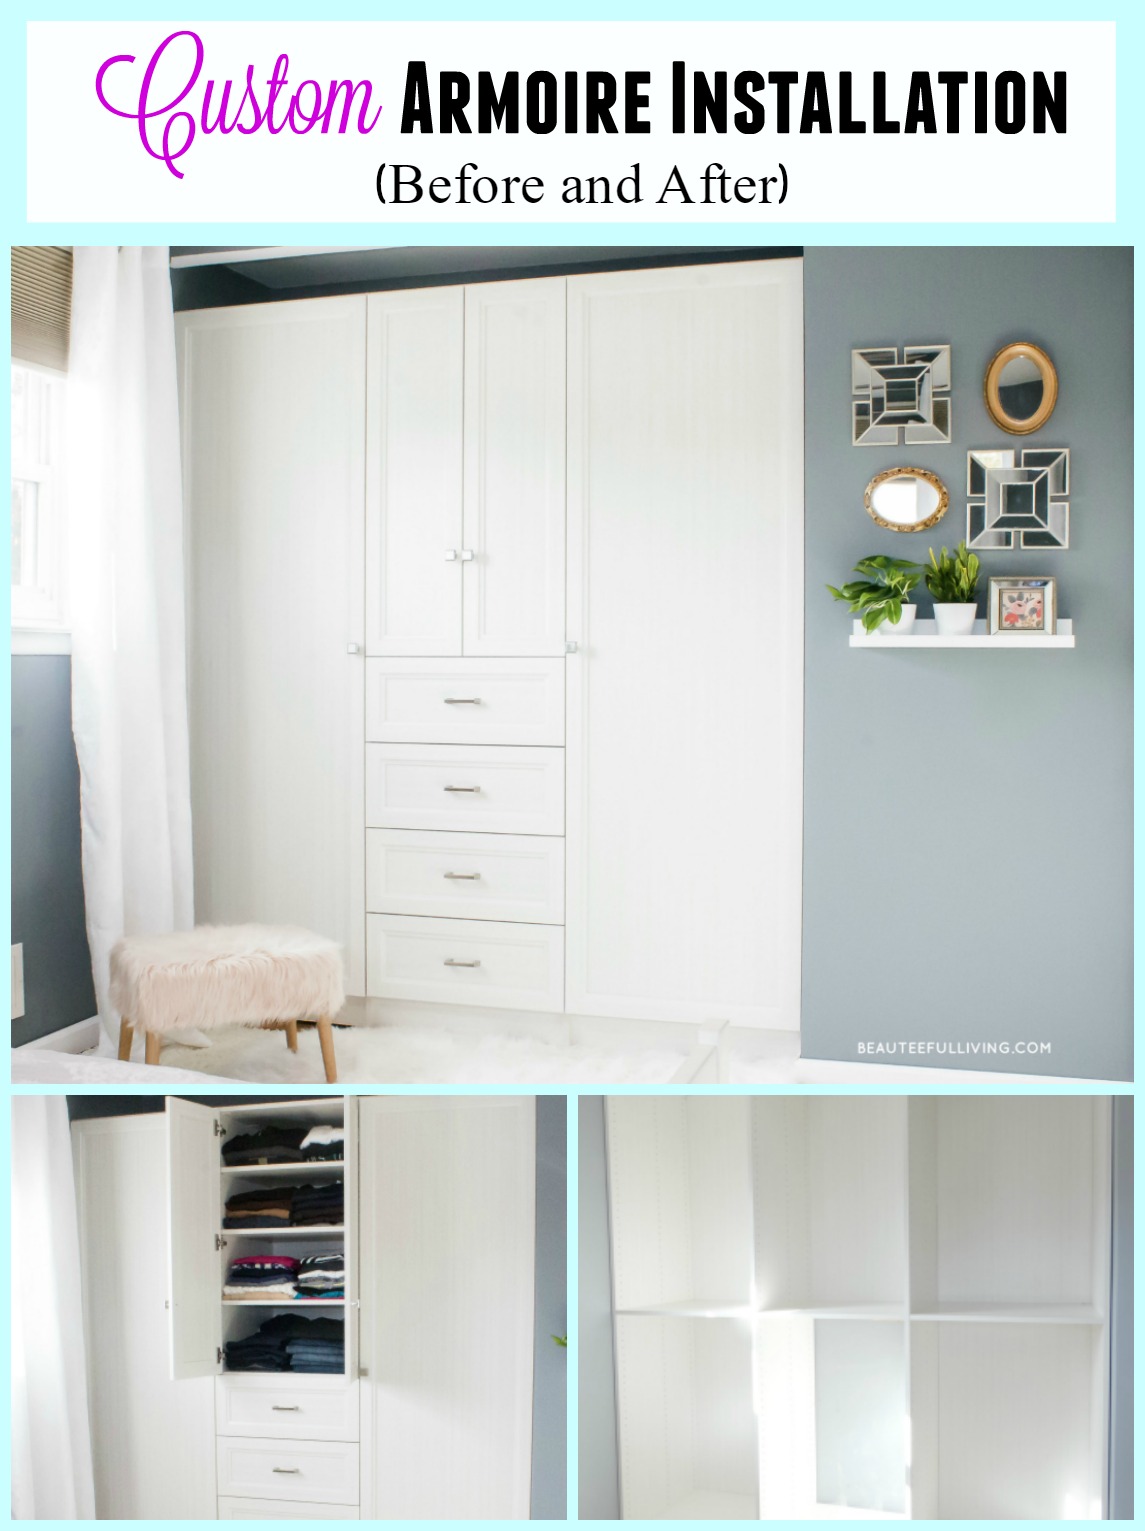
Photo 11 – My side of the armoire.
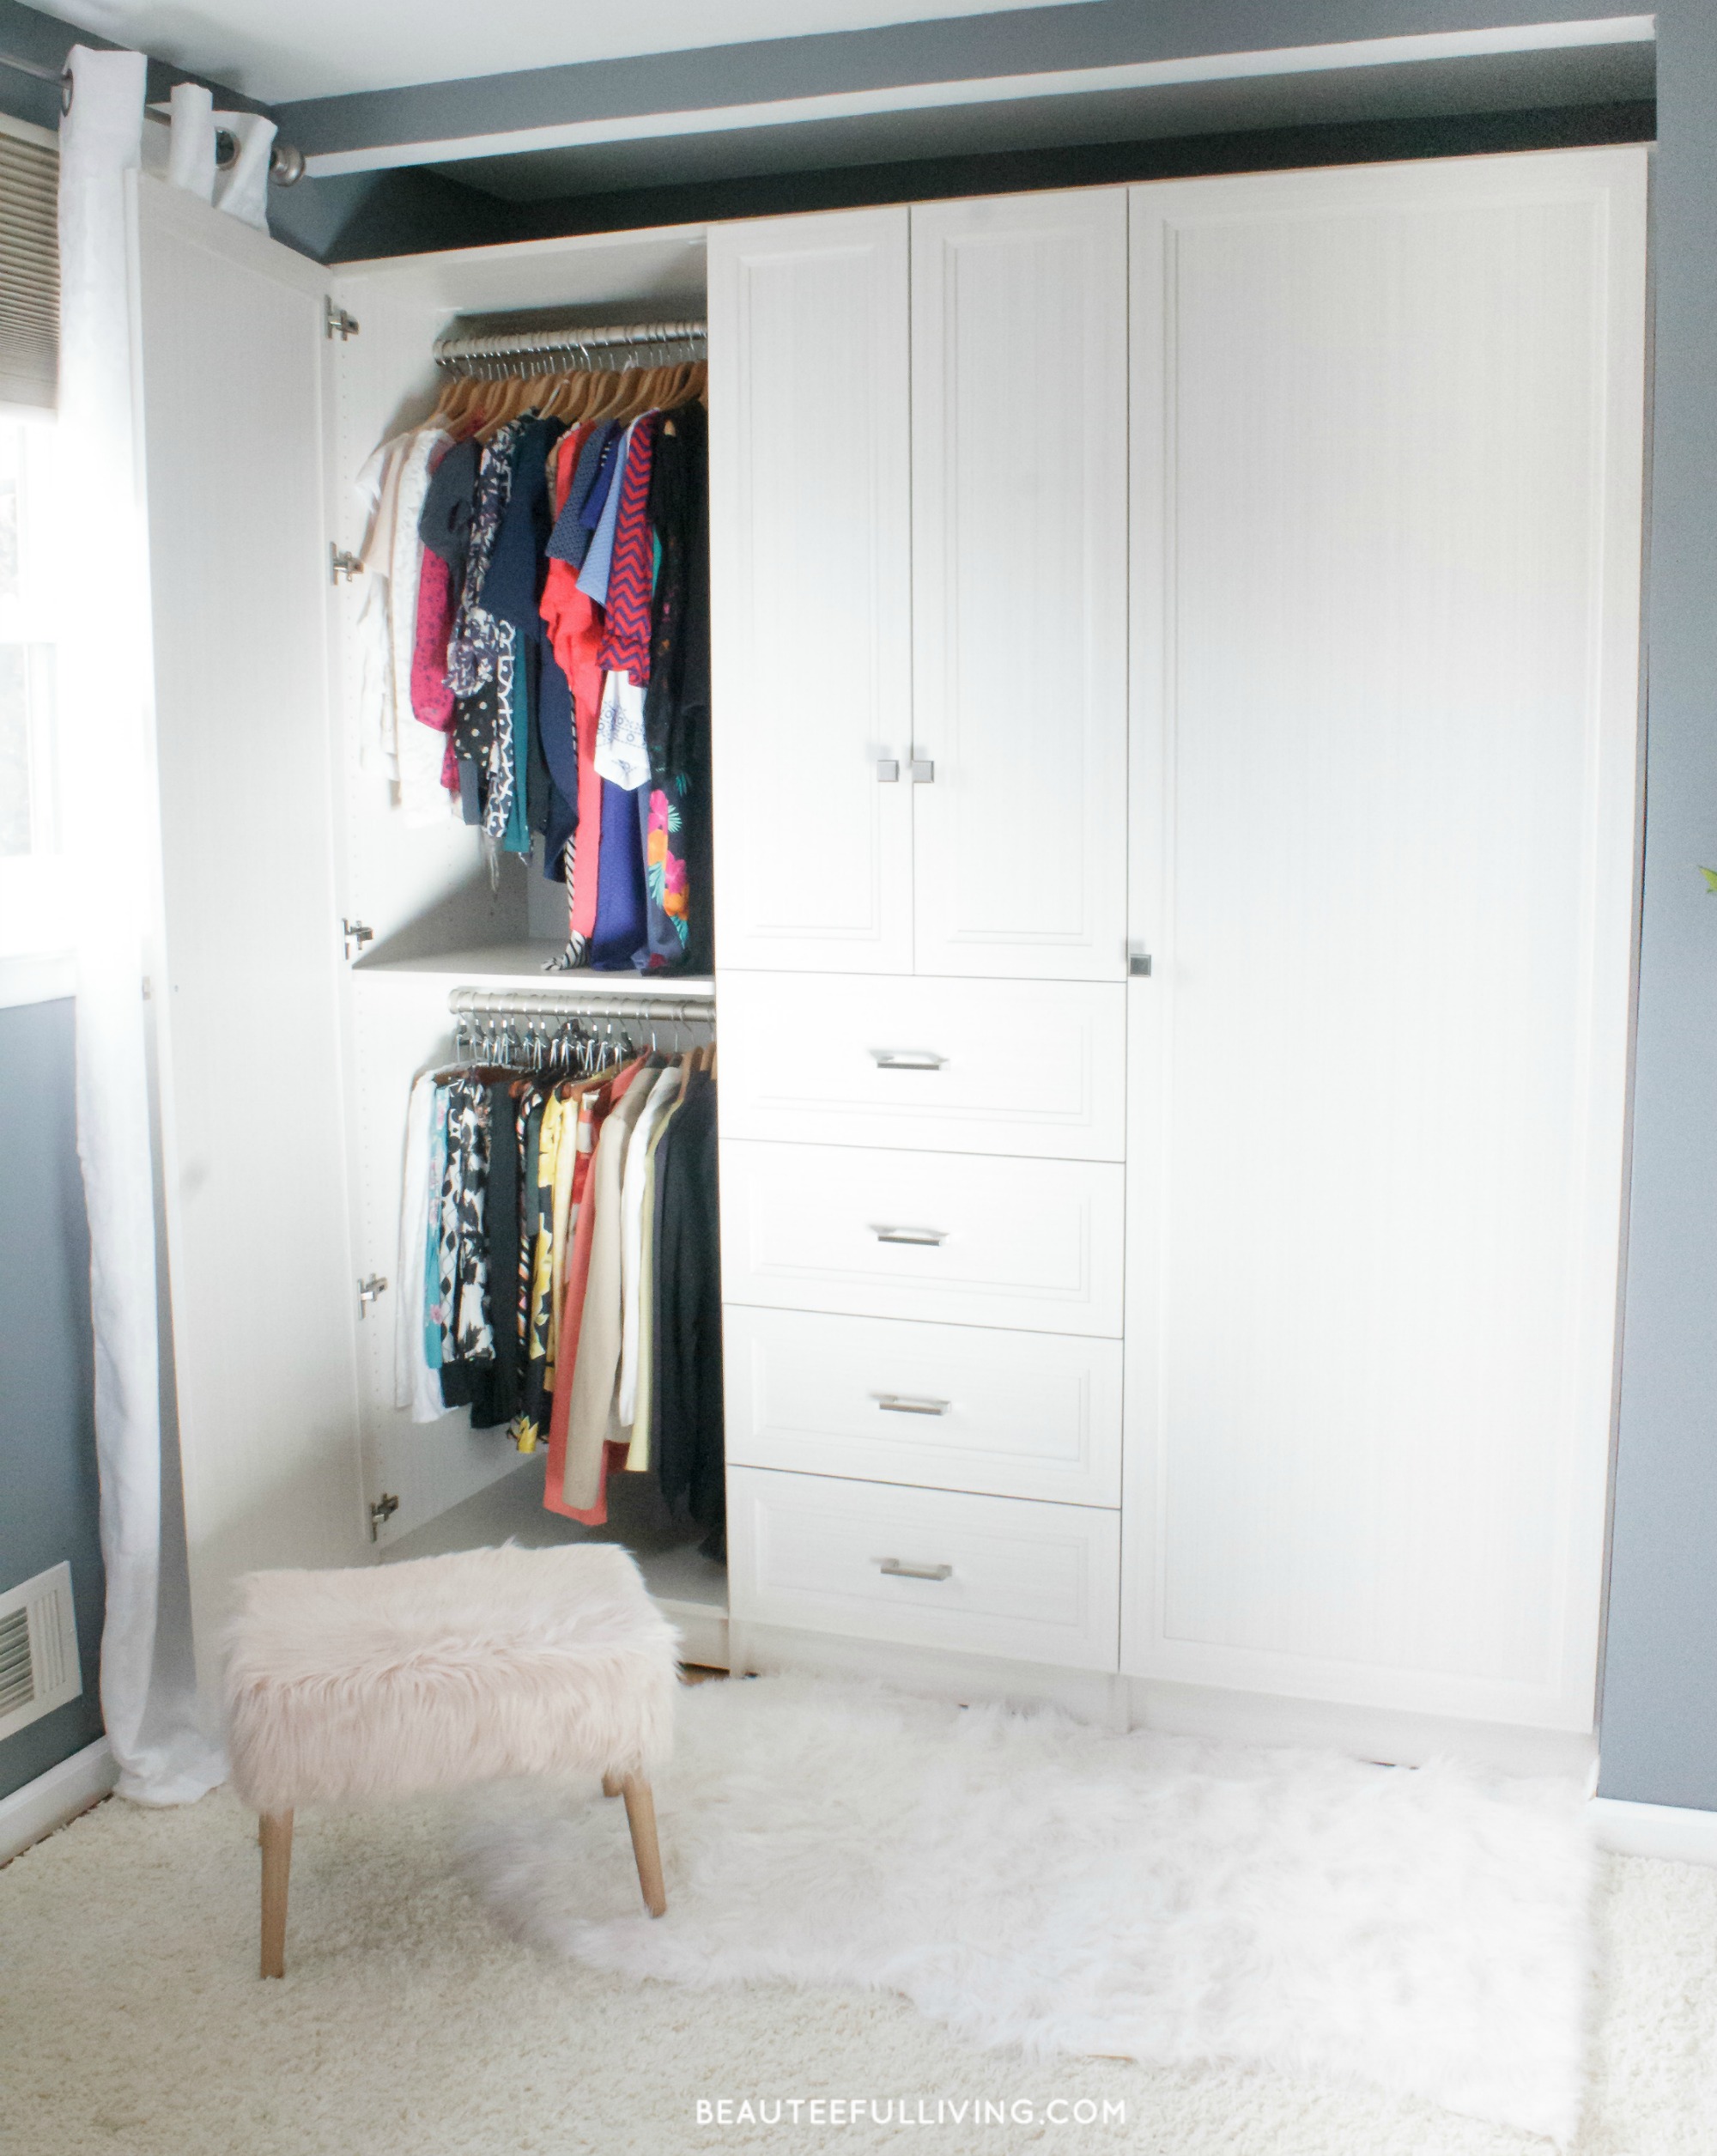
Photo 12 – Top shelves hold both my clothes and husband’s clothes. Bottom drawers contain more of my folding clothes.
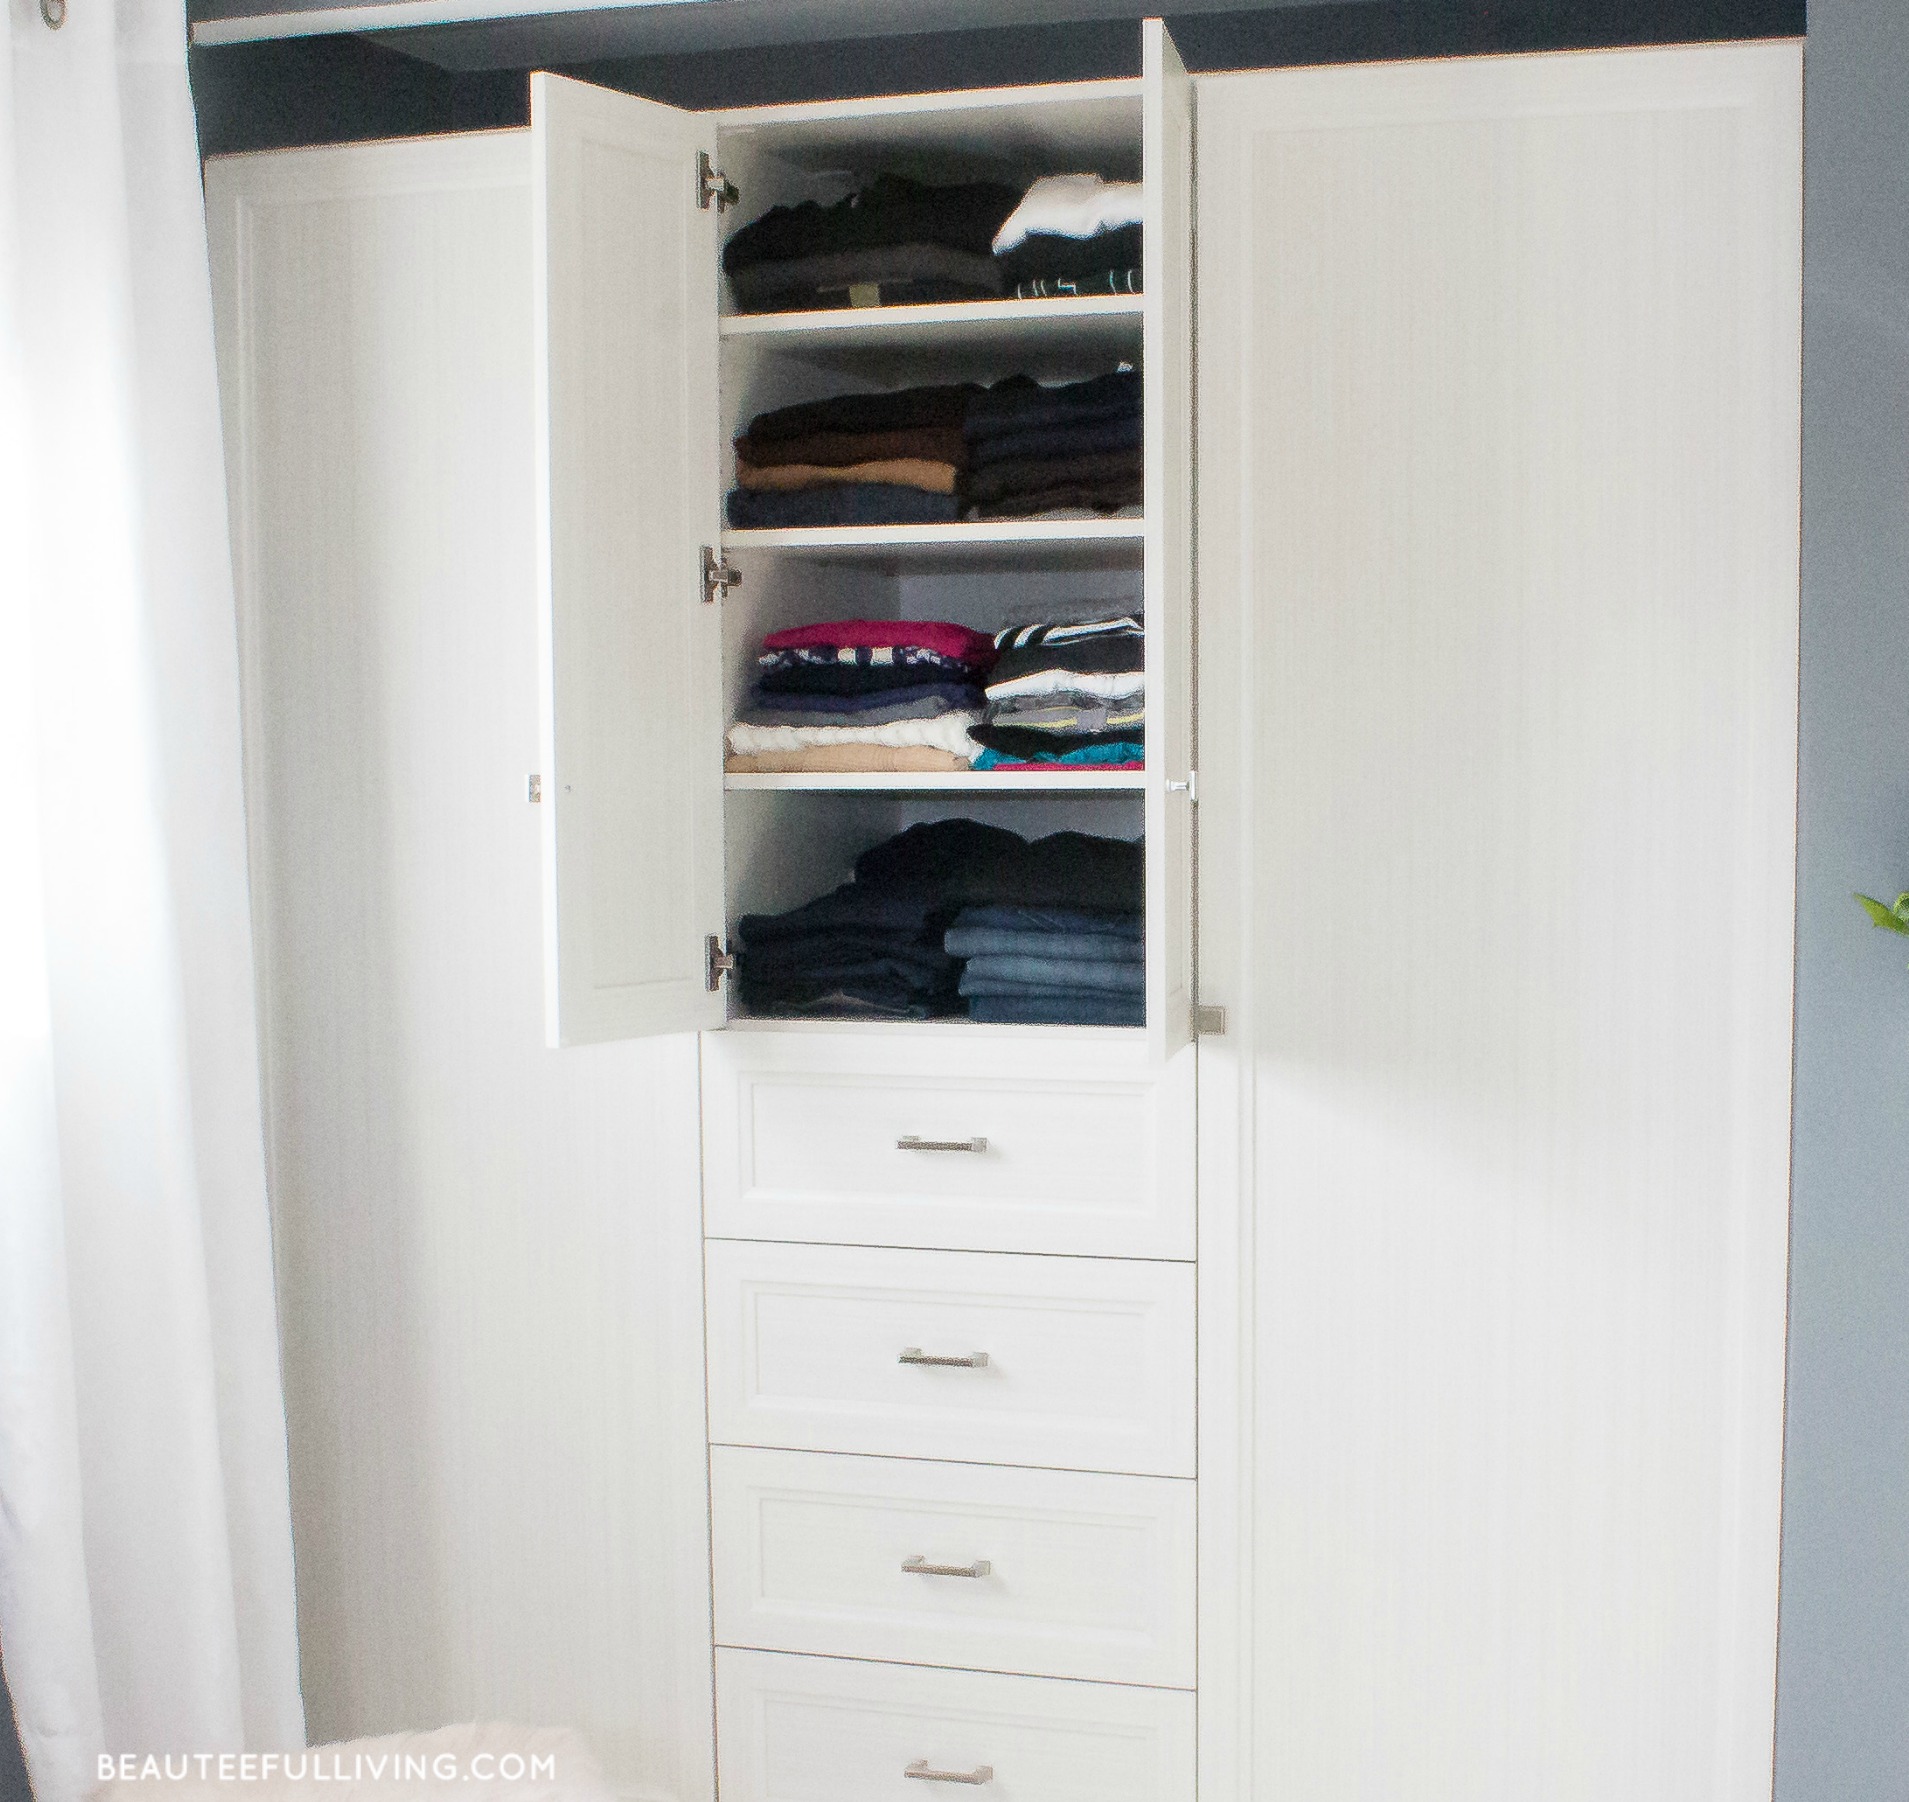
Photo 13 – My husband’s side of the armoire.
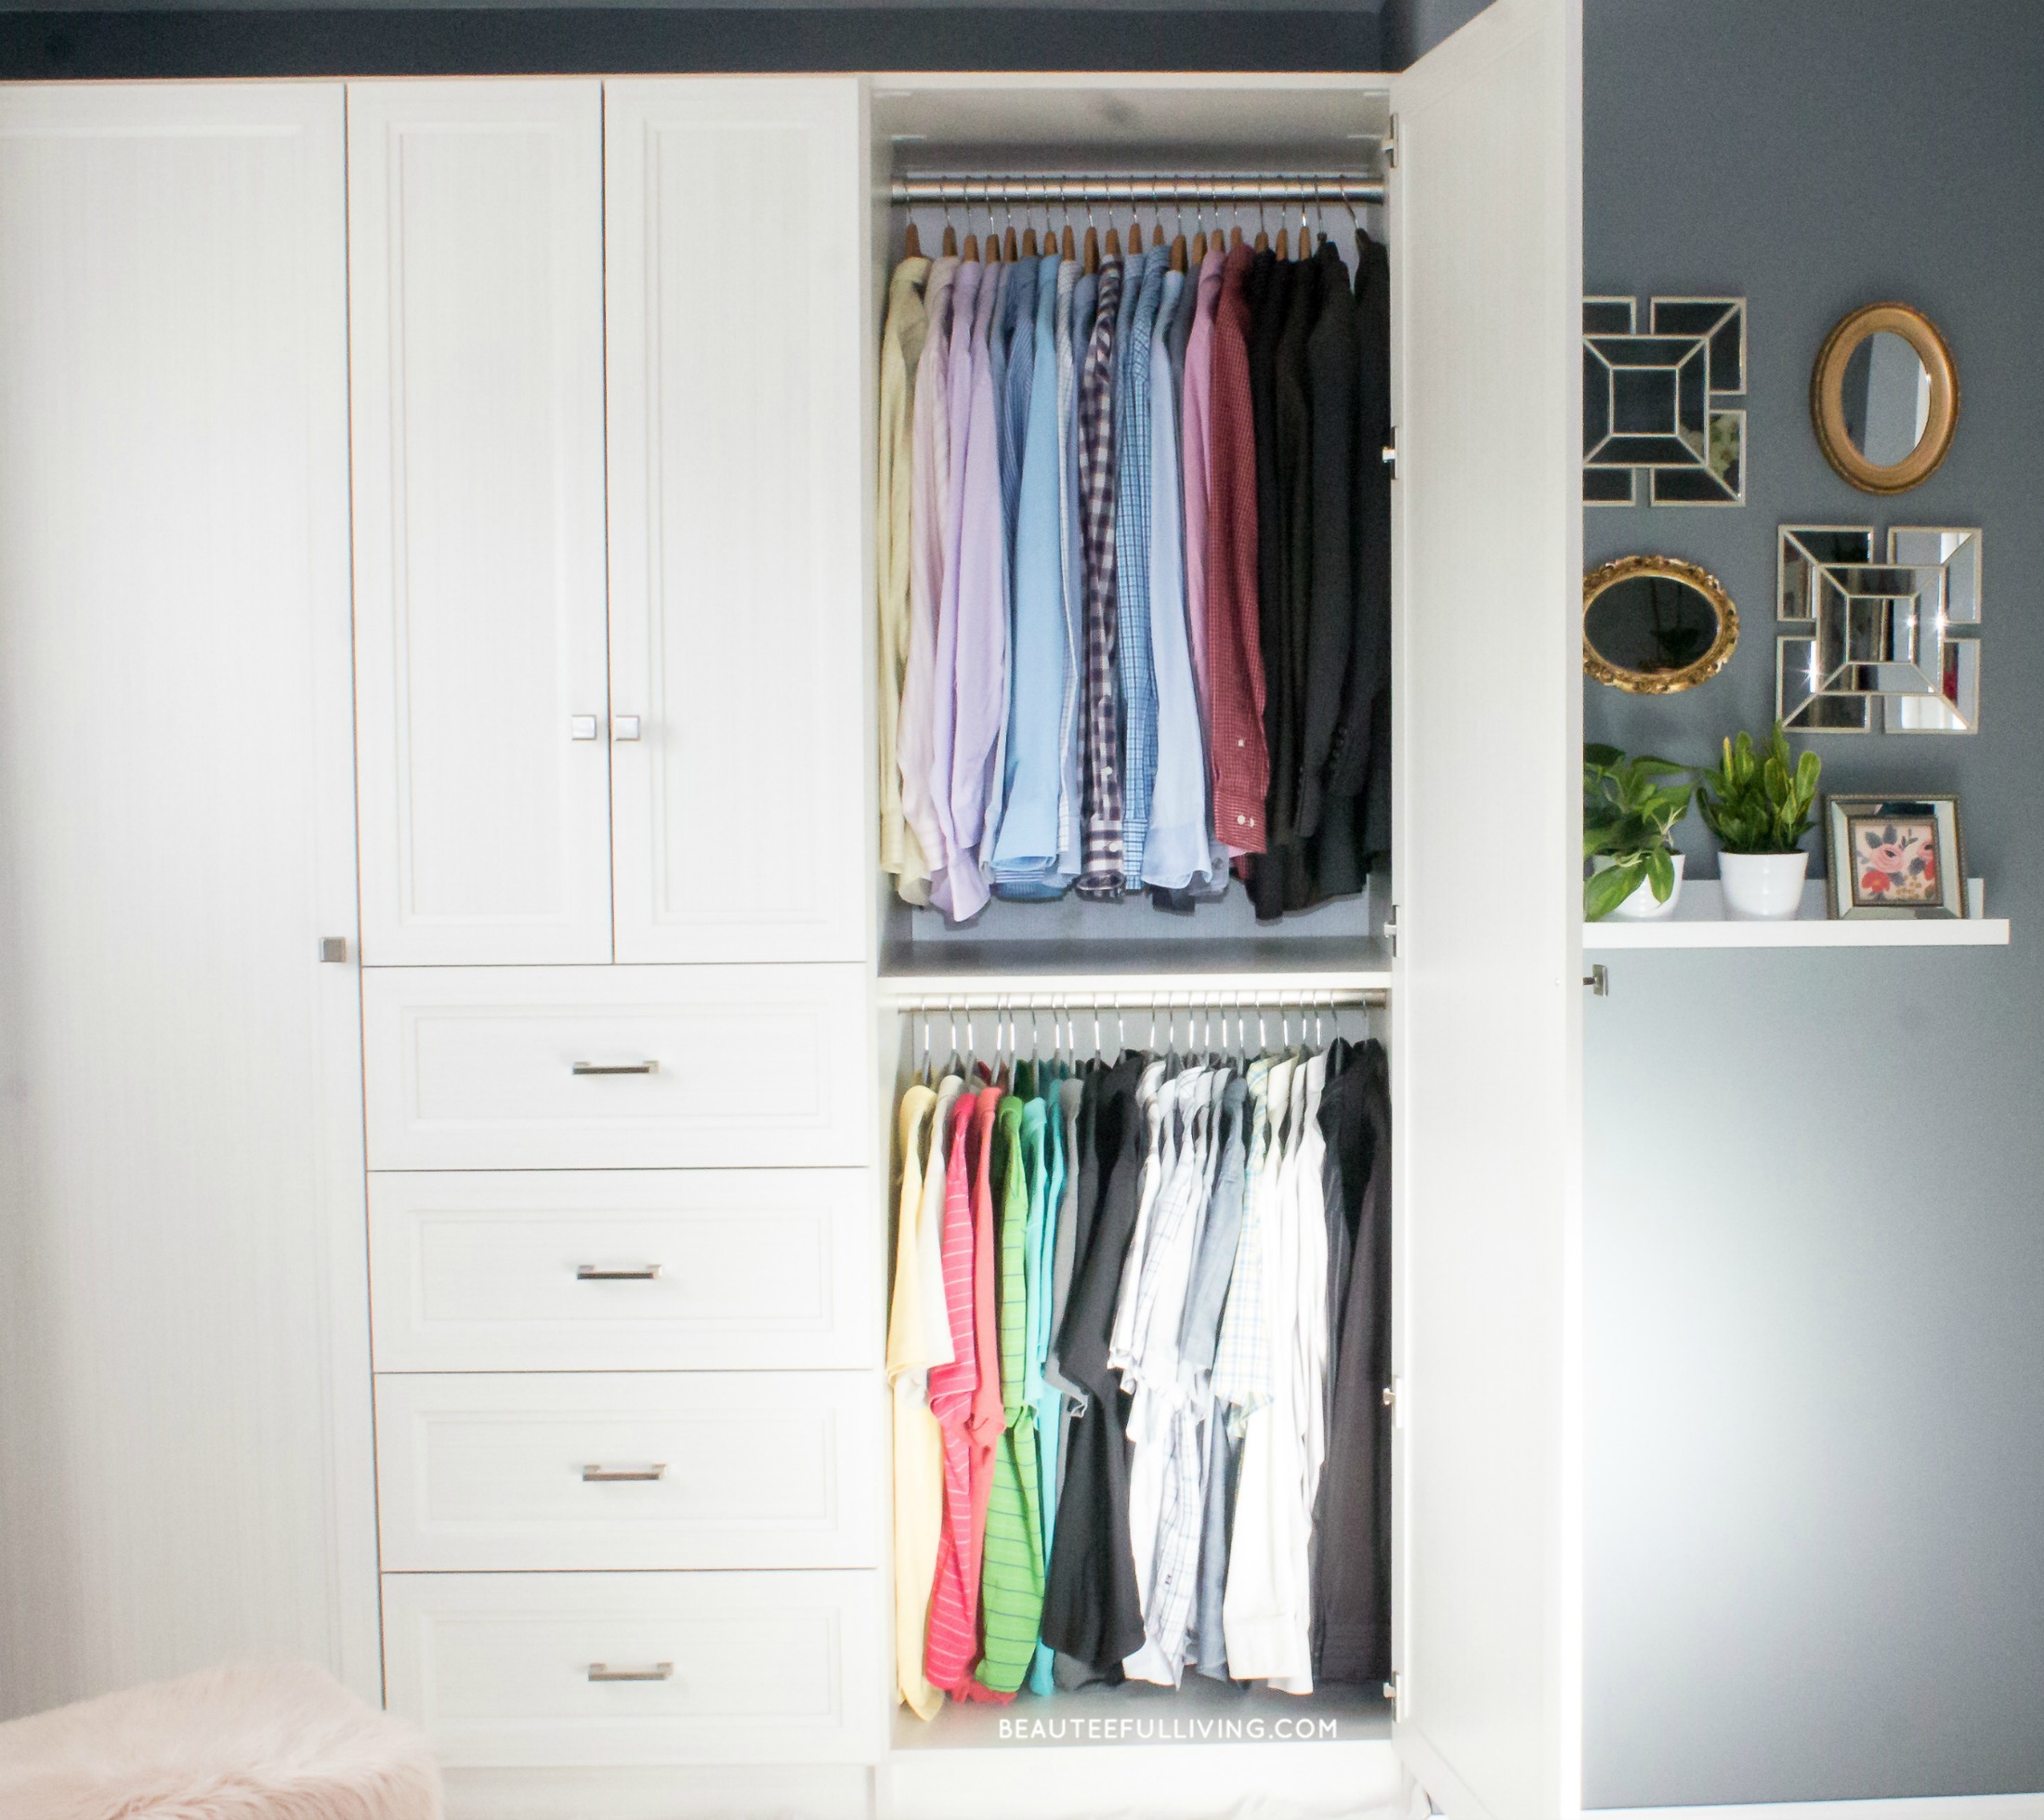
Photo 14 – This is the full view of the armoire. I love gazing at this side of our bedroom!
Love this makeover? Please PIN / Save Post
NOTE: Custom closet solutions can range from $1,000 and up. Please contact Closet POSSIBLE at 609-778-7677 for pricing information. Don’t forget to mention that you saw this post on Beauteeful Living. Thank you for supporting businesses that support this blog.
I hope you’ve enjoyed seeing the full, “step-by-step” process of how our armoire was installed. Please stay tuned for more projects coming up on Beauteeful Living! There’s quite a number of things I’m working on lately. Can’t wait to share with you all very soon! Xo, Tee.


Looks nice, but I don’t think this would work for me. I have such a small closet that I keep looking at the thickness of the “armoire” frame and counting the lost inches, lol!
Since I’m constantly looking to see how I can squeeze every last inch of storage out of my small storage-less house, may I make a suggestion for that empty space at the top? If me, I’d install a large piece of nice molding over it on a couple of hinges or a piano hinge along with a magnetic catch (like a kitchen cupboard). That space looks perfect for storing a (folded flat) step ladder, wrapping paper, or any thin item not often used. Never waste valuable real estate; if you got use it!
where do you keep your shoes?
Hi, we keep our shoes in a shoe cabinet in our foyer. We also keep our off-season shoes in a coat closet, located in our family room (adjacent to our foyer). Thanks for your question.
Why did you not have them install a filler above the closet? It would have looked more “built-in” than it looks like right now, which seems to be an “insert” into your previously existing closet. A new buyer could still have it removed if they wanted to.
Hi Nancy, thank you for stopping by the blog and for your comment. I was going to close the extra space above but it actually doesn’t bother me at all. I may store some items there in the future or decide to close it up for a more “built in” look. Right now, the unit with that space above doesn’t bother me at all. I love how this closet brightens up my small bedroom. Thanks again for your feedback.
Love this but my closet is our attic access… any idea how they would work around that?
Thanks for your feedback and for your question. Having an attic access in that area is tricky. I would recommend having a custom closet rep check the closet and provide some recommendations. I bet they can try to work around that or at least see if another space where the attic access can be relocated (if possible). Good luck!
Ugh! I had the same dang problem. Every time someone needed to get up into the attic I had to completely empty my closet and shelf out. Then because the “trap door” was so small, I had dirty shoe prints all over the wall below the access point. HATED it SO much, I finally took a page out of my parent’s 1950’s house and bought an attic door with built-in ladder. Home Depot and Lowes has them in wood and metal. they’re made to go between the rafter joists so rather simple to install.
I then hired a handyman to install it in the ceiling at the end of my hallway… only took a few hours and I had handyman add some nice trim around it and then put a matching trim frame at the other end of the hall so it looks like I have a decorative ceiling and not just an attic trap door at one end. I LOVE it! Now I can keep everything in my closet where it belongs; and when someone needs up in the attic, just pull down the hall ladder!
Btw, handyman put an eye screw in the trap door and then handed me a broom handle with a cup hook on one end to grab the eyelet screw and pull it open. I keep the broom handle hanging up in the dinning room closet.
When I had my house appraised, the appraiser told me that he “Deducted” some because I had removed my closet doors. My closet interior was a standard organizer.(I thought it looked nice). This is the perfect solution!
Thanks for your comment, Kathleen. Glad this gave you an idea to solve your problem.
What is the paint color? It’s a really great match to a beautiful piece!
Hi Nona, the paint color is from Sherwin Williams. The color is called Software. With so many shades of grey paint out there, I’m so glad I stumbled across this color. 🙂
Looks beautiful, BUT where do you and you husband hang your long pants/slacks?
Hi Maureen, my husband has his pants in a dresser in the room. I have mine in the middle section of the custom armoire. We’ve done a lot of purging of our clothes and only keep those that we wear regularly. 🙂
What were the dimensions of your closet and what was the cost for the project – It looks the same as mine – Would love to attempt this – What is the skill level to do a project like this?
Hi, the height of the armoire panels went up to 87 inches. The width of our closet was 79 & 1/2 inches. Our cabinet drawers were 24 inches deep. We did the first part of the renovation (removing old closet and prepping the space after the demo). A custom closet company installed the custom armoire for us. If you did this on your own, the price will certainy be lower since you will only be paying for materials. We used high grade materials and they were 2k (at cost). Your project cost will, of course, vary depending on what type of material you use and the size of your armoire/closet. Good luck!
What is that space above the armoire? Looks like only a few inches….
I LOVE it! What do you do with hanging longer things like dresses tho?
Thanks so much, Suzanne! Believe it or not, these hanging sections were tall enough for my dresses that were knee-length. I don’t own too many long formal dresses (not a big fan of them) so for the few that I do have, I keep them in my coat closet downstairs with all my long coats, etc.
That void/space at the top of the installation. Are you going to be using it for storage or will it be blocked in?
Hi Rebou, I was originally going to keep it open for added storage. Since I don’t find myself needed the extra storage, I will likely close that area up with molding one of these days. Not my top priority just yet though :). Thanks for commenting.
Oh my goodness, that is just fabulous. Swoon swoon swoon! We have a small walk-in that is organized but just looks cluttered because there are no clean lines. This is definitely being put on my wish list.
Thanks so much for the compliment, Kathy! Good luck on getting a similar project like this done in your home!
Might consider doing this for my own room. Looks like it provides more space.
Thanks so much, Via. It really has given us more storage space!
Beautiful! But where to you hang long dresses?
I have the same question.
Hi Laurie, the length of most of my dresses either land a little before my knees or a little below. This closet is able to hold all of my dresses except for a few long gowns. For the few long (formal) gowns that I own, I have them in a coat closet downstairs along with my long jackets. This has worked out fine for me. I probably may end up donating those gowns soon because I don’t see myself wearing them again :).
Who owns four pairs of shoes
Hmm, not sure about this question since shoes were never mentioned in this post. I keep my shoes in a large closet I have by my entrance. It’s also where I hold my coats and other jackets.
I really love the idea of this idea!! It started an avalanche of ideas for me–that I don’t have to keep anything “as-is”, or work within structural confines…It really opened my eyes and imagination! Thank you, Tee, for sharing, and thanks also to my sister, who simply tagged me in an “I love u, Sis” post, on Beauteeful Living fb page. So grateful to you both!!!
Hi Michele – thanks so much for your sweet and supportive comment! I’m so glad that this post provided some inspiration for you. Best of luck with all your projects! I bet they will come out fabulous! 🙂 – Tee
Gorgeous redo! Are there a few inches at the top? maybe cap it with some crown moulding.
Thanks so much for your comment and feedback, Amy! Yes, the next step will be to add some crown molding to the top of armoire. I was originally going to leave it open for extra storage but it doesn’t seem like I’ll be using that space for that purpose.
How about working some soft lighting into that space…like a generous string of white LED twinkle lights, twined in with some realistic-looking ivy? Could be used as mood lighting, or soft night-lighting if/when needed.
That’s a great idea, Elle. I love LED twinkle lights. I’d love gazing at that closet even more ;). Thanks for your comment and suggestion.
What a transformation! Incredible. I love your choice in hardware 🙂 Thanks for sharing!
Neelam
http://patternsandprosecco.com/
Thanks so much for commenting and for stopping by the blog, Neelam!
I love the custom closet armoire! Both of my sons took their closet doors off so I’m thinking about having something like this installed. It makes organizing everything much easier. It also looks a lot nicer than the hot mess they’ve got going on in their closets now! Haha
I would love this. How cool is it. What a great idea to store everything behind doors. I’ve seen them at the mall and on some home tours. I just want to know if they are affordable?
Thanks for commenting, Valerie. You’d be surprised at how affordable custom options can be. It’s an investment but one thing for sure is the difference in quality you would find versus the standard armoire furniture available in stores.
It’s amazing to see how the room changed, I truly love the results. It looks wonderful and the space is being used in a much more efficient way!
What a difference this made. I don’t own my apartment so I can’t do something like this but if I ever get the chance, I’ll do a custom closet armoire reno.
Wow! What a difference! I really like how it turned out! It’s really simple and elegant and goes so well with the decor.
Wow how beautiful. It came out so nice. I love the clean look of that closet.
Simply Stunning! I wish I lived in your neck of the woods so that I could take advantage of that offer. I dream of my closets having organizational units like this. After seeing yours, I think I’ll move it up on my to-do list a littler further!
This is a beauteefull closet. We have a small walk in and this would be great for that closet. Your post has given me ideas and now I am sure my wife will be pushing me to do it. Thank you.
I have a lot of space in our old house yet it’s not as usable as I would like. Something like this would help me make use of our space!
I just love this! The compartments are just right to keep clothes organized. I love that it was painted white. I would also love it in a deep brown color. Let me check if we can accommodate this into our budget this quarter.
Wow! What a transformation. That new closet system looks like a piece of custom furniture. I bet it’s an absolute dream to use and organize your clothing with. And thank you so much for the discount code. Our closets could definitely use a tune up!
OH MY GOSH!@ I want to learn more. I love the idea of a closet armorie for my daughters closet/room I am so showing this to my husband, we have to invest in this. THanks for the great idea.
Love this! I live in a 2 floor apt and the closets leave a lot to be desired! The second floor (third floor of an apt house) was an add on. The closets are basically add ons with plywood and a chintzy door. If I could afford it, my landlord would let me remodel I think lol.
That is really awesome! I would love something like this in my home. My closet is just a shambled mess right now. It really needs some organization.
It would be amazing to do this to my closet. I will have to plan it for a spring project. Thanks for the great idea.
Wow, the custom armoire turned out beautifully! I love how much more organized it is than a regular closet.
That is an amazing closet transformation! I need some help in our mudroom. The space is SO small and we had a quote to add some space savers but it was way too expensive. I need some new options
The closet looks gorgeous. I rent so I can’t have anything custom built within my unit. I did, however, install the Ikea Algot system in my parent’s house and that was awesome.
I need someone to do that to my closet! It is a disaster area! I love how well it turned out for you.
That looks absolutely beautiful! I’m always trying to find new ways to make your house look updated and functional. I’ll definitely have to check into this.
Now, this just looks awesome! This would be great for my craft room and it would help me keep things organized and clean.
Thanks so much, Dee! Yes, this would be great for a craft room.
SO beautiful!!! I didn’t know you could pip up the wall above the closet like that!! This looks really nice rather than stuffing it in the closet. It is so clean and crisp! I bet less dust too!
Built ins are becoming more and more standard in homes again. Great to take a old closet and turn it into something really useful.
Oh my gosh! This closet is SO beautiful! We have a really big walk through closet (it is kind of like a hall!) and I would love to do something different with it.
Carrie
curlycraftymom.com
Thanks so much, Carrie! Your walk through closet sounds spacious though!
I WISH my new place had closets! One of the most difficult things to get used to about living in Europe is that built-in closets are not standard features in most properties. Given the smaller size of living spaces in general, it still amazes me that so much room space has to be given over to freestanding wardrobes 🙁
I hear you, Sage. Freestanding units take on so much space. I hope you’re enjoying Europe. My husband and I can’t wait to bring our kids to Europe one day soon. We’ve always enjoyed our visits there.
It looks so nice. I love built ins and this is the ultimate one. So nice to keep everything organized.
What a difference! I love the beautiful armoire and all the added storage. Amazing!!
Oh my. That is so beautiful! SO BEAUTIFUL! My husband is going to hate you. BECAUSE THIS WILL BE DONE! =)
Hi Paula, you will love the results of getting a custom closet installed. Your husband will have to deal… ;). I’m sure he’ll love the end results too. Thanks for commenting.
I love it!
Thanks, Jason! We love it too 🙂