Are you one of those people who loves decor items hanging from ceilings? I certainly do. In fact, if I could insert an emoji right now of a girl raising her hand up high, I totally would. 🙂 It’s the event decorator in me!
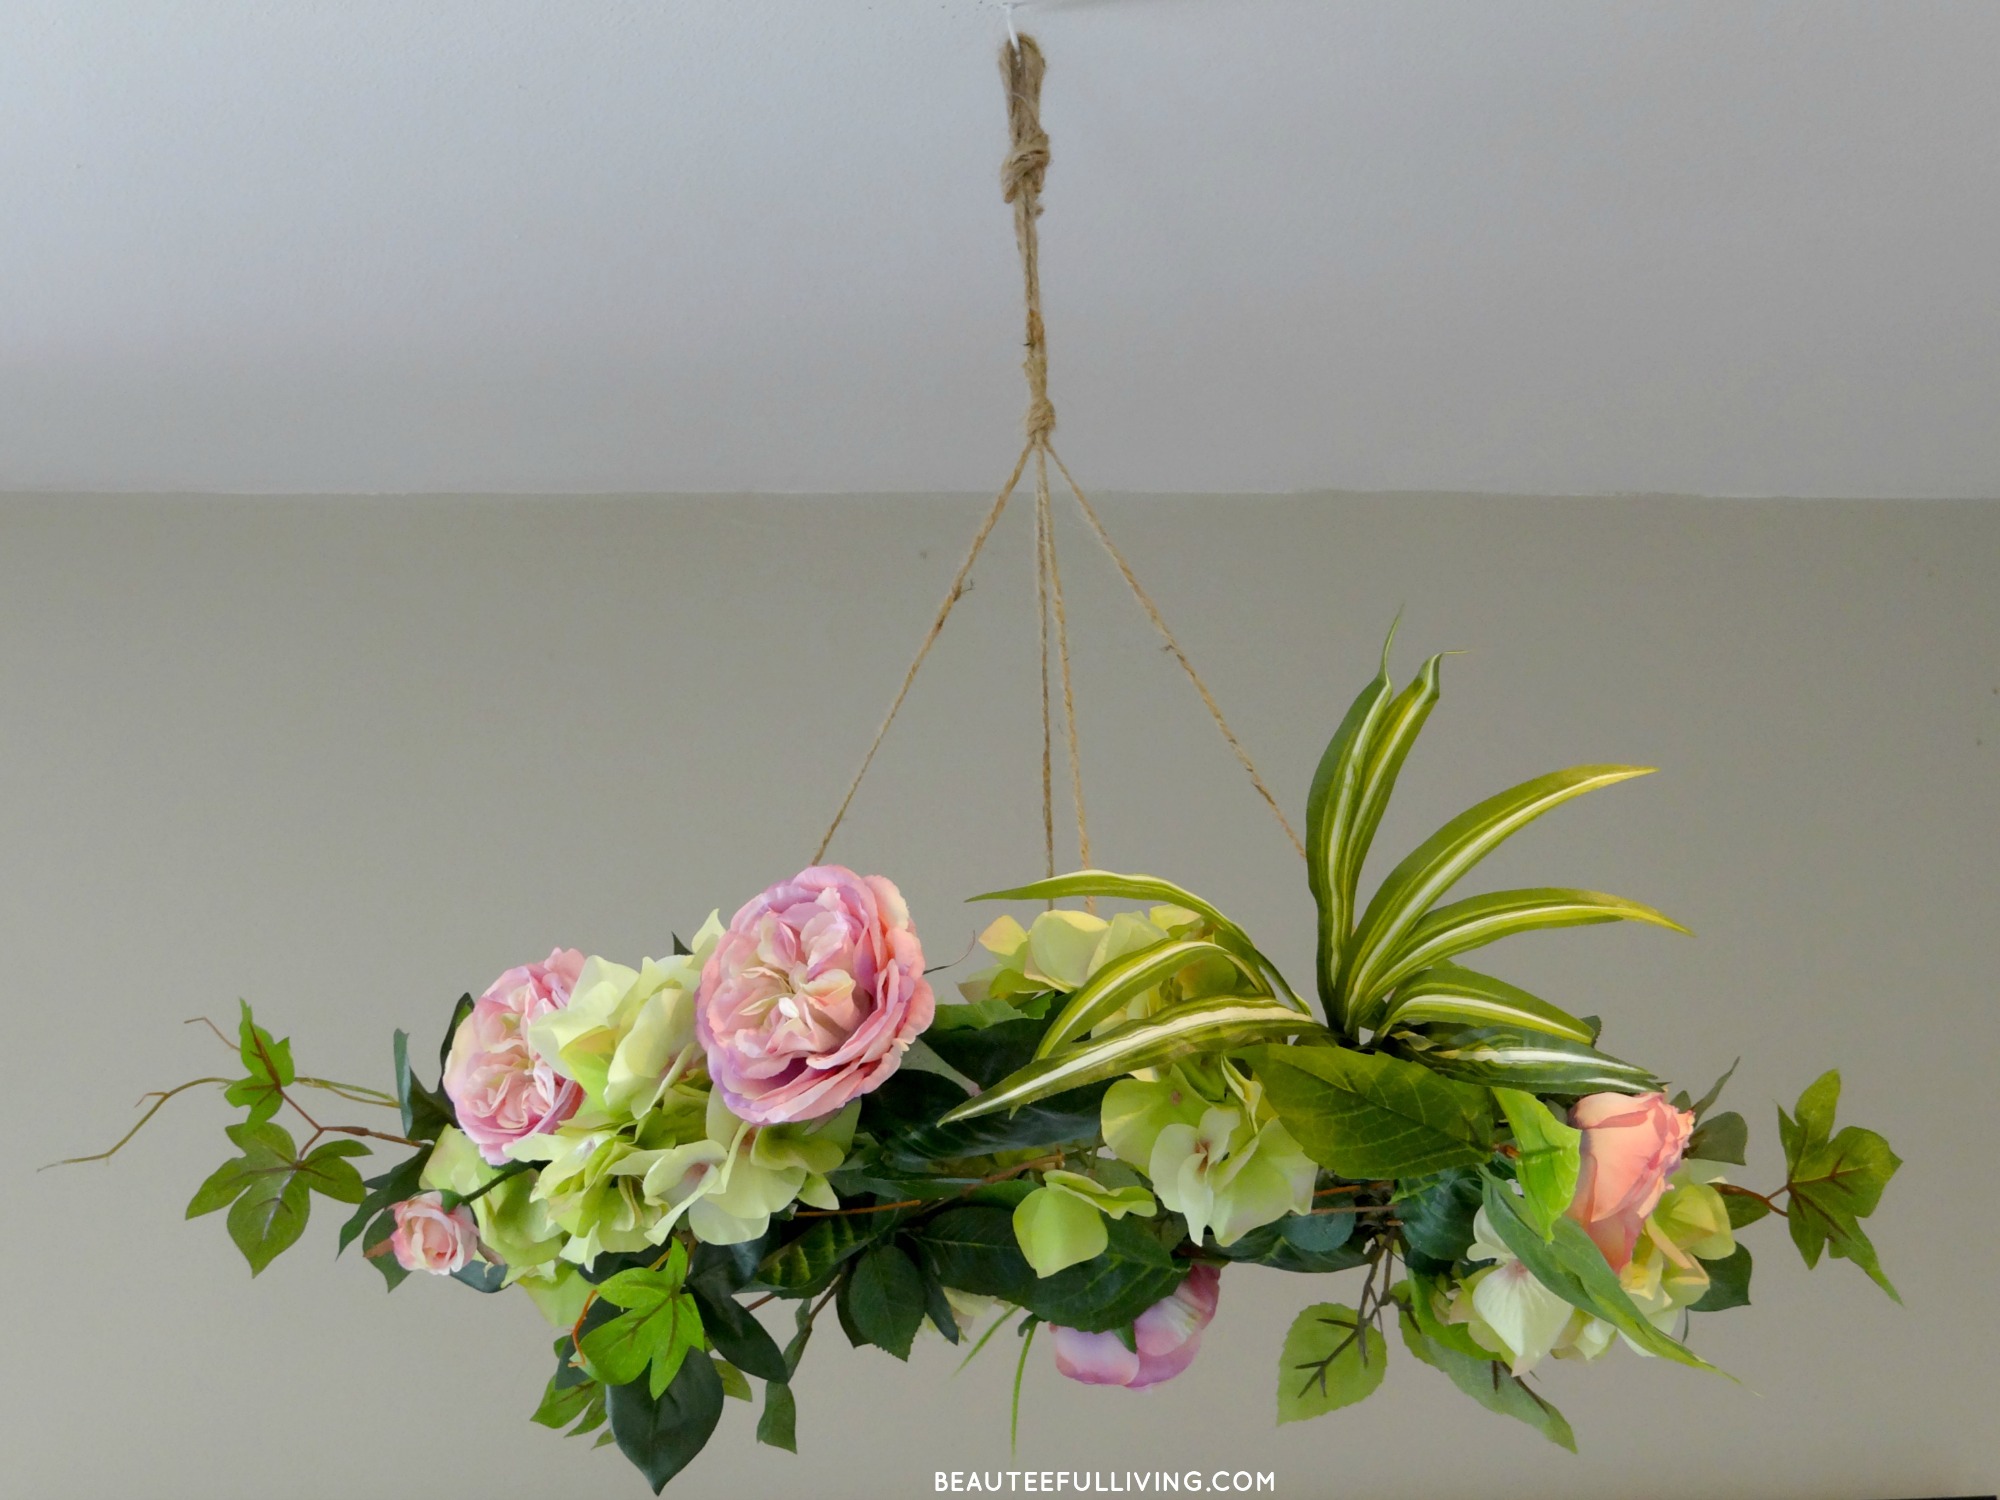
On the blog today, I’m sharing a floral project I’ve wanted to do for the longest time —- A Hanging Floral Chandelier! I’m linking this fun project to Hometalk’s DIY My Spring Blog Hop. Be sure to check out other spring-related projects at the end of this post.
UPDATE: This project was featured on Good Housekeeping’s website here. Yay!
If you’ve stopped by your local Arts and Crafts store, you probably noticed shoppers filling their carts with silk flowers. Let me be the first to admit that for the longest time, I used to turn my nose on fake floral stems. The word “tacky” screams at me when I see them. You know what? While there certainly are still tacky fake flowers out there, there’s also a host of “faux-fabulous” and realistic-looking silk flowers available too! If you didn’t like faux floral stems before, I hope the ones you see today will make you sing a different tune.
Note: Affiliate links are provided below for convenience. For more info, see my full disclosure here.
Let’s get to the tutorial of my “Floral Hanging Chandelier DIY Project!”
MATERIALS NEEDED
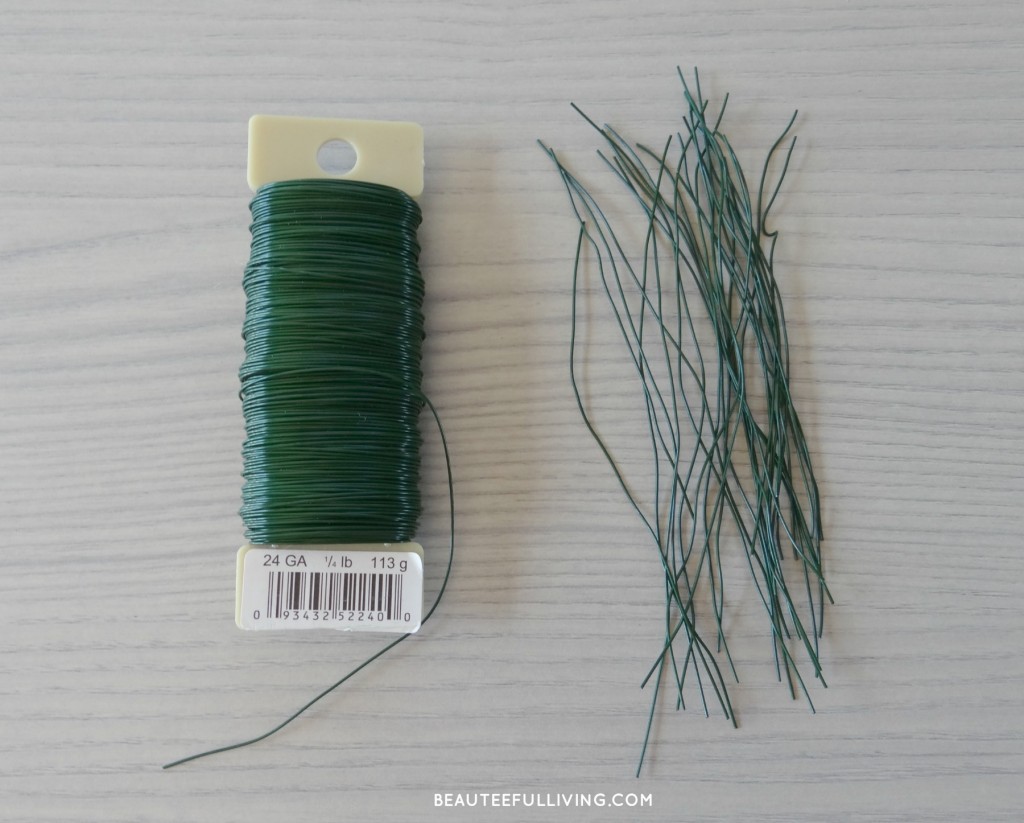
2. Floral Wire
3. Wire Cutter or heavy duty scissors
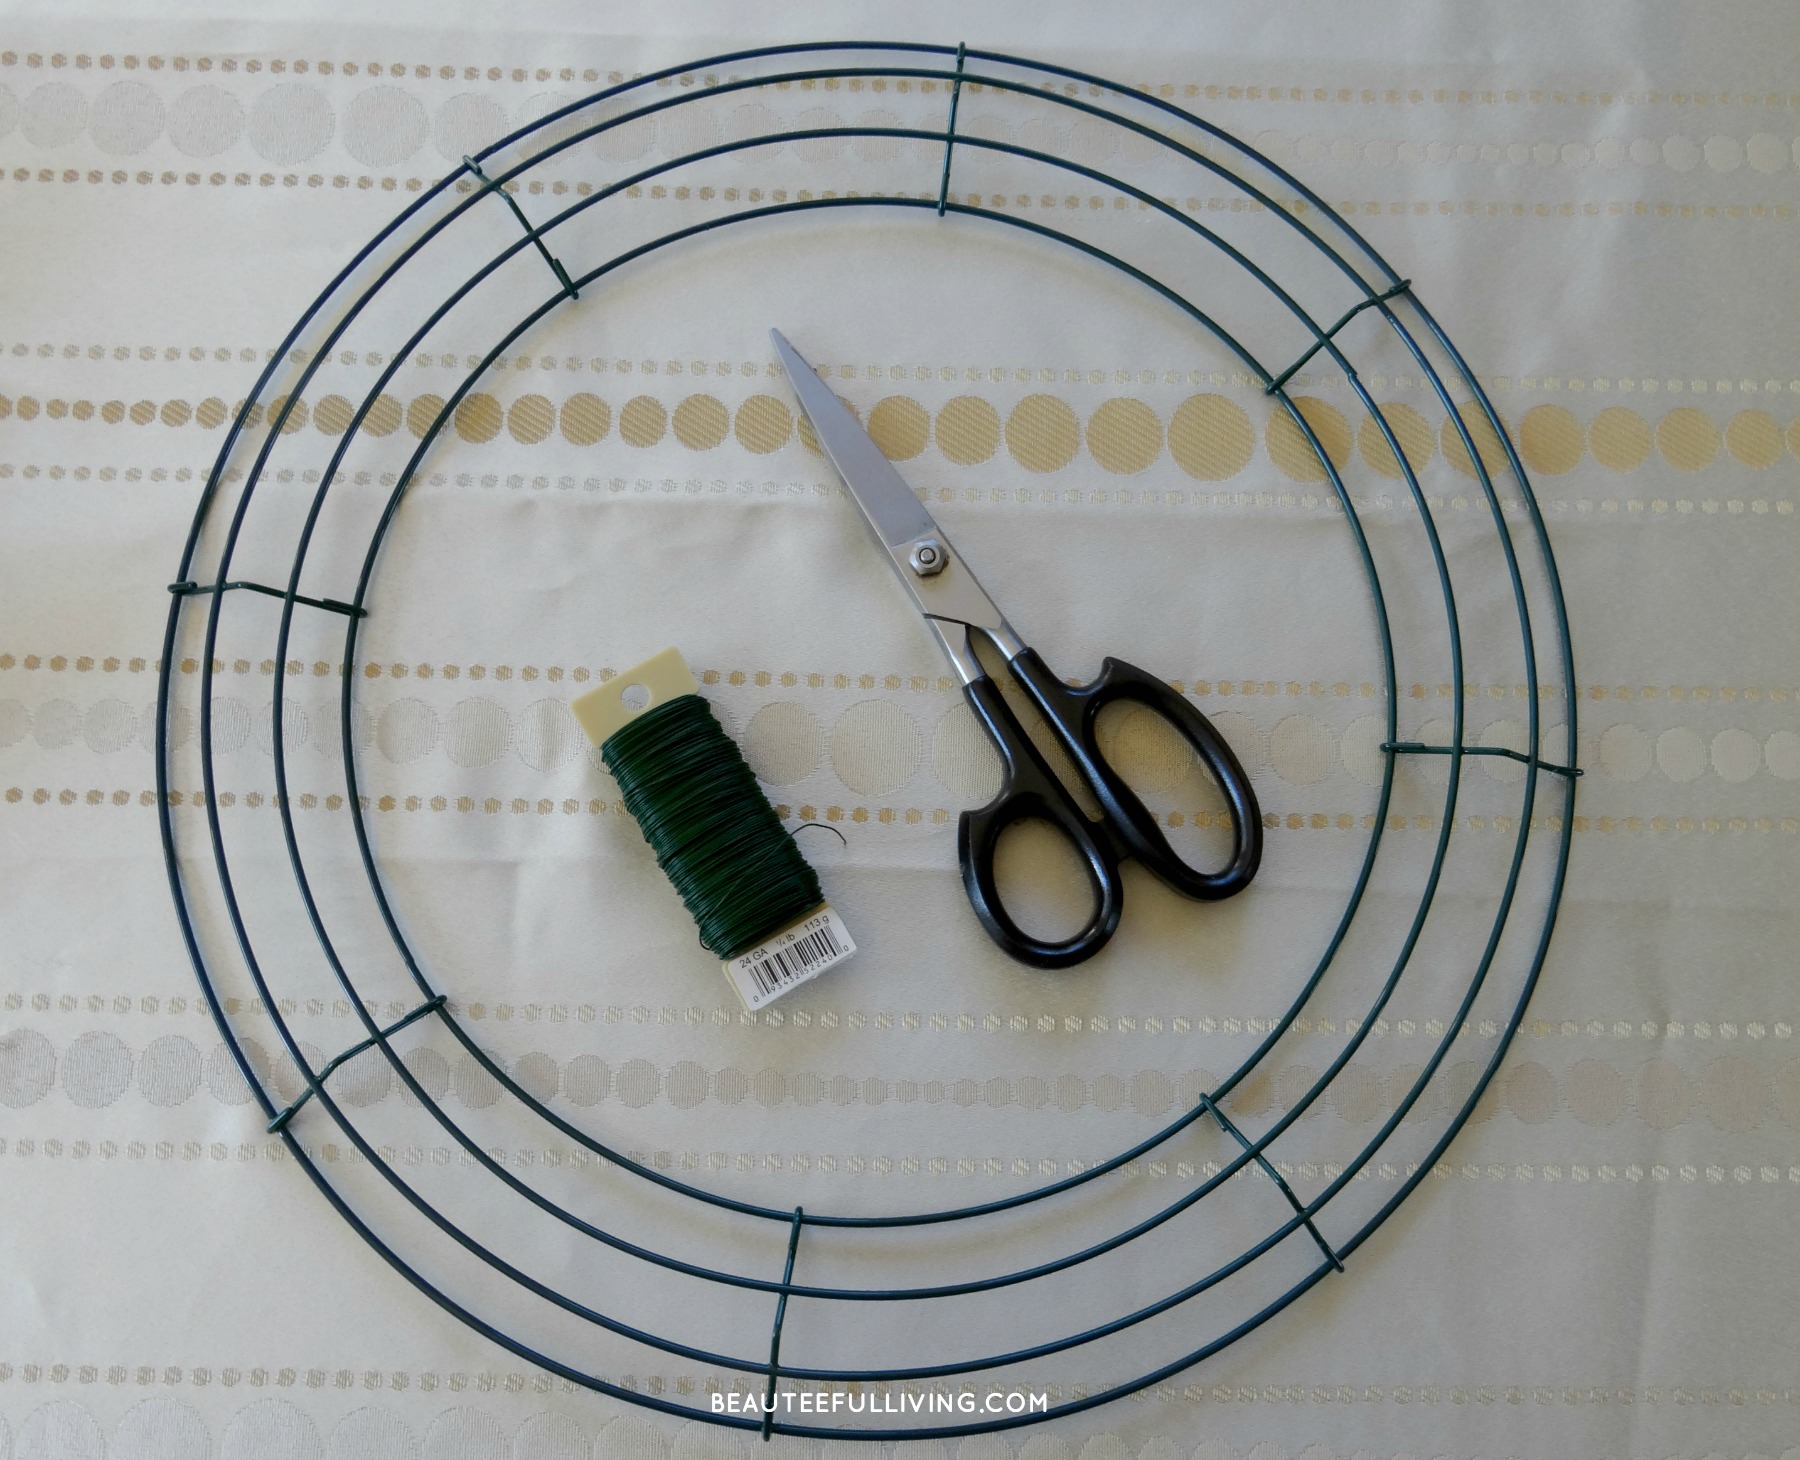
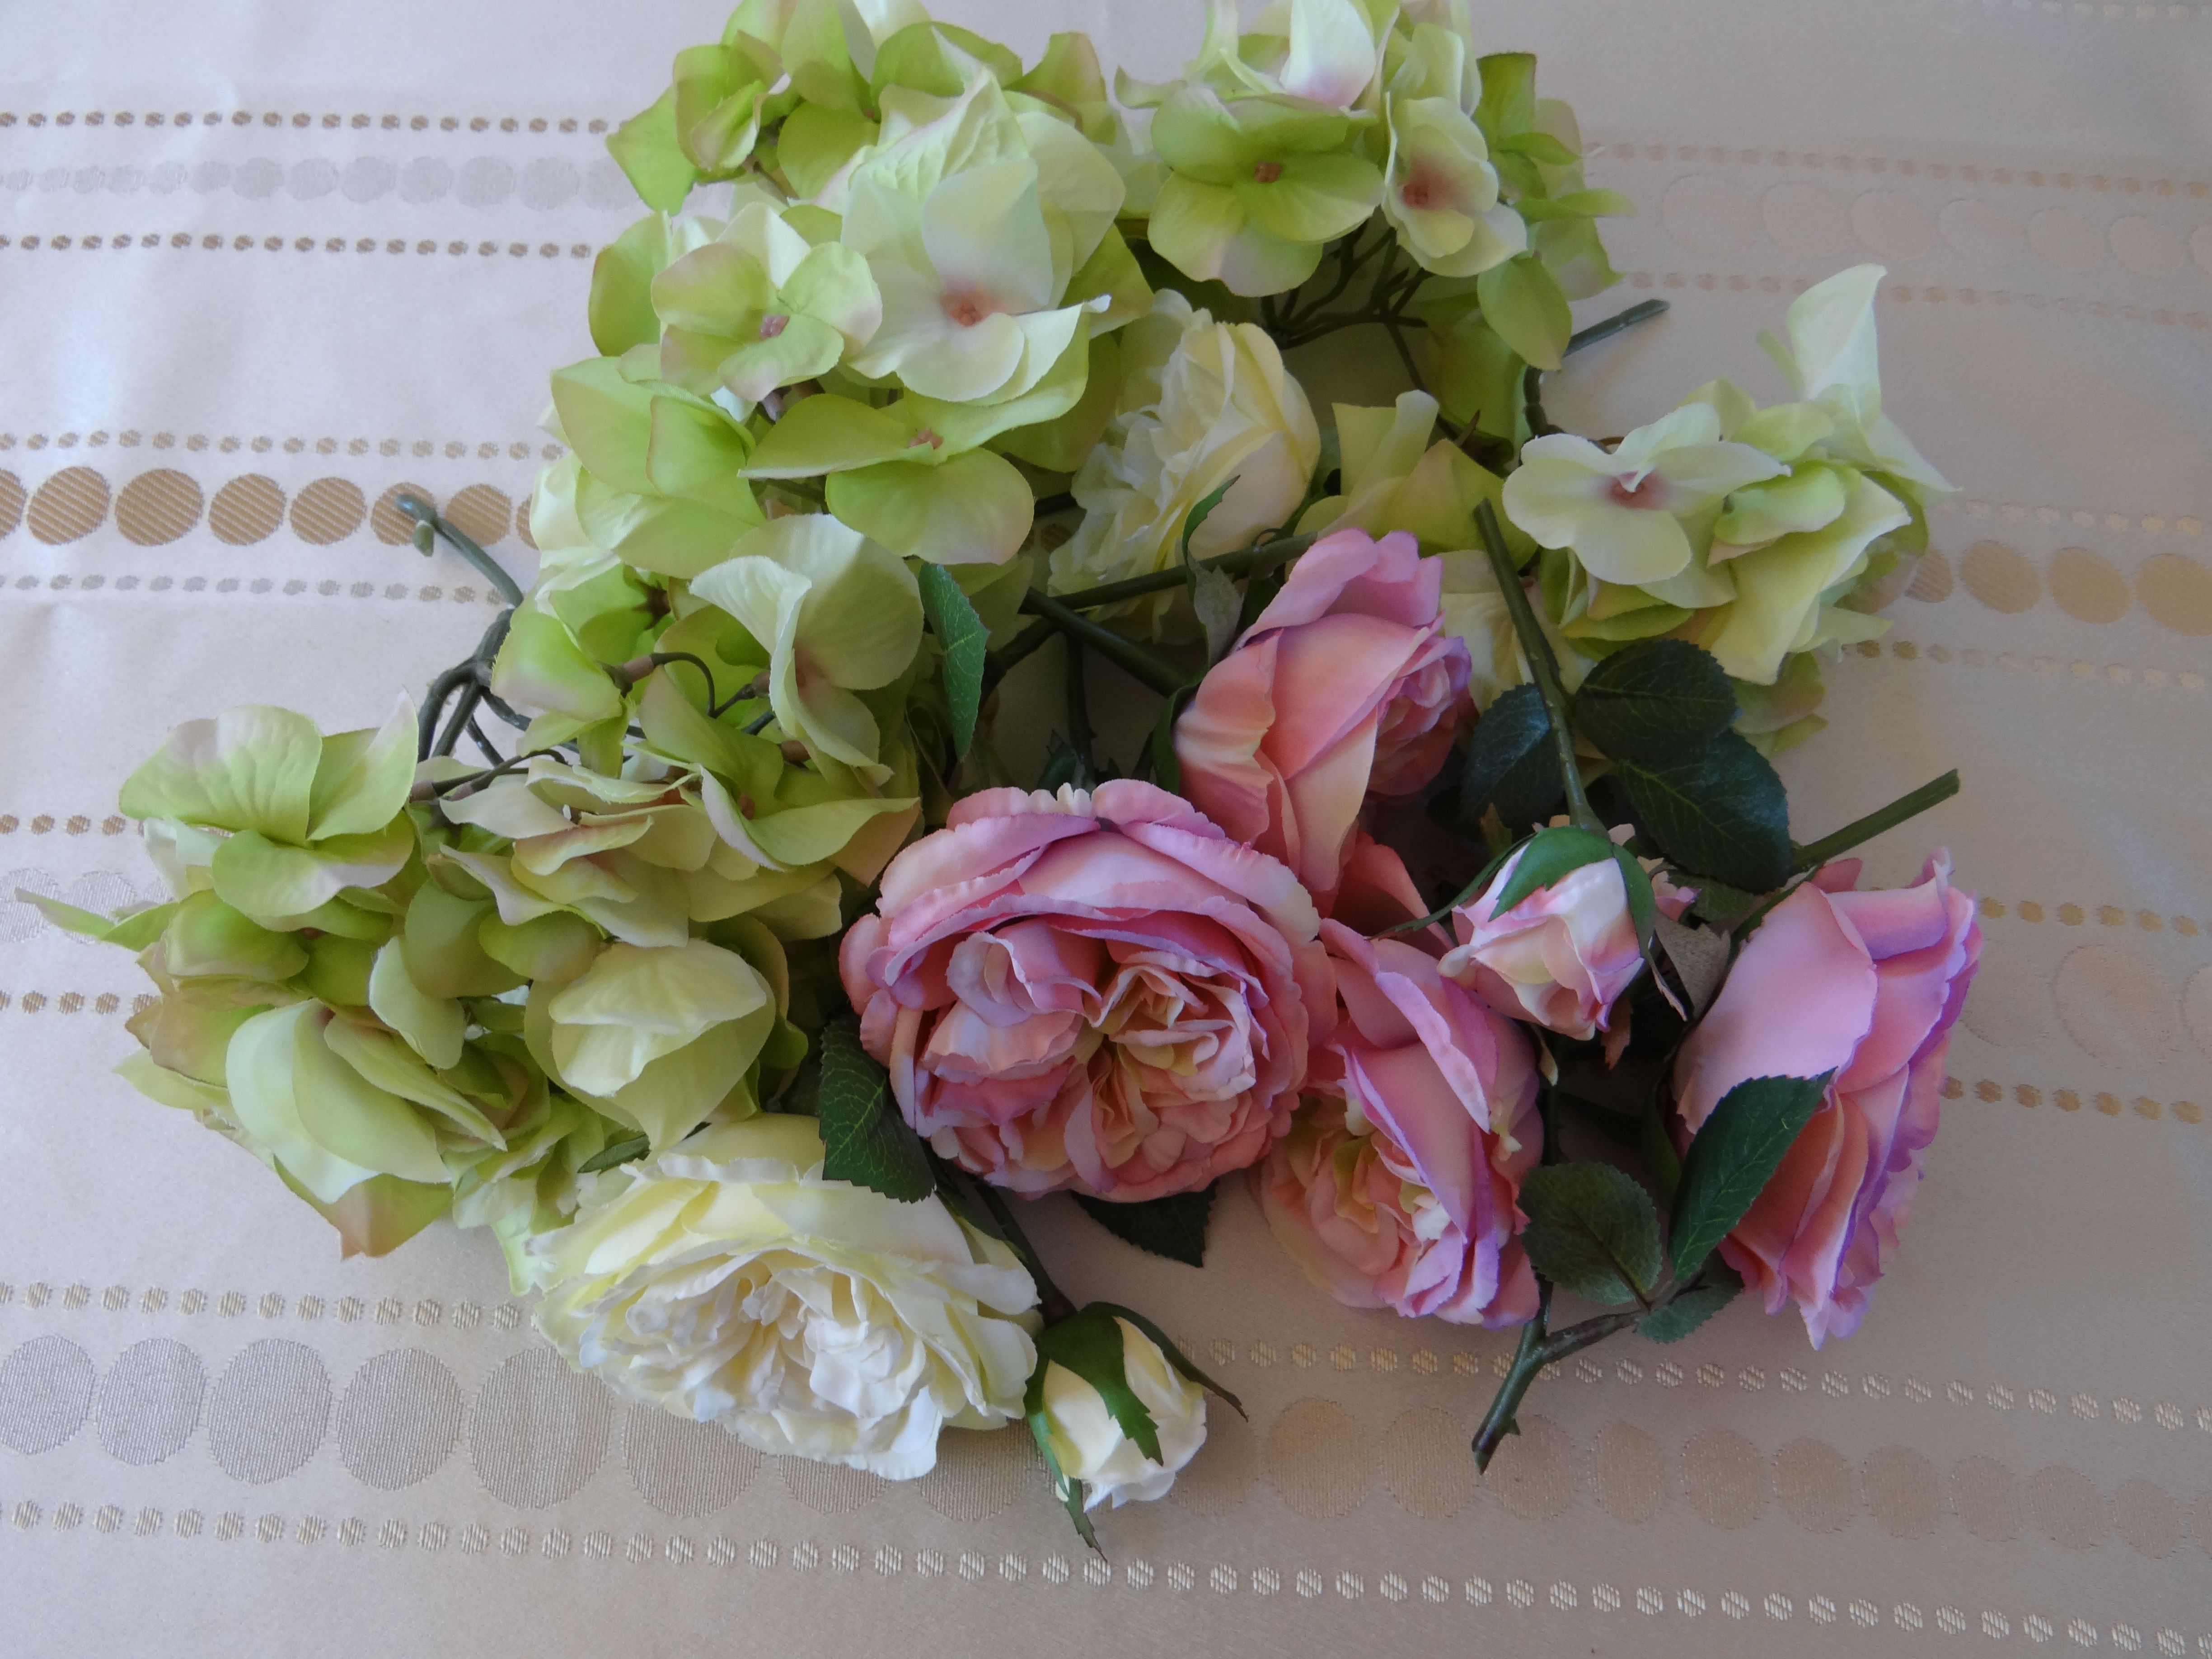
4. Bunches of Silk Hydrangea stems (Mine had 6 blooms)
5. Bunches of Silk Ranunculus stems (I used 1 set of yellow ranunculus and 1 set of pink ranunculus flowers). Each set had 6 flowers.
Note: I purchased my silk flowers from A.C. Moore.
6. Large bunch of foliage leaves (these came from the hydrangea and ranunculus stems). I just clipped them off the long metal stem that held the flowers together.
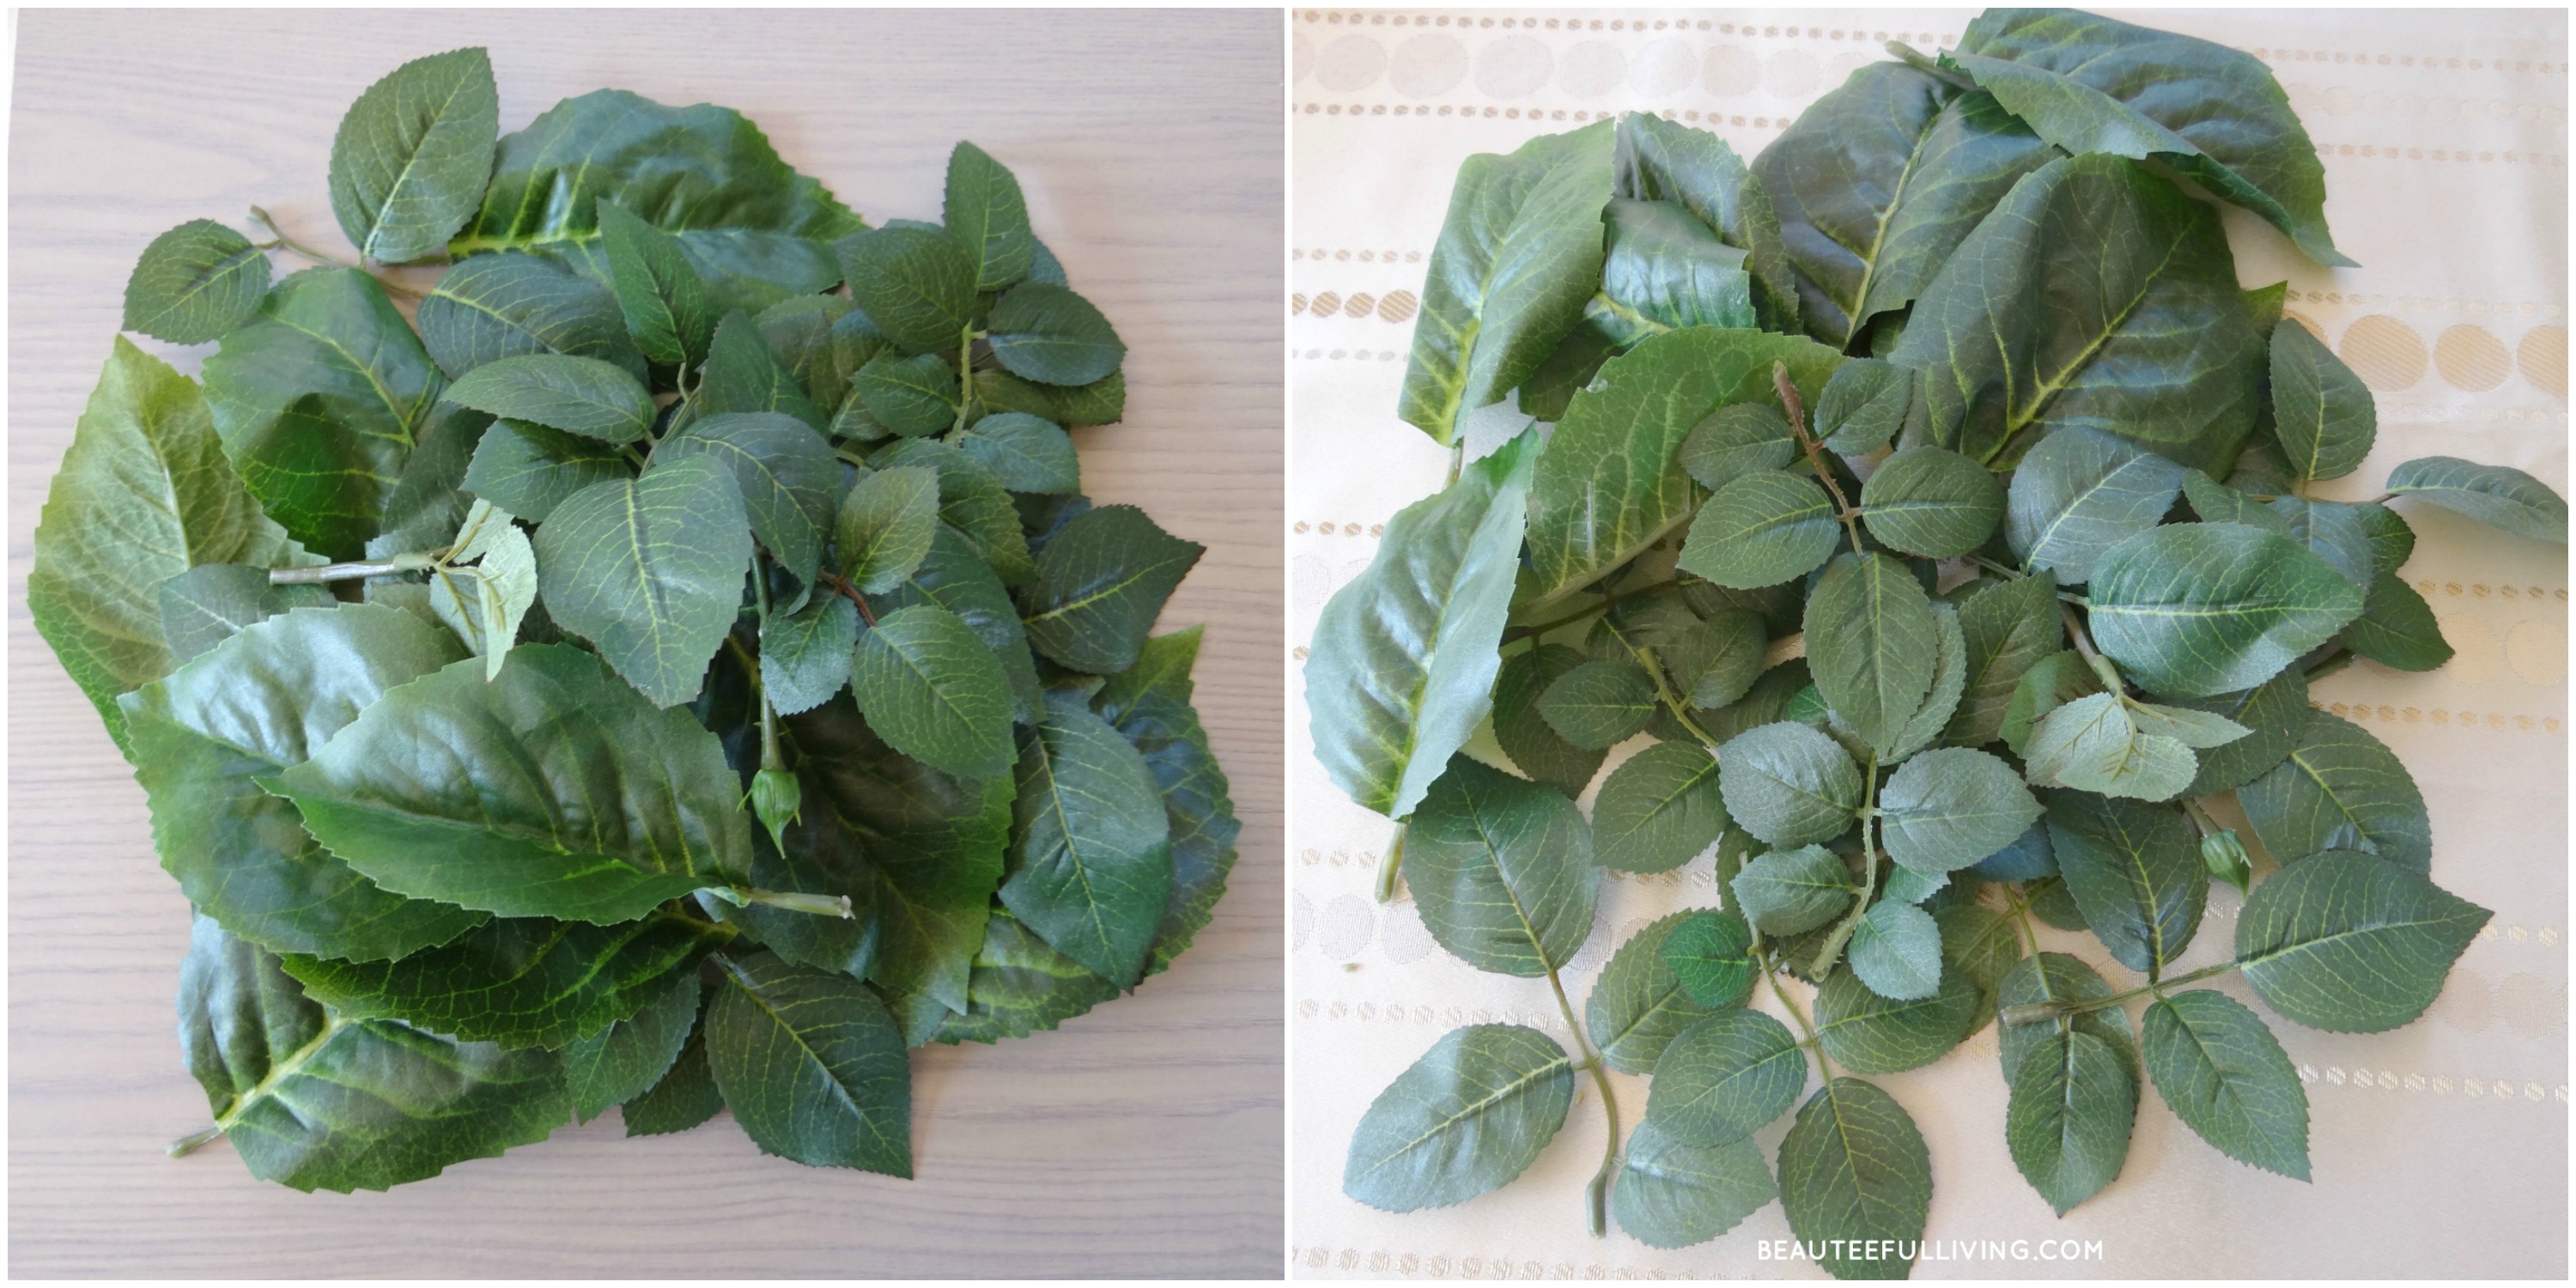
7. Large bunch of mixed tropical stems. I bought a set of these leaves to give my wreath a fuller, more tropical look!

8. Glue gun.
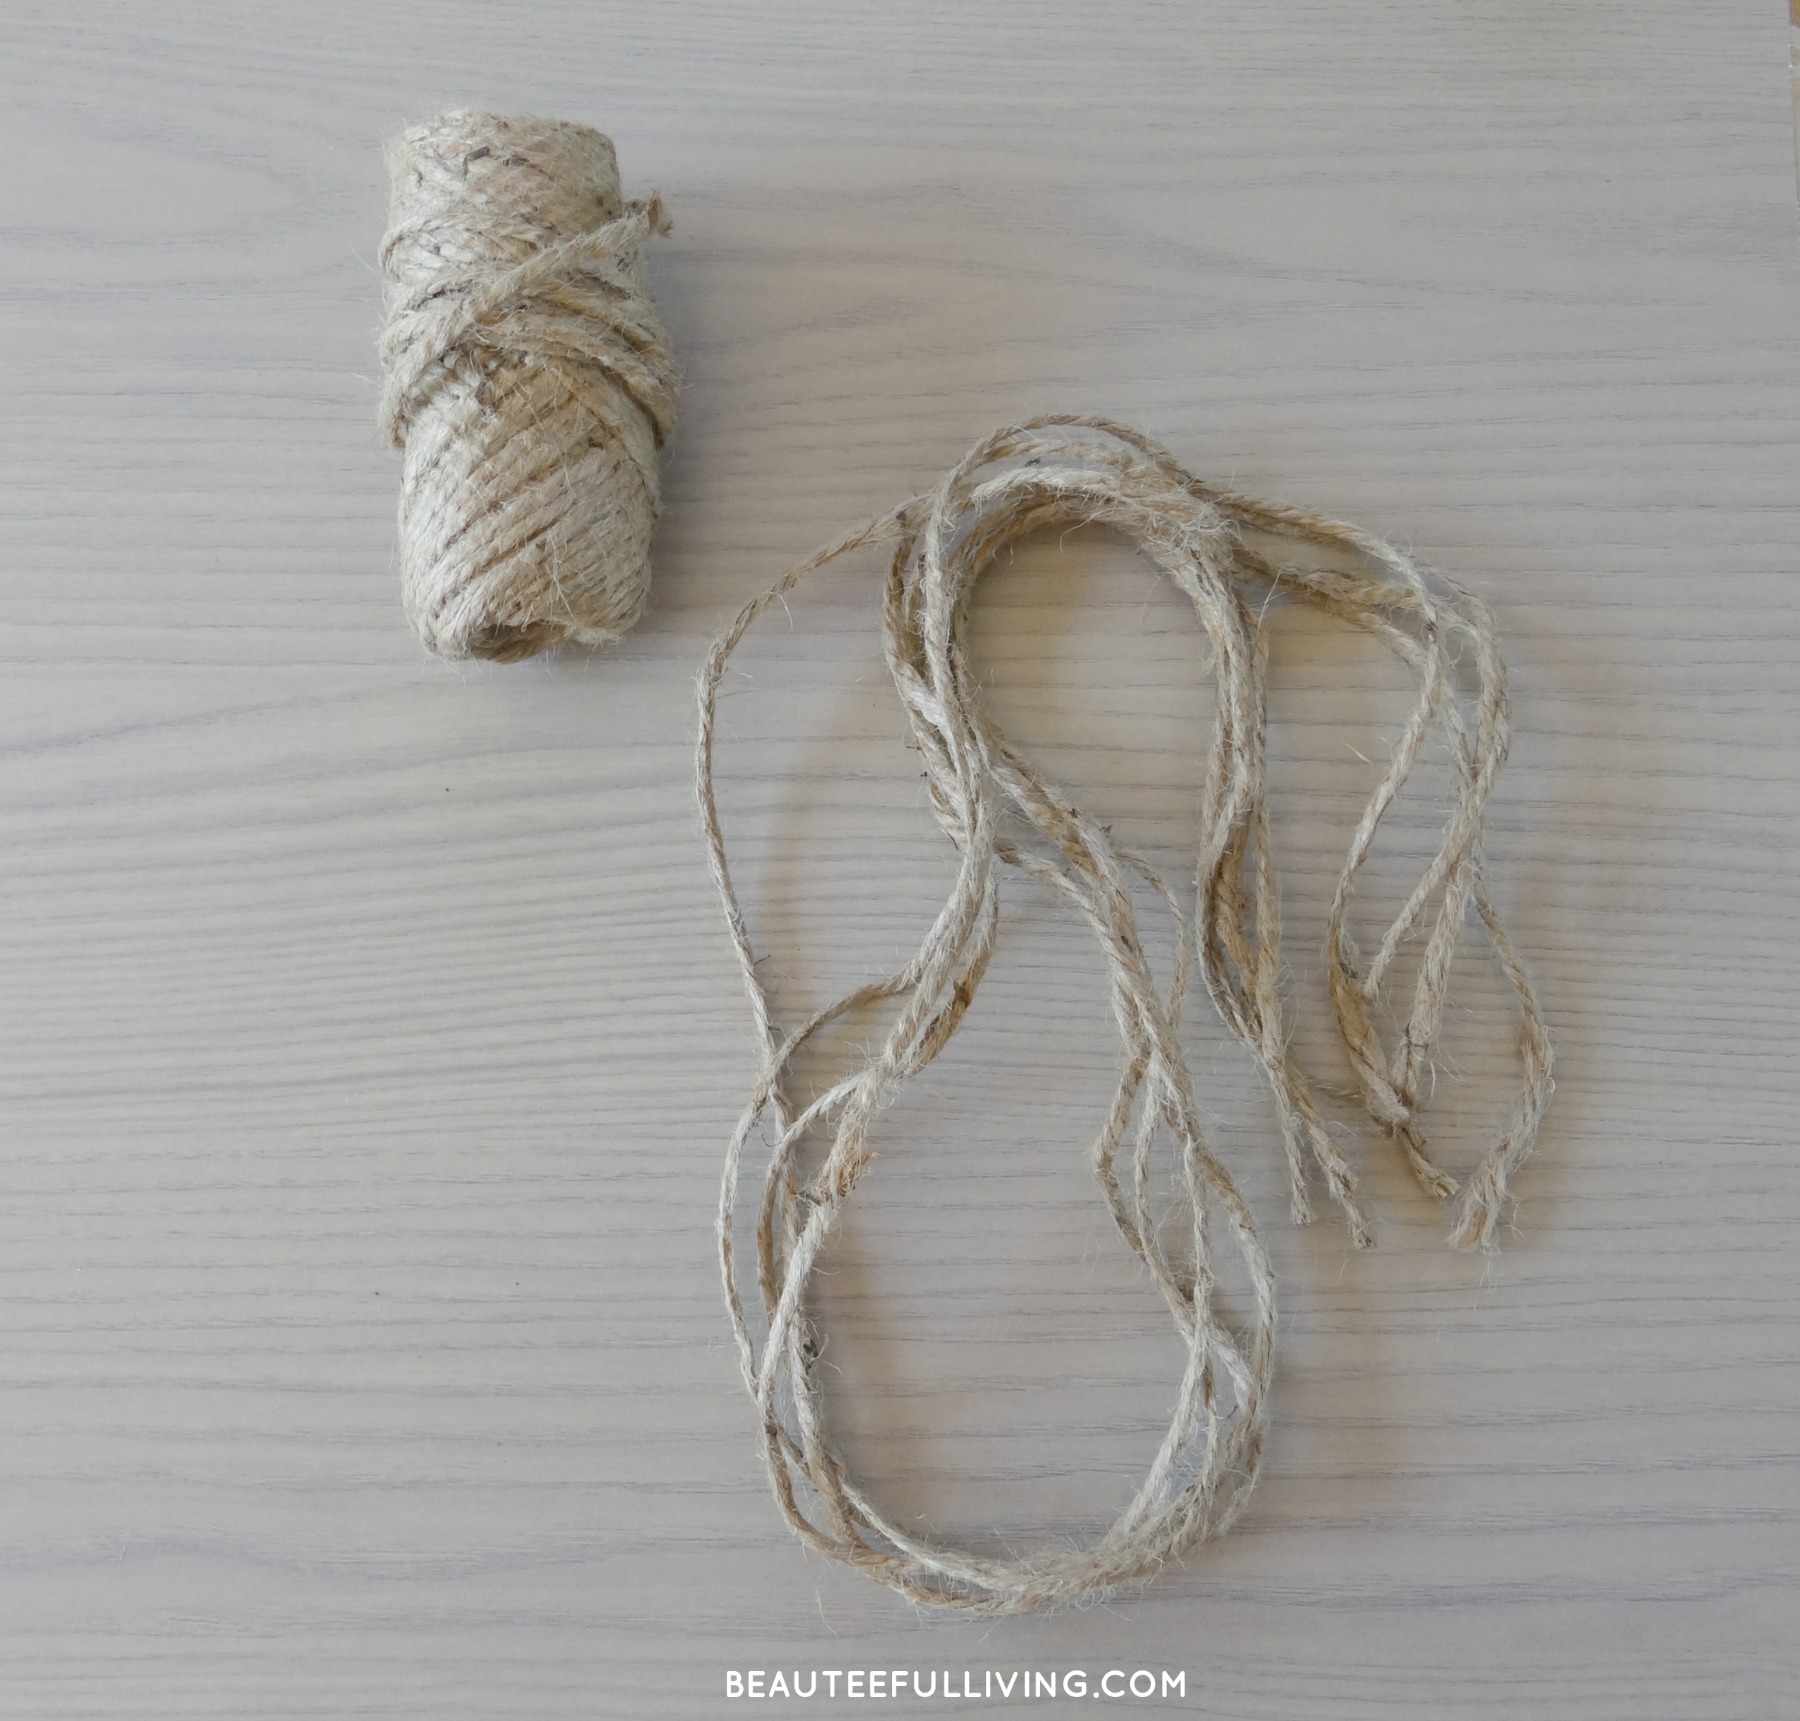
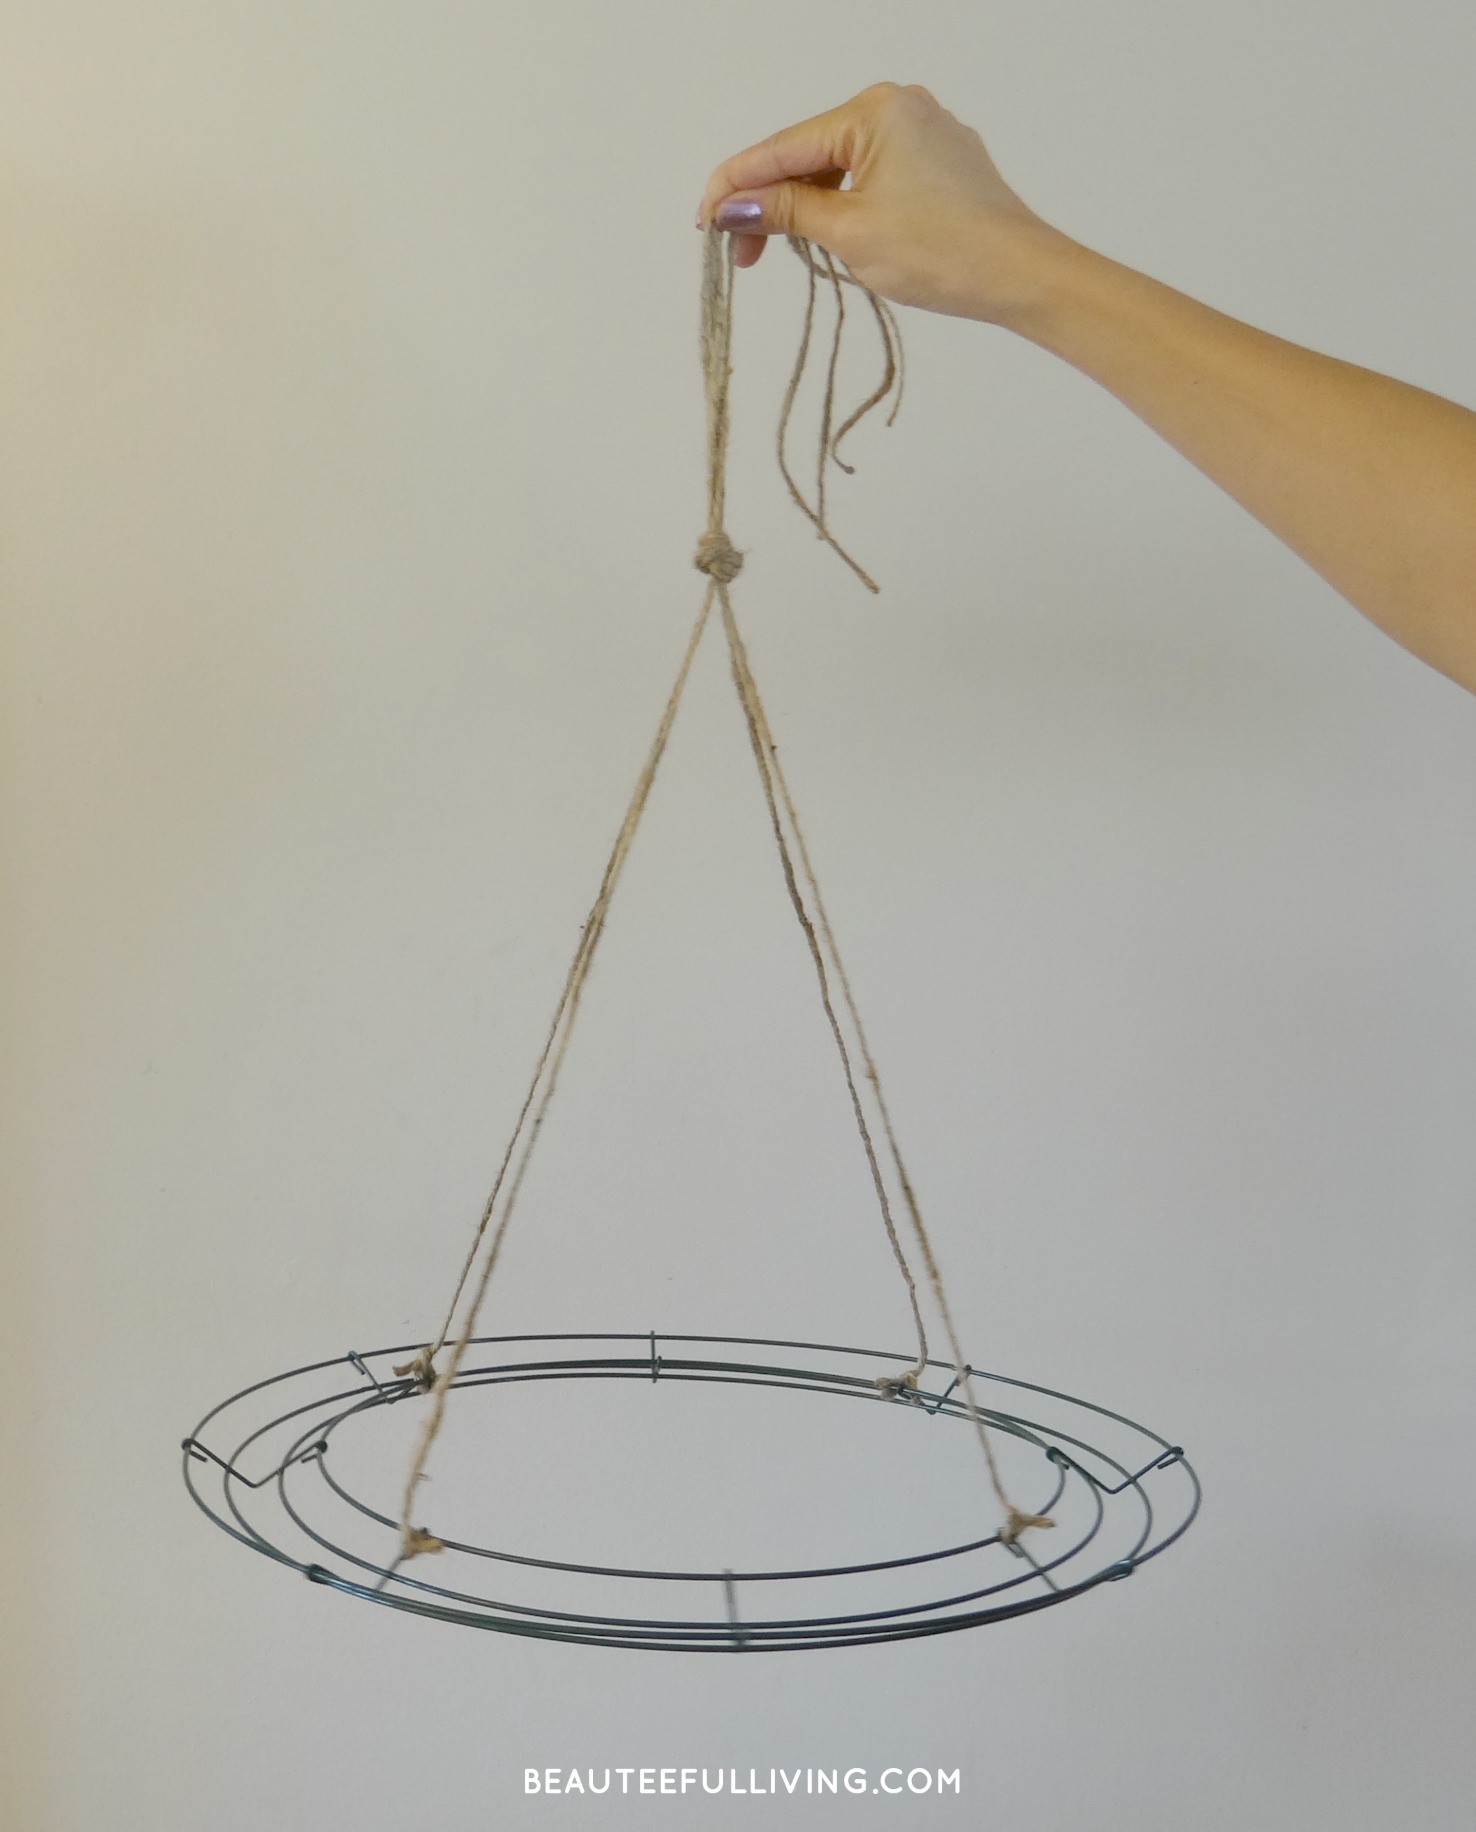
9. Twine. To hang the wreath, I used 4 strands of twine. Each strand was 33 inches long.
STEP-BY-STEP TUTORIAL
STEP ONE:
Tie each of the 4 strands of twine to your wire wreath. Two at the top and two at the bottom like photo.
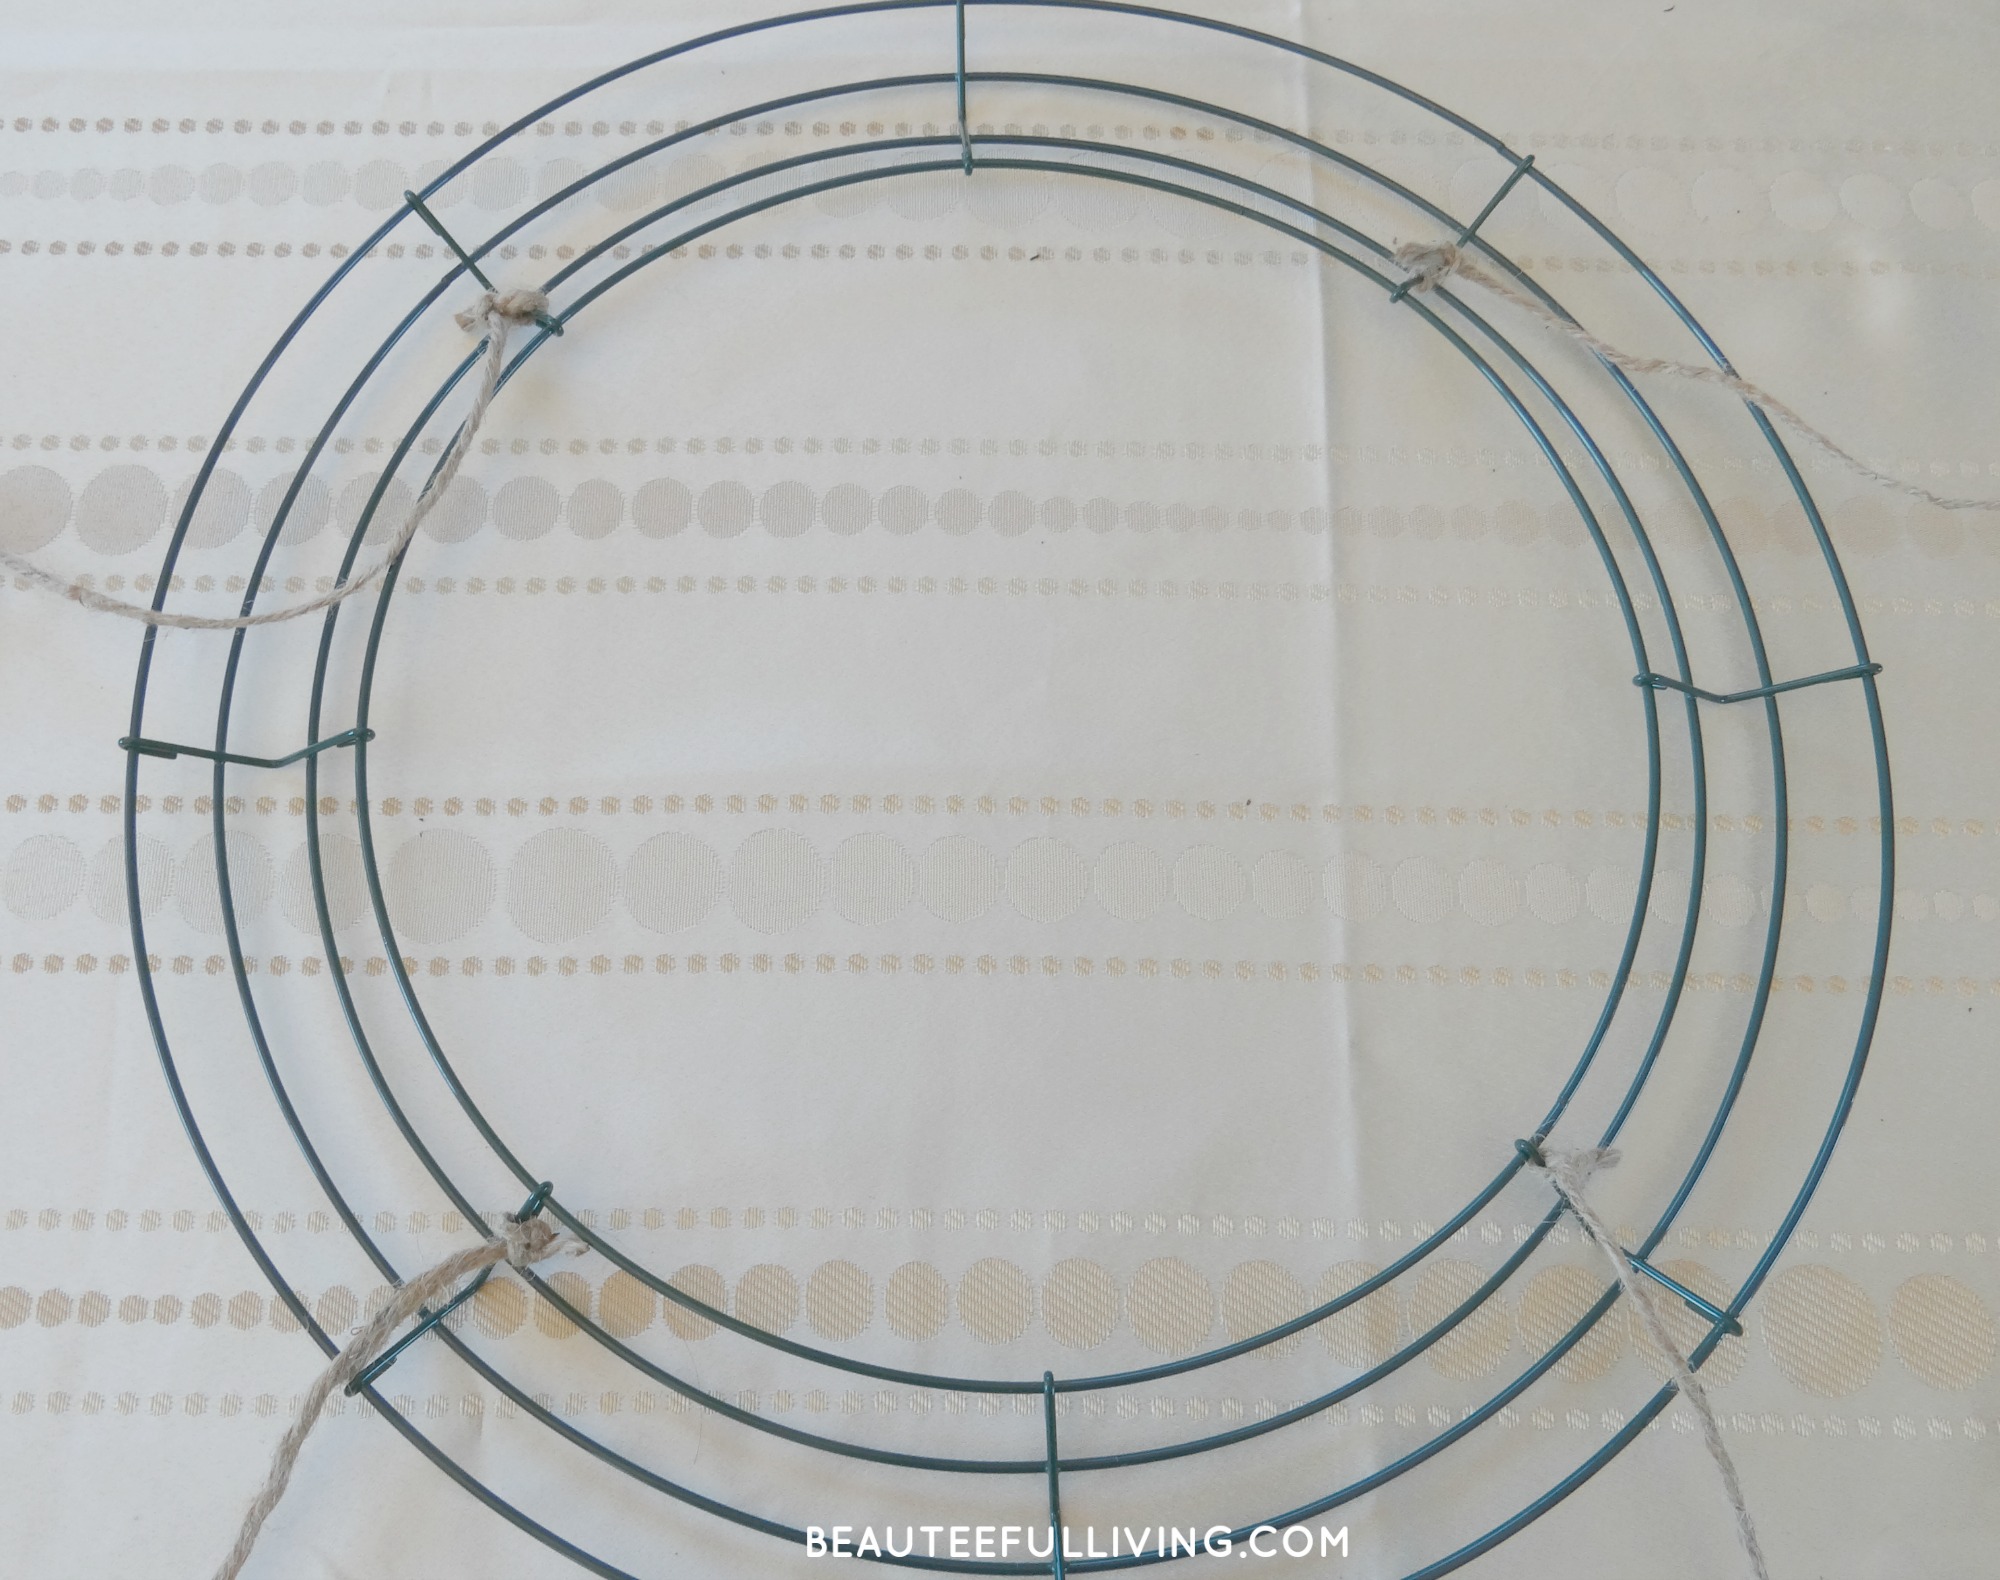
STEP TWO:
Tie a knot toward the end like photo.
STEP THREE:
Cut floral wire into 4 inch long pieces. Be prepared to cut at least 40 pieces.
STEP FOUR:
Using floral wire, tie the bottom of one of the hydrangea leaves to your wire wreath.
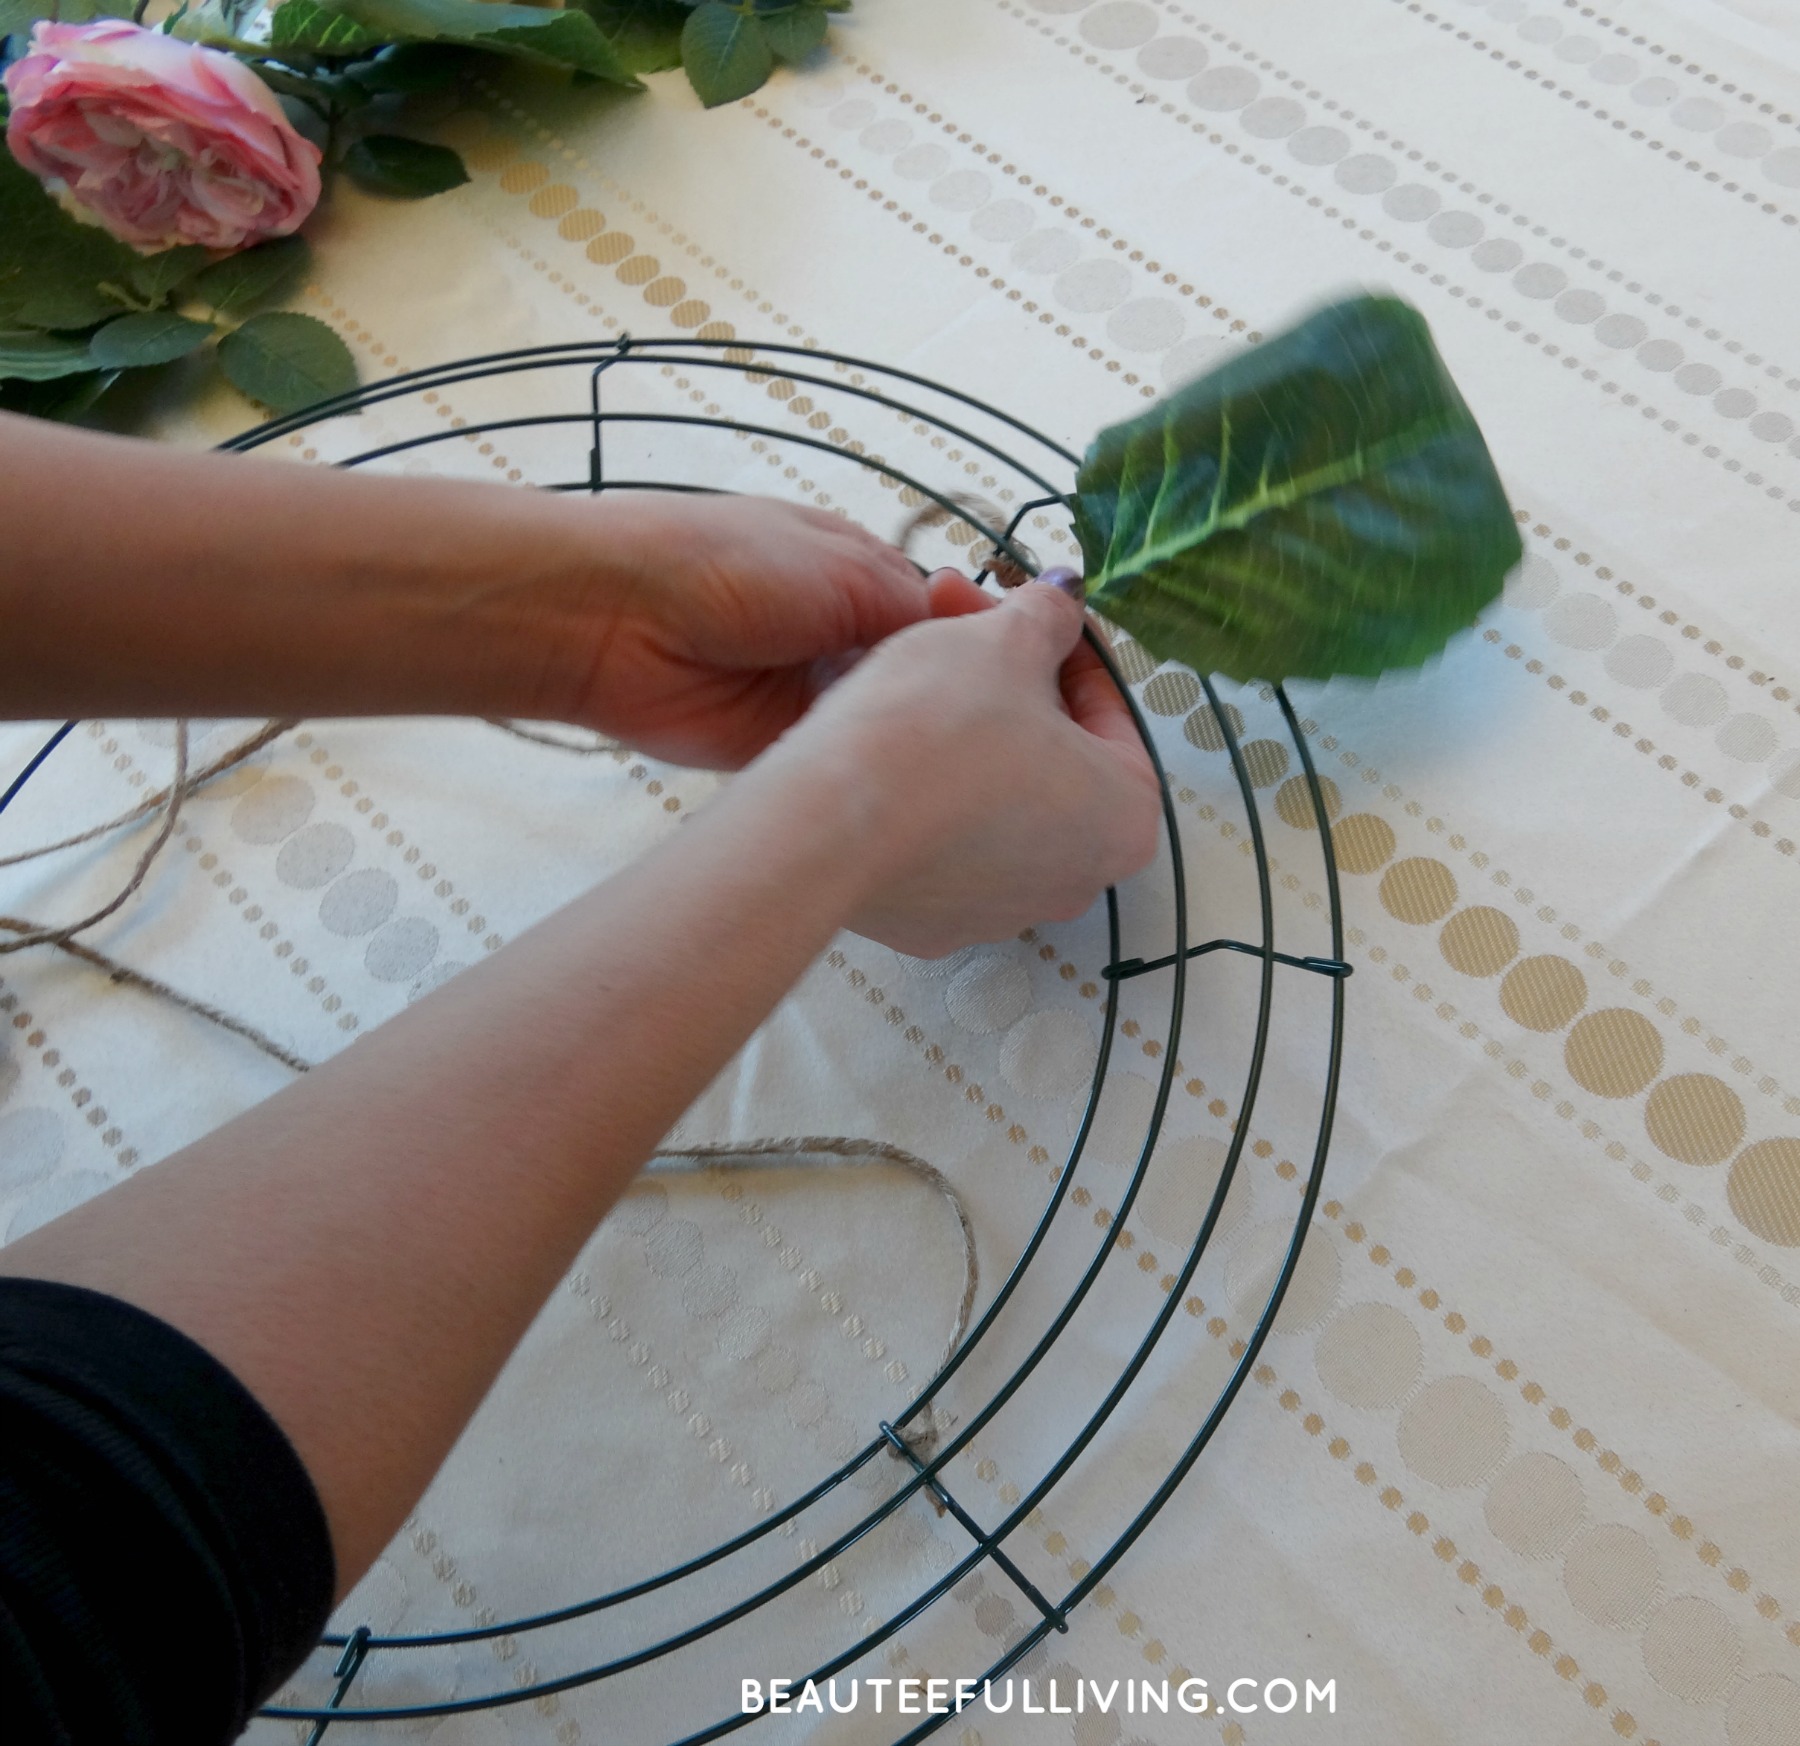
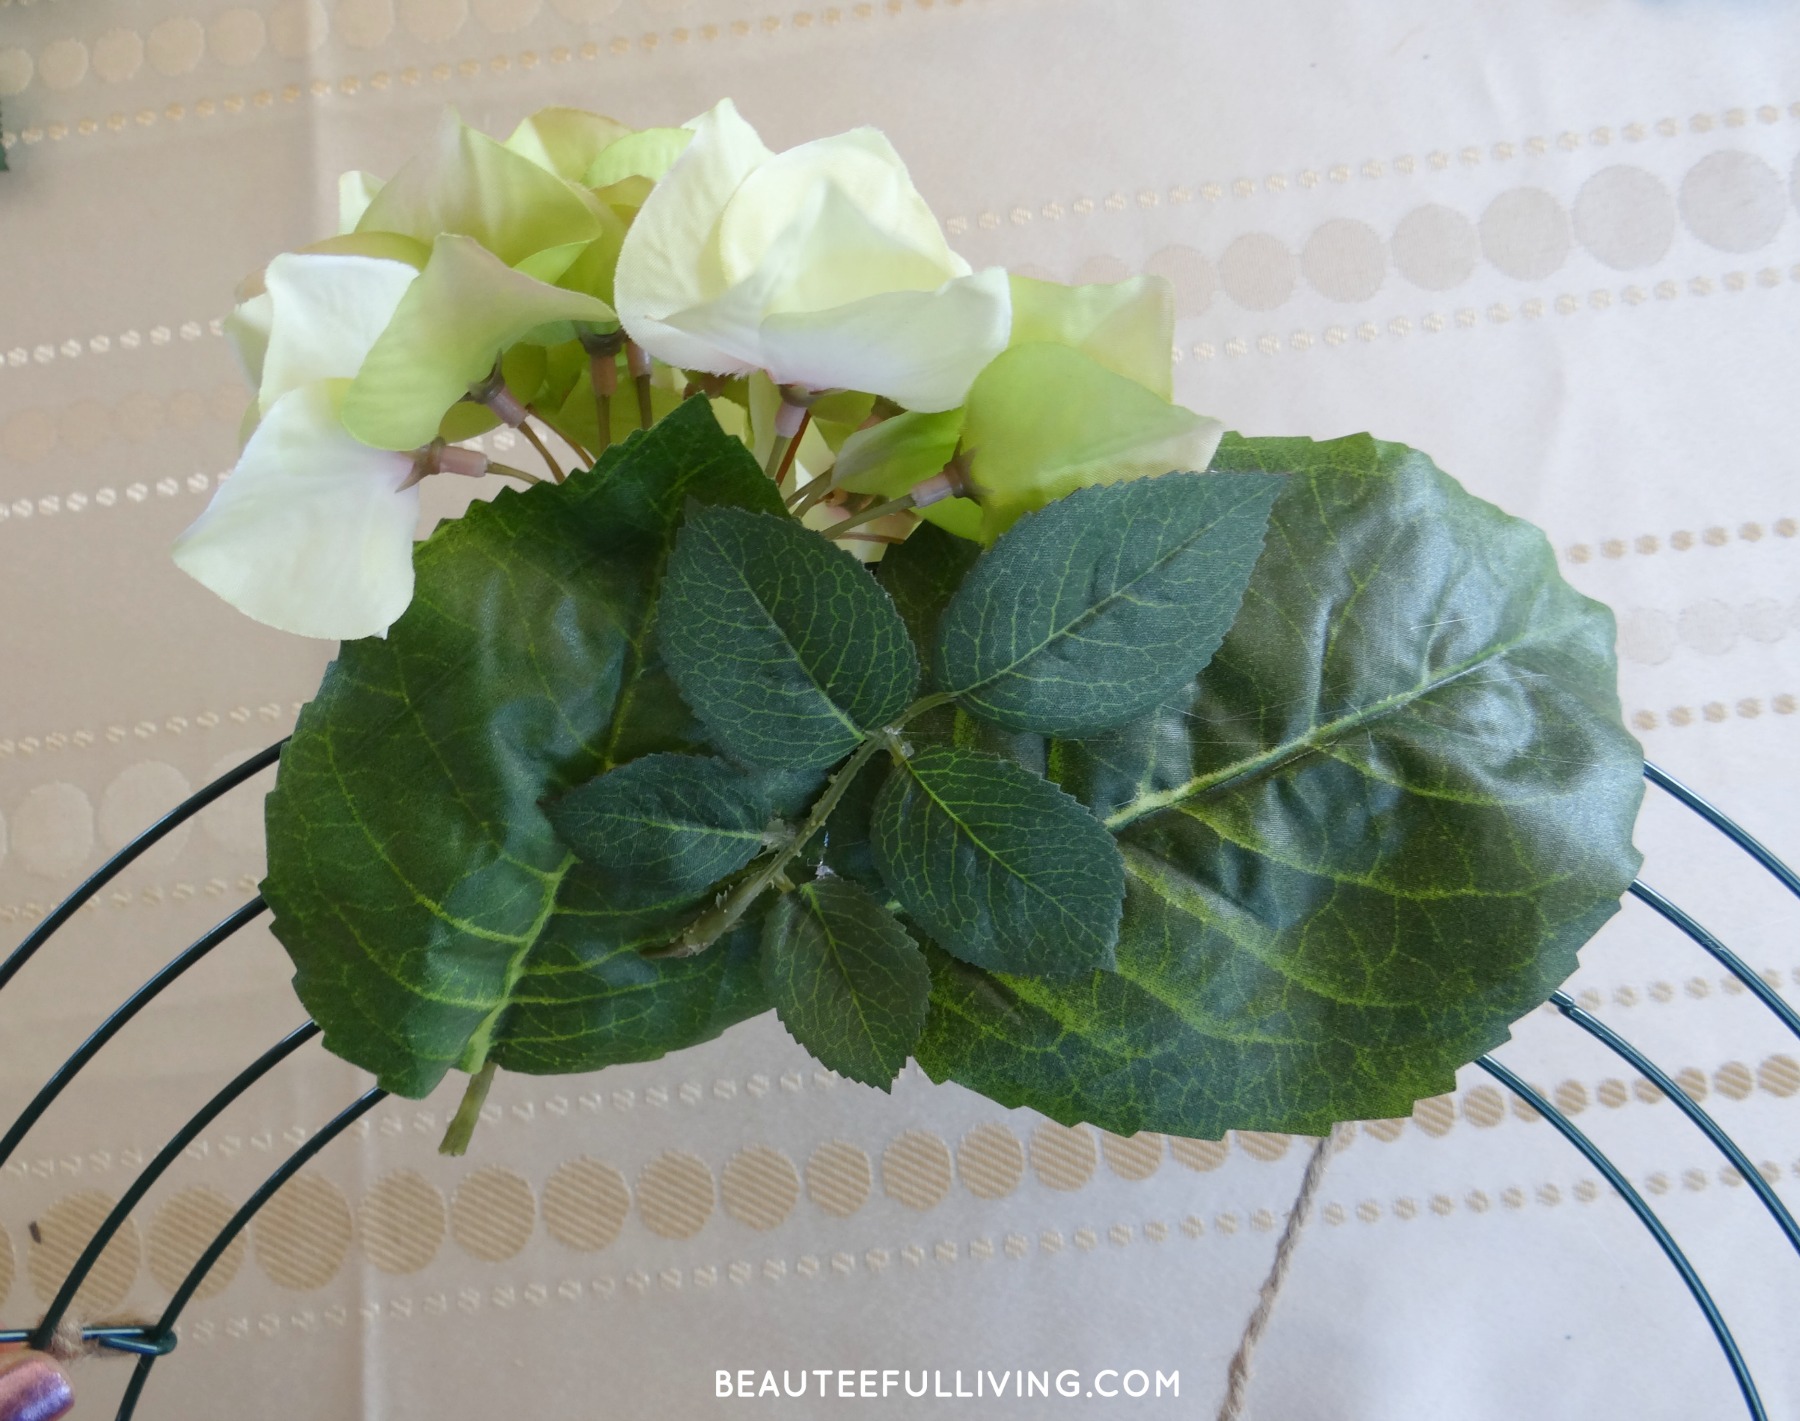
STEP FIVE:
Set your hydrangea bloom on wire wreath and tie floral wire to secure it in place. Continue tying hydrangea leaves around the wire wreath. Using your glue gun, begin gluing the smaller leaves on top of your larger leaves to fill in any gaps (hiding metal on wire wreath).
STEP SIX:
Continue assembling hydrangea and ranunculus blooms, alternating here and there so wreath wouldn’t look too uniform.

STEP SEVEN:
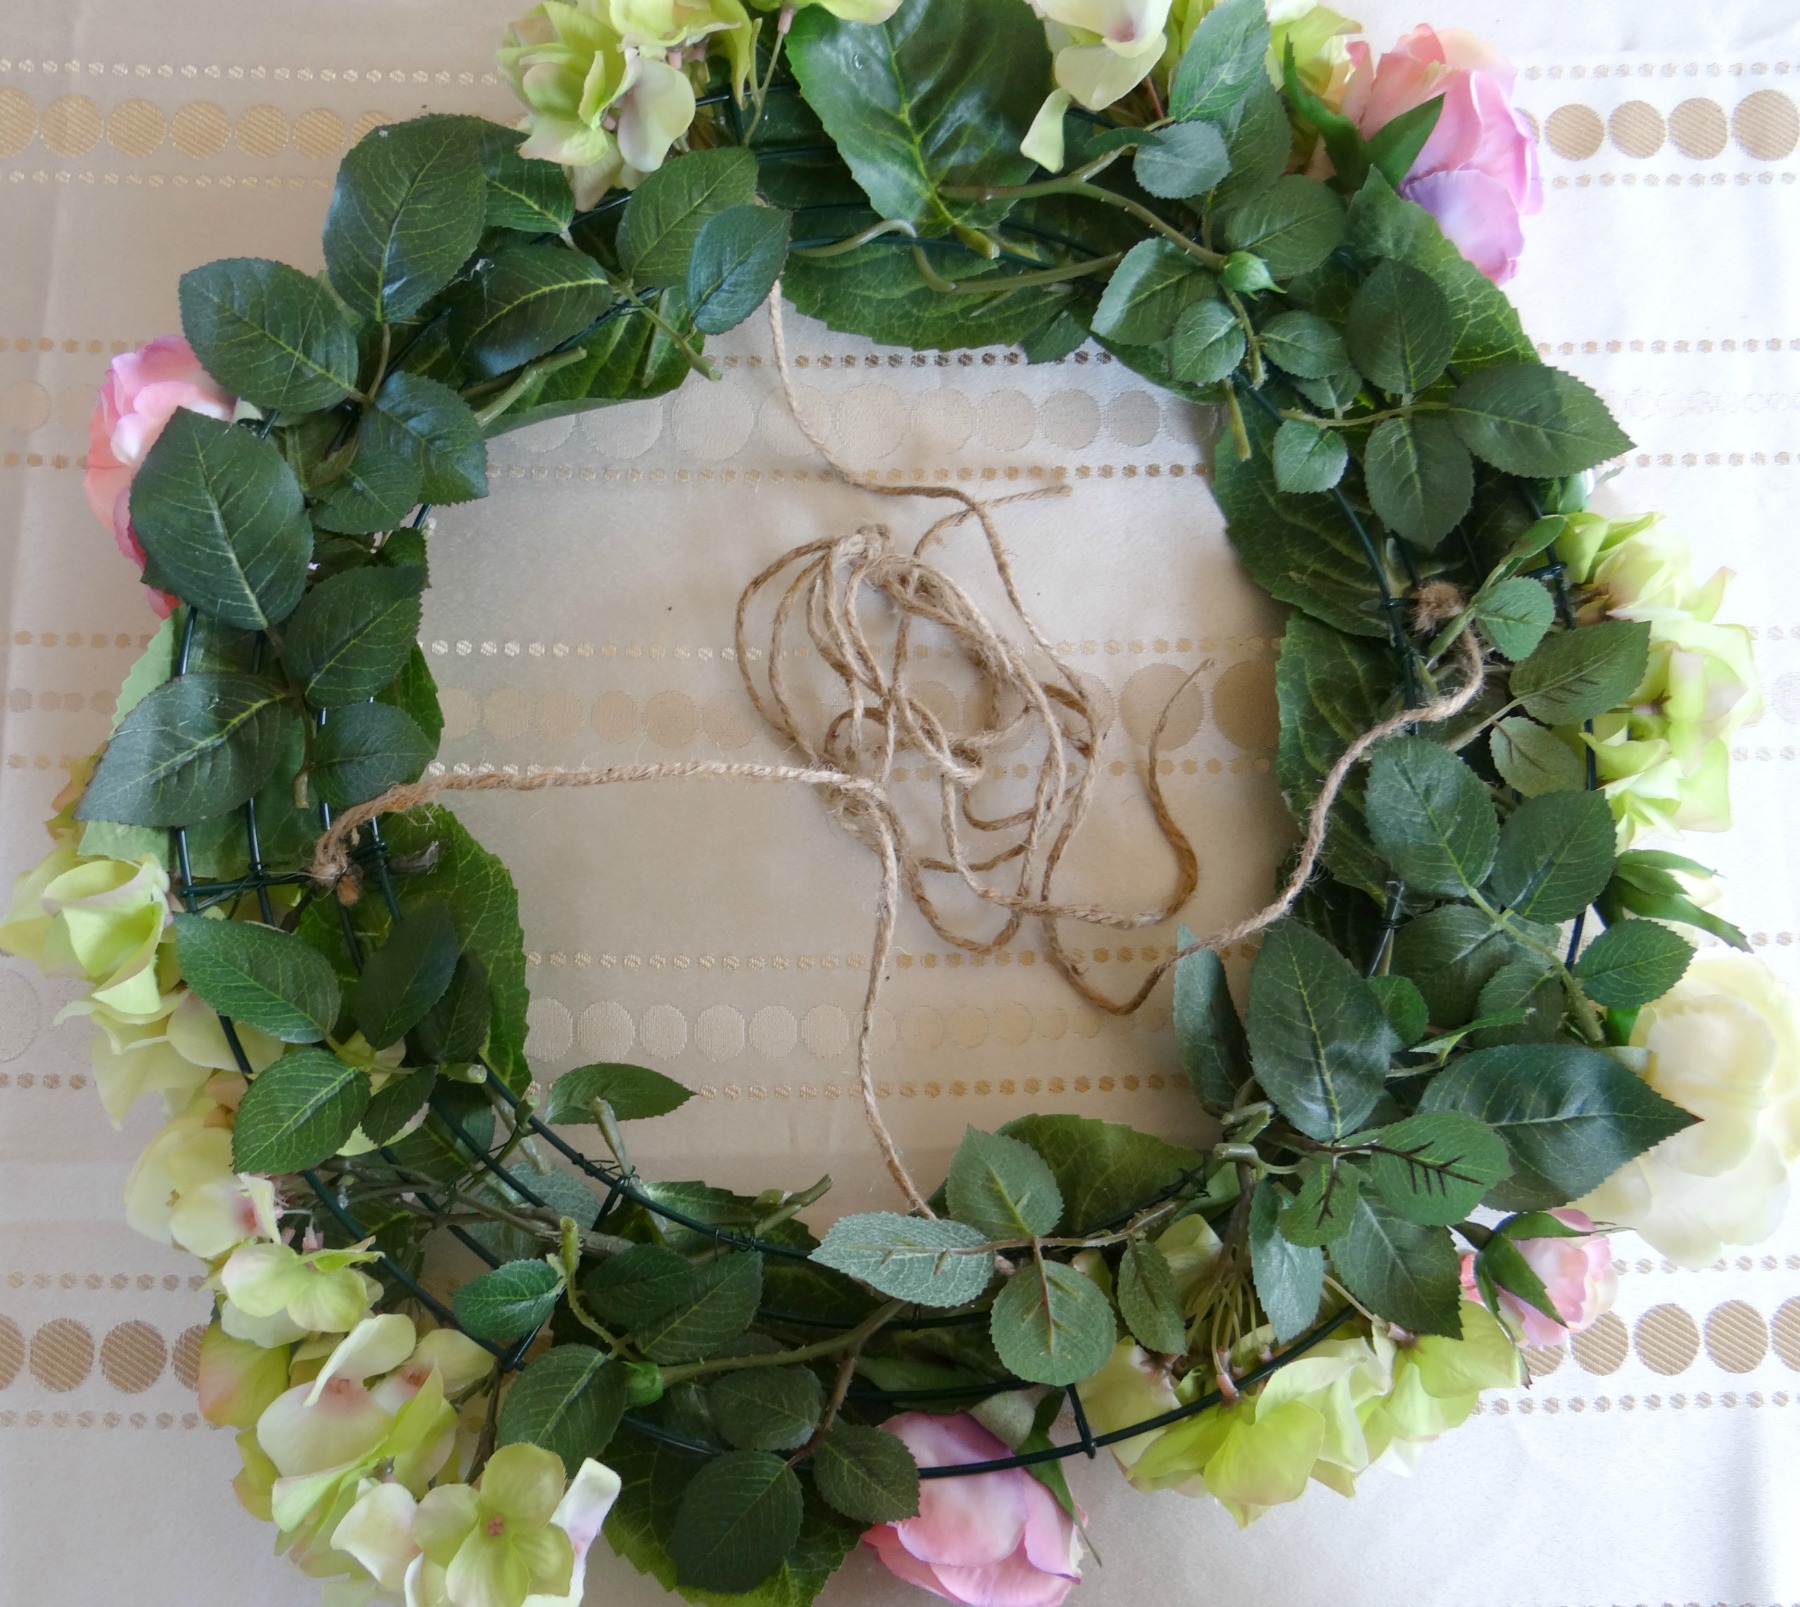
Make sure that the leaves are glued securely onto metal wire.

STEP EIGHT:
Be sure that the bottom of your wire wreath is covered entirely by leaves. This way, when the wreath is hung, you won’t see parts of the metal from your wire wreath.
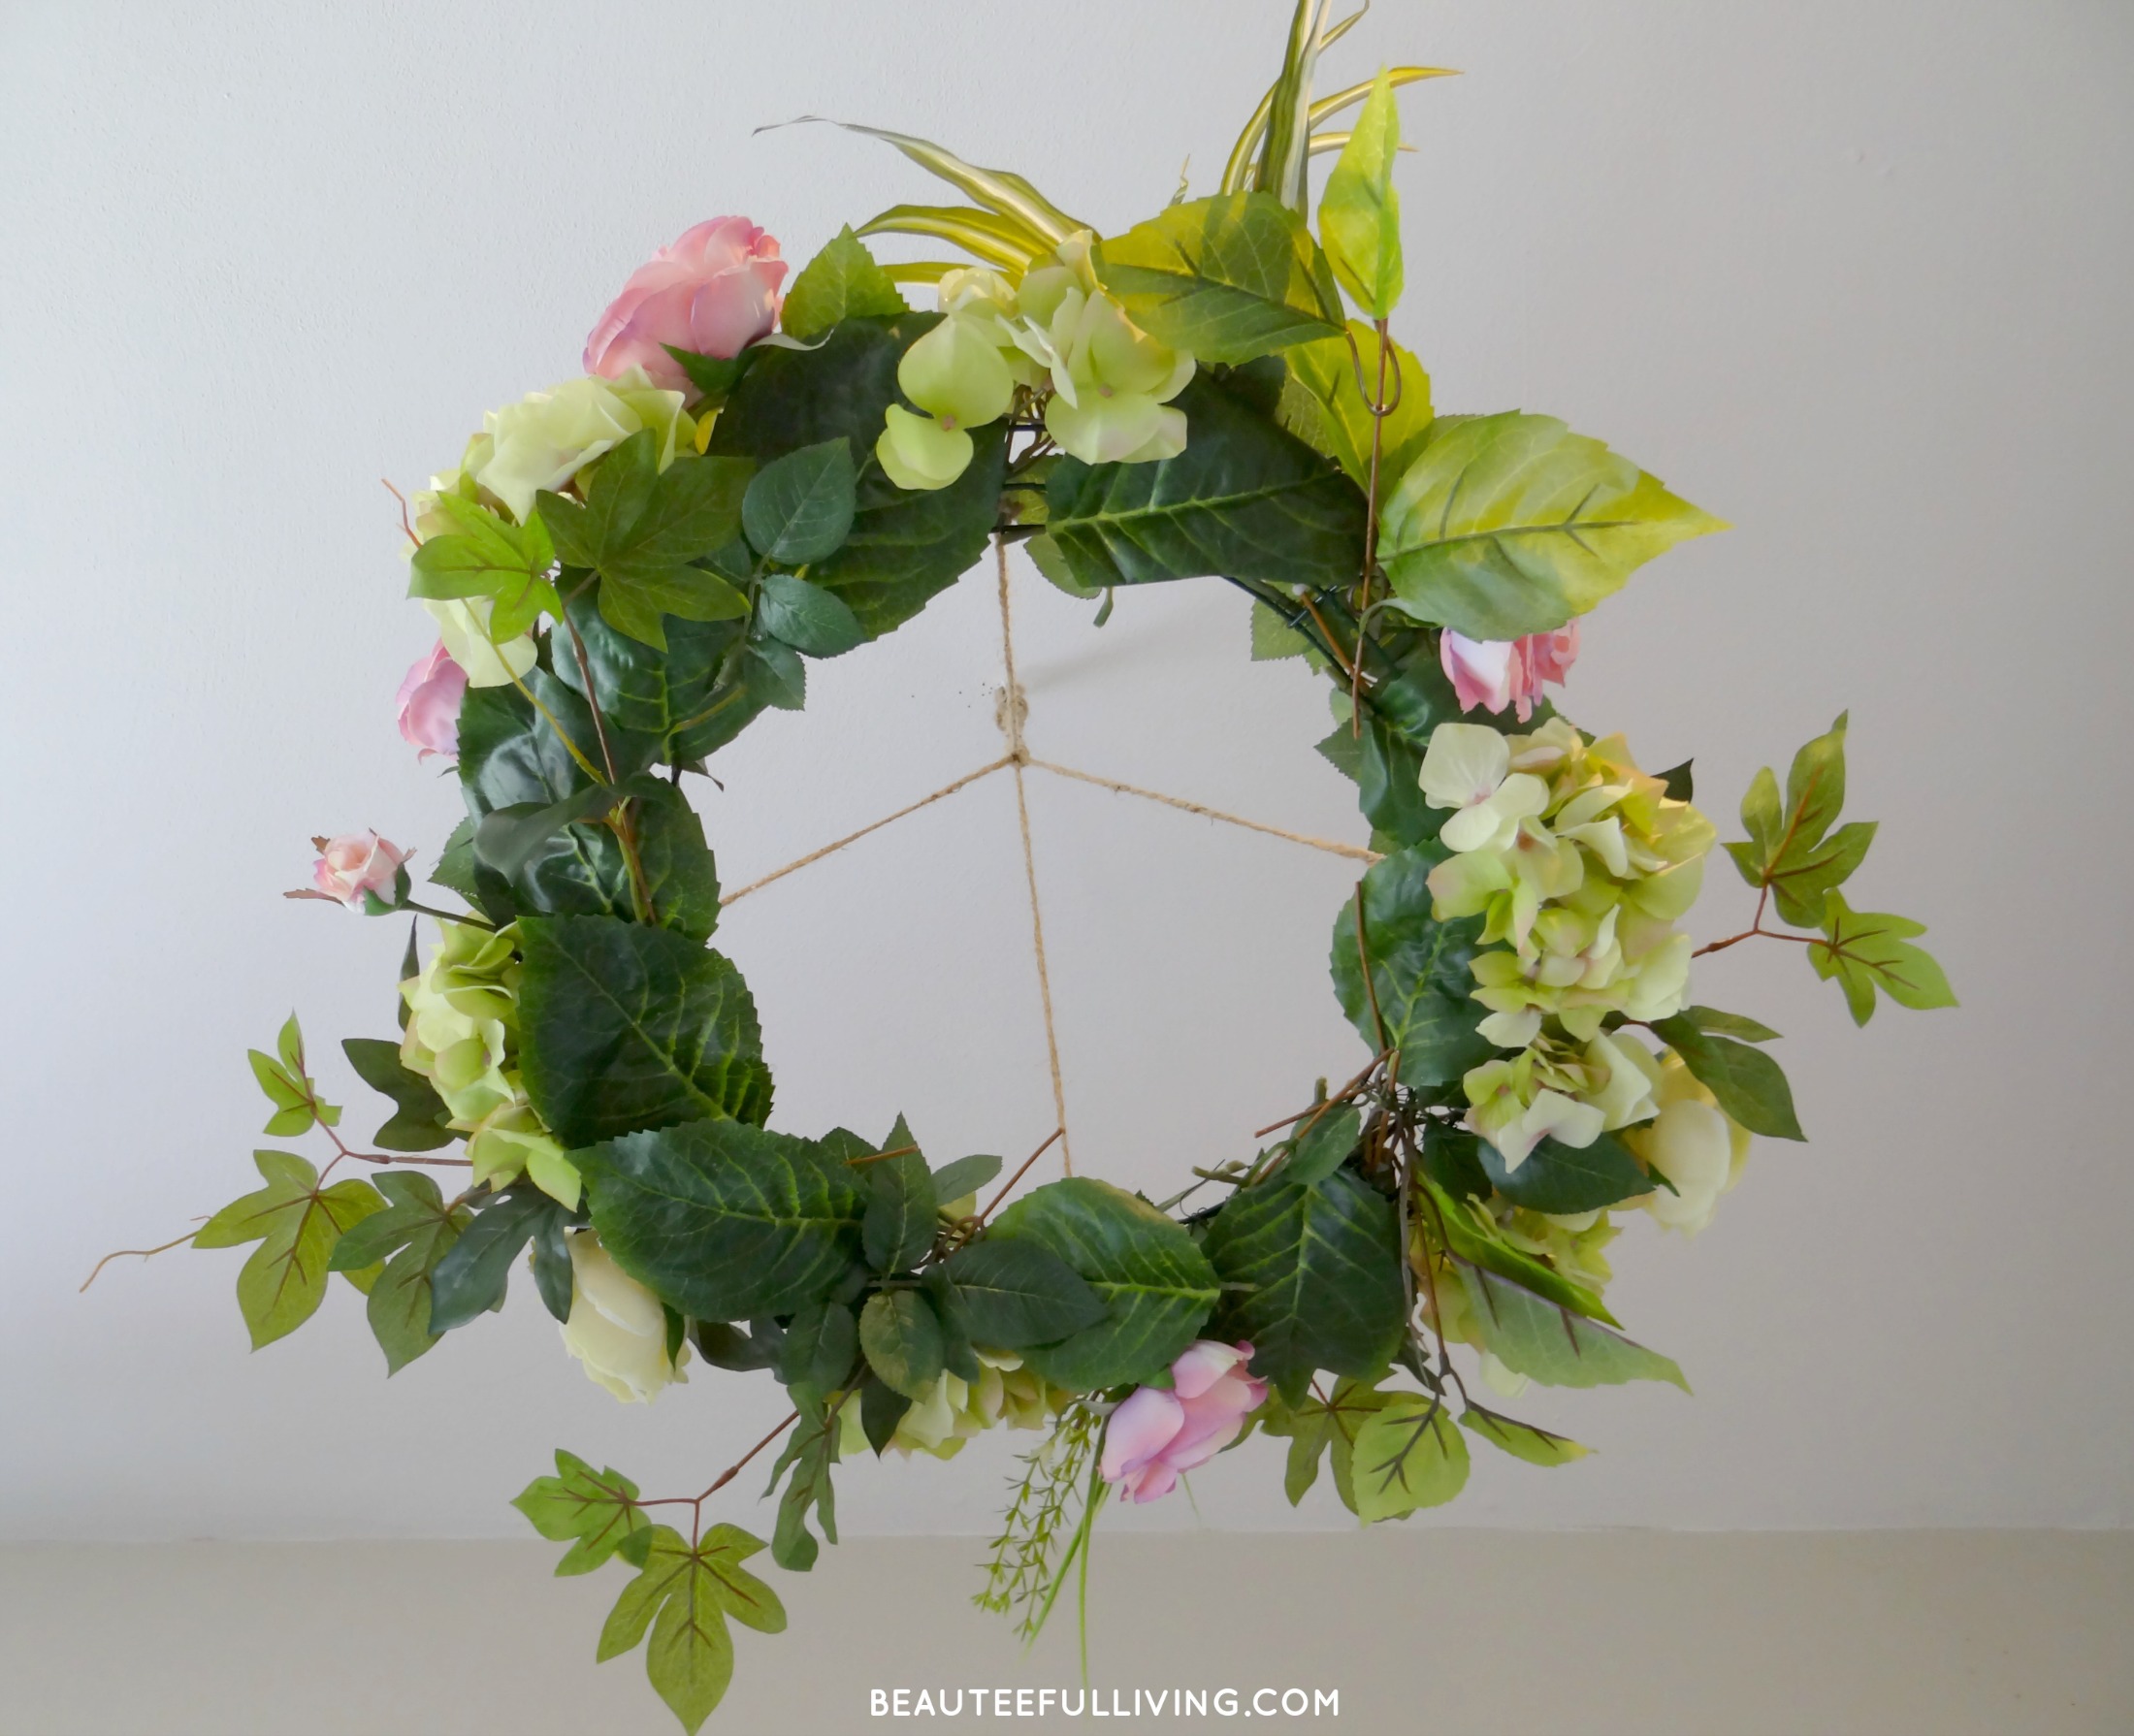
STEP NINE
Fill in the wreath with the set of “tropical” foliage bunch. Cut the leaves off the stem to separate them. Insert the leaves into your wreath to add more depth and interest to the hanging floral chandelier! Secure the leaves with floral wire if necessary.
STEP TEN:
The last step is to loop a knot at the end of your rope so you can hang your “floral chandelier” on your ceiling!

Here’s how the bottom of the hanging wreath looks.
Below is a photo of how the floral chandelier looks in our living room. I love it. I’m so glad it came out the way I had envisioned!

Like this project? Please Share and PIN this post. Thanks a bunch!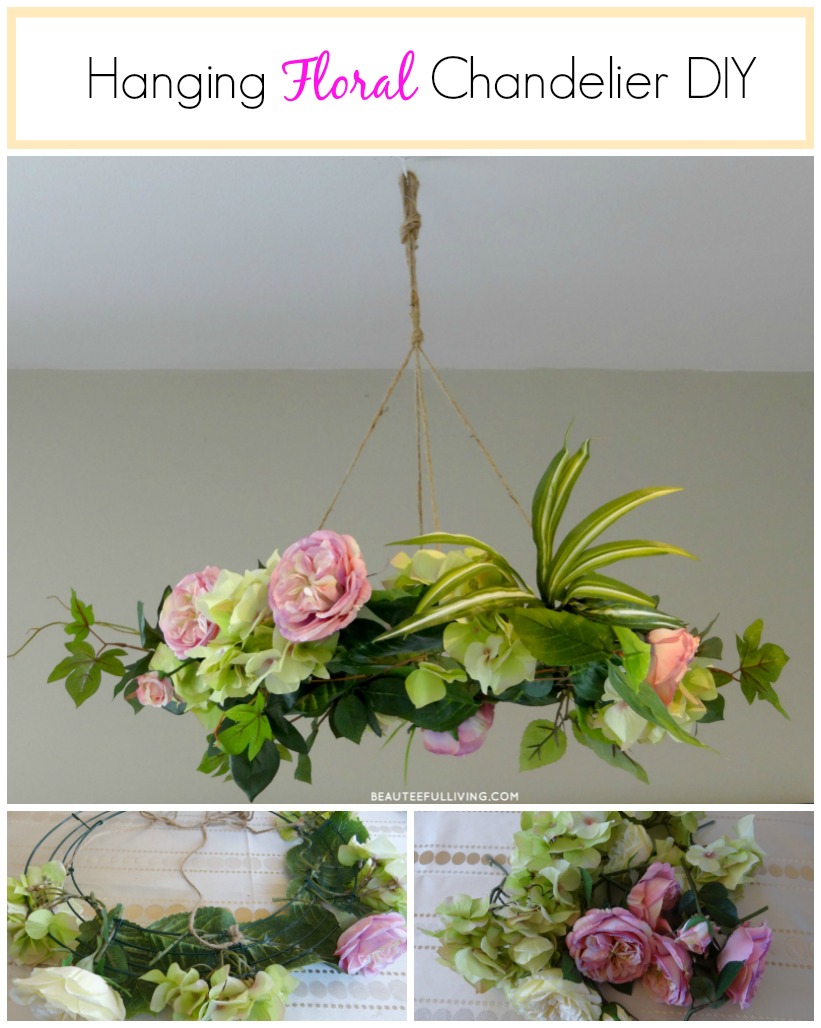
Thanks for stopping by today. To receive future tutorials delivered to your inbox, please subscribe here:
Enjoy the lovely projects that linked up below! Xoxo, Tee.
Facebook // Instagram // Pinterest // Twitter // Google+


such a fun springy DIY!
such a fun DIY! look great! great reminder of spring!
This is such a fabulous idea! So pretty. TFS!
Thank you all for your incredibly sweet and encouraging comments!
What a cute project! I think these would be great at a wedding or party. Visiting from the #DIYMySpring blog hop! Pinned!
This is gorgeous! I may need to make my own version for a garden party bridal shower I’m hosting soon. This would be perfect!!!
You have such a great touch for making everything around you beautiful…your blog is so appropriately named! Beautiful idea!!
This is so beautiful! I can’t wait to make one to put out on my back patio. Bring on the spring! 🙂
This is so fun and unique and perfect for spring! What a great way to bring spring to a new spot. Pinning!
This is GORGEOUS! What a great idea!
How pretty! I love how Springy this looks. I need one… now I need to find the spot! Thanks for sharing! 🙂
What a pretty way to bring Spring to the dining room, love it!
Hi Tee – What a pretty spring project! Visiting as a fellow contributor to #DIYMySpring. Hope your week is full of sunshine! Hugs, Holly
Tee, this is really stunning!
This is so pretty, and a great idea! I love the colors you used and it fits perfectly over that table.
How very beautiful! I love to hang decor as well! Such under utilized space! So lovely!
I love this. It’s like having your own spring garden hanging over your head. What a great way to get in the spring mood. And those flowers look very realistic.
Hi, Tee! I love your floral chandelier! Very pretty! 🙂
I just LOVE this- it turned out beautifully. Happy #DIYMySpring!
Sarah (Sadie Seasongoods)
Love this it is really fresh and beautiful looking !
So pretty! I especially love the hydrangeas!
Enchanting! I think I need a trip to the craft store and grab a few flowers… you really made them look so realistic!
Looks beautiful! What a great idea!
Wow, this is just gorgeous! You did a great job on this and it is beautiful and looks so natural. I have to agree, flowers are so much better these days and its hard to tell they aren’t real. This definitely adds a touch of Spring to your home!
Carrie
curlycraftymom.com
So pretty! Light enough that it could be hung almost anywhere–love it!
Perfect spring chandelier! I love it!
This is so lovely! Think I will borrow/steal this idea for Easter! I used to feel the same way about faux flowers but nowadays the quality is so much better they look so lifelike (and the cats don’t try to eat them lol) Linking up from DIY My Spring
Cheers!